Yes, you can share audio on MacBook by using the AirPlay feature or connecting external speakers for enhanced sound quality. Sharing audio on MacBook is simple and convenient using built-in tools and external accessories, allowing you to enjoy your favorite music, videos, or podcasts on a bigger and better sound system.
MacBook users have the flexibility to share audio seamlessly thanks to the intuitive design of Apple products. Whether you want to share a playlist during a gathering or stream a movie with friends, MacBook provides a hassle-free way to enhance your audio experience.
We will explore how you can easily share audio on your MacBook, whether you are using AirPlay technology or connecting external speakers. Let’s delve into the quick and easy ways to enjoy high-quality audio on your MacBook.
Built-in Audio Sharing Options
When it comes to sharing audio on your MacBook, there are built-in options that make it easy to transmit audio to other devices. These options include using AirPlay and Soundflower, which allow you to share audio seamlessly. Let’s explore these built-in audio sharing options and how you can make the most of them.
Using Airplay
AirPlay is a convenient feature that allows you to stream audio from your Mac to other AirPlay-enabled devices, such as AirPort Express, Apple TV, and compatible speakers. To use AirPlay for audio sharing, simply follow these steps:
- Ensure that both your Mac and the destination device are connected to the same Wi-Fi network.
- Click on the “AirPlay” icon located in the menu bar of your Mac.
- Choose the AirPlay-compatible device you want to share audio with from the list of available options.
- Adjust the volume and enjoy streaming your audio to the selected device.
Using Soundflower
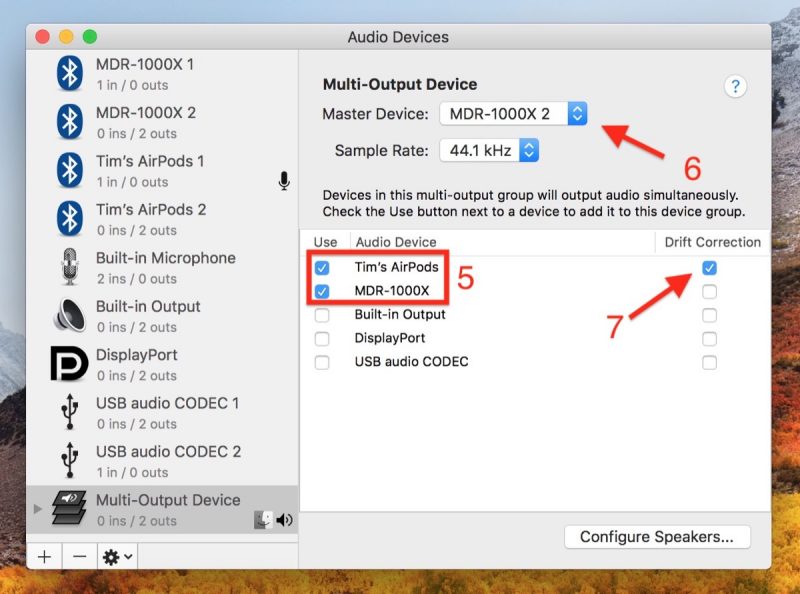
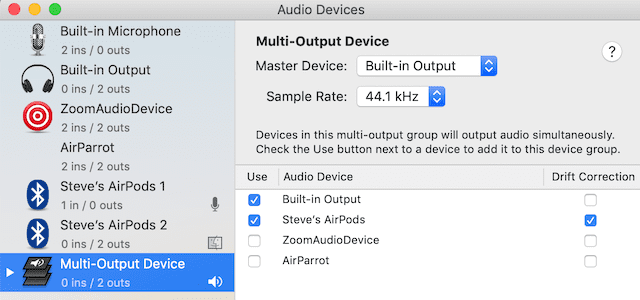
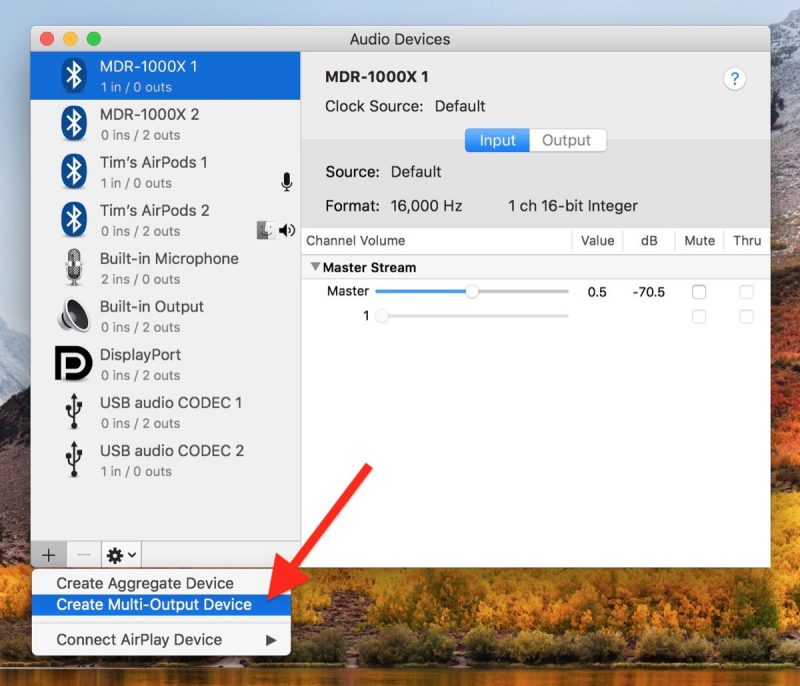
Soundflower is an open-source extension for macOS that allows you to route audio between applications. By using Soundflower, you can share audio from specific applications or even capture system audio for recording purposes. Here’s how you can utilize Soundflower for audio sharing:
- Download and install Soundflower on your Mac.
- Set the audio output of the application you want to share from to Soundflower (2ch).
- Open the application where you want the audio to be received, and set its input to Soundflower (2ch).
- You can now share audio between the two applications using Soundflower.

Credit: www.macrumors.com
Third-party Applications For Audio Sharing
Exploring third-party applications can enhance audio sharing on your MacBook. Different platforms offer unique features for seamless audio sharing experiences.
Soundcloud
SoundCloud is a popular platform for sharing audio content. It allows users to upload and stream, creating a collaborative space for audio sharing.
Spotify
Spotify offers a vast music library for streaming and sharing audio tracks. With its social sharing features, users can easily share music with friends.
Google Meet
Google Meet is a reliable platform for virtual meetings and audio sharing. Its integration with Google services makes it convenient for sharing audio content.
Zoom
Zoom is a versatile platform for online meetings that also supports audio sharing. It provides high-quality audio transmission for effective communication.
Skype
Skype enables audio and video calls, making it a great tool for personal and professional audio sharing needs. Its user-friendly interface enhances the sharing experience.
Streaming Audio On Macbook
Streaming audio on your Macbook opens up a world of music and entertainment right at your fingertips. Whether you prefer to use iTunes, Apple Music, or Spotify, your Macbook allows seamless streaming of your favorite tunes.
Streaming With Itunes
iTunes is a versatile platform for streaming and managing your music library. To stream audio with iTunes on your Macbook, simply open the application, search for the song or album you wish to listen to, and hit play.
Streaming With Apple Music
With Apple Music, you have access to a vast array of songs and playlists. To stream audio using Apple Music on your Macbook, open the app, explore the various playlists and genres, and enjoy uninterrupted music playback.
Streaming With Spotify
Spotify is a popular streaming service known for its extensive music library and personalized recommendations. To stream audio on Spotify with your Macbook, log in to your account, search for your favorite tracks, and create custom playlists for a tailored listening experience.

Credit: eshop.macsales.com
Sharing Audio From External Devices
Share audio from external devices to your MacBook effortlessly. Connect your favorite devices and enjoy seamless sound-sharing convenience. Experience top-notch audio quality with ease on your Mac.
Sharing Audio from External Devices When it comes to sharing audio from external devices on your MacBook, the process is quite simple and versatile, allowing you to connect various types of audio devices for a seamless audio-sharing experience. Whether it’s external speakers, Bluetooth headphones, or wired headphones, your MacBook offers straightforward connectivity options. Connecting External Speakers To connect external speakers to your MacBook, simply plug in the audio cable from the external speakers into the headphone jack of your MacBook. Ensure that the volume on your MacBook is not at maximum to avoid sudden loud sounds through the external speakers. Connecting Bluetooth Headphones Connecting Bluetooth headphones to your MacBook is a convenient way to enjoy wireless audio. To do so, simply turn on the Bluetooth feature on your MacBook and put your Bluetooth headphones in pairing mode. Once your headphones appear on the Bluetooth devices list, select them to complete the pairing process. Connecting Wired Headphones If you prefer using wired headphones, you can easily connect them to your MacBook. Simply plug the headphone jack into the headphone port of your MacBook. The system will automatically detect the connected headphones and adjust the audio output accordingly.Recording Audio On Macbook
Recording audio on your MacBook opens up a world of possibilities, whether you’re a musician, podcaster, or just looking to capture memorable moments. With the right tools and software, you can easily record high-quality audio right from your device. In this blog post, we’ll explore three popular methods of recording audio on your MacBook: using GarageBand, using QuickTime Player, and using Audacity.
Using Garageband
GarageBand is a powerful and user-friendly software that comes pre-installed on all MacBooks. It offers an array of features for recording, editing, and mixing audio with ease.
To start recording audio in GarageBand:
- Launch GarageBand and create a new project.
- Select the audio track option.
- Click the red record button to start recording.
| Tips for recording audio in GarageBand: |
|---|
| • Use a good-quality microphone for optimal sound. |
| • Ensure a quiet environment to avoid background noise. |
| • Monitor your audio levels to avoid distortion. |
Using Quicktime Player
Another simple yet effective method for recording audio on your MacBook is by using QuickTime Player. This native application is commonly used for playing videos, but it also has a built-in audio recorder.
To record audio using QuickTime Player:
- Open QuickTime Player from the Applications folder.
- Click on “File” in the menu bar and select “New Audio Recording”.
- Click the red record button to start recording.
Using Audacity
Audacity is a popular open-source audio-editing software that is available for free on MacBooks. It offers a wide range of features for recording, editing, and enhancing audio files.
To record audio using Audacity:
- Download and install Audacity from the official website.
- Launch Audacity and select the desired input device.
- Click the red record button to start recording.
With these easy-to-use tools at your fingertips, recording audio on your MacBook has never been more accessible. Whether you’re a beginner or an expert, you can start capturing and creating high-quality audio right away.
Troubleshooting Audio Sharing Issues
Experiencing audio sharing issues on your MacBook can be frustrating, especially when you want to enjoy your favorite music or share audio with friends. But worry not! In this section, we will guide you through the troubleshooting process to help you resolve any audio sharing issues you may encounter.
Check Audio Settings
The first step in troubleshooting audio sharing issues on your MacBook is to check your audio settings. It’s possible that a simple adjustment can resolve the problem. Here’s what you need to do:
- Go to the Apple menu and click on “System Preferences.”
- Select “Sound” from the available options.
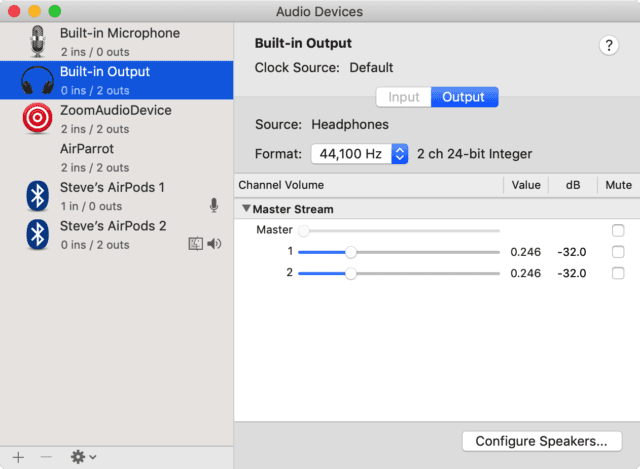
- Make sure the correct output device is selected for audio playback.
- Adjust the volume settings to an appropriate level.
If your audio sharing issue persists even after checking the settings, don’t worry! There are a few more troubleshooting steps you can try.
Restart Audio Devices
Sometimes, a simple restart of your audio devices can do wonders in resolving sharing issues. Follow these steps to restart your audio devices:
- Disconnect any external audio devices or headphones connected to your MacBook.
- Shut down your MacBook completely.
- After a few seconds, power on your MacBook again.
- Reconnect your audio devices and check if the audio sharing issue is resolved.
If restarting your audio devices doesn’t fix the issue, it’s time to check for any necessary updates.
Update Audio Drivers
Outdated or incompatible audio drivers can sometimes cause problems with audio sharing. By updating your audio drivers, you can ensure compatibility and potentially resolve the issue. Here’s what you should do:
- Go to the Apple menu and click on “App Store.”
- Click on “Updates” and check if there are any available updates for your audio drivers.
- If updates are available, click on “Update” to install them.
- Once the update is complete, restart your MacBook and test the audio sharing feature again.
By following these troubleshooting steps, you can troubleshoot audio sharing issues on your MacBook and regain the joy of sharing audio effortlessly. Give these steps a try, and you’ll be back to enjoying your favorite tunes with friends in no time!
Security And Privacy Considerations
When using your MacBook to share audio, it’s essential to consider the security and privacy implications. Managing access and permissions, as well as protecting personal information, are crucial aspects to keep in mind. Let’s delve into these considerations to ensure a safe and secure audio-sharing experience on your MacBook.
Managing Access And Permissions
When sharing audio on your MacBook, it’s important to manage access and permissions carefully. Restricting access to specific individuals or groups can help mitigate the risk of unauthorized sharing or potential security breaches. Utilizing built-in privacy settings and user controls can aid in managing who has access to your audio files and potentially sensitive information.
Protecting Personal Information
Protecting personal information is paramount when sharing audio on your MacBook. Implementing encryption for your audio files can add an extra layer of security, ensuring that even if unauthorized access occurs, the information remains protected. Additionally, being mindful of where you share your audio, and being cautious of unsecure networks or public platforms, can help prevent unauthorized access to personal information.

Credit: eshop.macsales.com
Frequently Asked Questions On Can You Share Audio On Macbook
Can You Share Audio On Macbook?
Yes, you can easily share audio on your MacBook. There are multiple ways to share audio, such as using AirPlay to connect to speakers, sharing audio files via AirDrop, or using screen sharing to play audio on another device remotely.
Additionally, you can also share audio during video calls or presentations using software like Zoom or Google Meet.
Conclusion
Macbook offers several options for sharing audio, such as AirDrop, email, and messaging apps. With the ability to share directly from the Music app, it’s easy to send songs, playlists, and podcasts to friends and family. By following these simple steps, you can easily share audio on your Macbook and enjoy seamless sharing experience.


0 comments