
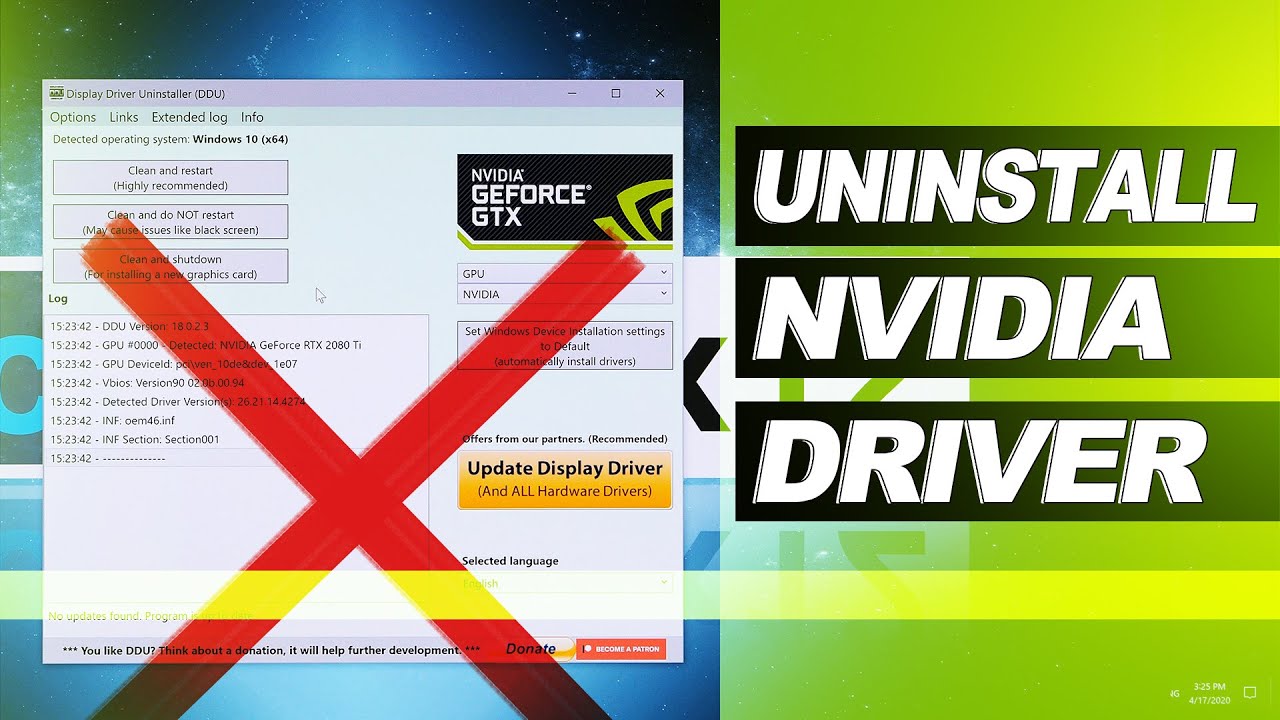
To uninstall Nvidia drivers, access the Control Panel, select Programs and Features, then locate and uninstall the Nvidia drivers. Uninstalling Nvidia drivers is a common troubleshooting step to resolve issues related to graphical performance or conflicts with other software.
By following a few simple steps, you can safely remove the existing Nvidia drivers from your system. This process ensures a clean removal, allowing for a smooth reinstallation or update of the drivers. Whether you are experiencing visual glitches, compatibility problems, or simply want to update to the latest version, uninstalling Nvidia drivers properly is essential.
This guide will walk you through the steps to effectively uninstall Nvidia drivers from your computer.

Credit: www.softwaretestinghelp.com
Preparation
Before you begin the process of uninstalling Nvidia drivers, it’s important to carry out some necessary preparation to ensure a smooth and successful removal. Taking the time to complete these initial steps can help prevent any potential issues and provide the option to easily revert back in case of unforeseen problems.
Check System Requirements
Ensure that your system meets the minimum requirements for uninstalling Nvidia drivers. This may involve checking if your operating system supports the uninstallation process and if you have the necessary administrative rights to make changes to the system’s drivers.
Create A System Restore Point
It is highly recommended to create a system restore point before uninstalling Nvidia drivers. This will allow you to revert to a previous state if any unexpected issues occur during the uninstallation process. The steps to create a system restore point may vary depending on the operating system you are using, but typically involve accessing the System Protection settings and initiating the creation of a restore point.
Credit: www.drivereasy.com
Uninstalling Nvidia Drivers
Uninstalling Nvidia Drivers is a straightforward process that can be done using different methods. Depending on your preference, you can use the Device Manager or the Nvidia Control Panel to uninstall Nvidia drivers from your system.
Using The Device Manager
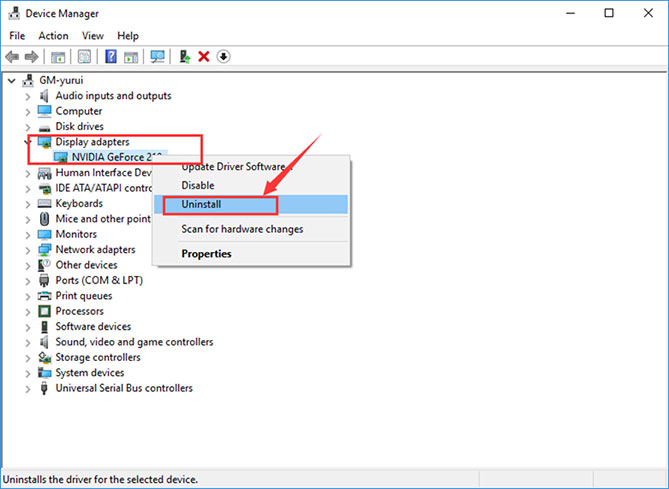
To uninstall Nvidia drivers using the Device Manager:
- Press Win + X and select Device Manager
- Expand the Display adapters section
- Right-click on the Nvidia graphics driver and choose Uninstall device
- Follow the on-screen instructions to complete the uninstallation process
Using The Nvidia Control Panel
If you prefer using the Nvidia Control Panel:
- Open the Nvidia Control Panel
- Click on Help in the menu bar and select “Updates” from the drop-down menu
- Click on “Uninstall” next to the Nvidia driver you wish to remove
- Follow the prompts to uninstall the driver successfully
Removing Nvidia Components
Uninstalling Nvidia Display Driver
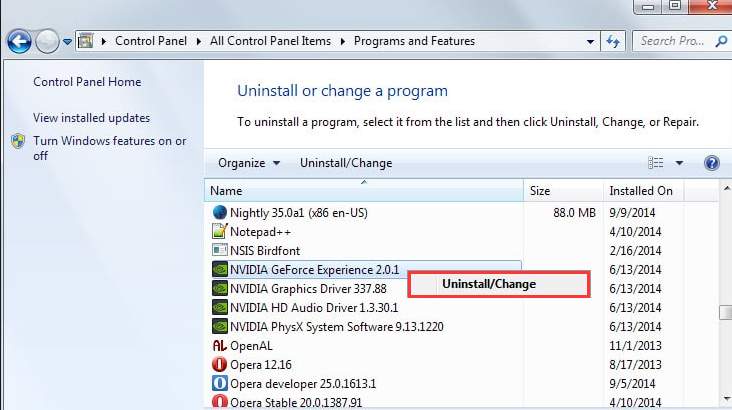
Uninstall Nvidia display driver via Control Panel.
Removing Nvidia Software
Access Programs and Features, uninstall Nvidia software.
Cleaning Up Residual Files
To uninstall Nvidia drivers, start by accessing the control panel and selecting “Programs and Features. ” Locate the Nvidia drivers, right-click, and choose “Uninstall. ” After the uninstallation, proceed to delete any residual files from the system to ensure a complete removal.
Cleaning up Residual Files When uninstalling Nvidia drivers, it’s crucial to clean up residual files to ensure a complete removal of the software. Cleaning up residual files involves deleting leftover folders and files, as well as utilizing third-party cleanup tools. Let’s explore these two methods in detail: ### Deleting Nvidia Folders and Files Before installing new drivers, it’s essential to remove any remnant Nvidia files and folders. These remnants could potentially cause conflicts with future installations. Here’s how to manually delete Nvidia folders and files: 1. Navigate to the Program Files folder on your C: drive. 2. Locate the Nvidia Corporation folder and right-click to delete it. 3. Empty the Recycle Bin to ensure all files are removed permanently. Another location to check for residual files is the AppData folder. Here’s how to access and clean the Nvidia folders and files within the AppData directory: 1. Press Windows Key + R to open the Run dialog box. 2. Type in “%appdata%” and press Enter. 3. Locate the Nvidia Corporation folder and delete it. By removing these residual files manually, you can effectively ensure a cleaner system before installing new Nvidia drivers. ### Using a Third-Party Cleanup Tool For a more comprehensive approach, consider using a third-party cleanup tool to remove residual Nvidia files. These tools can scan the system for leftover files, registry entries, and other remnants, providing a more thorough cleanup. Popular cleanup tools such as CCleaner, Revo Uninstaller, and IObit Uninstaller offer options specifically tailored for removing Nvidia software remnants. After using any of these tools, ensure to restart your computer to complete the cleanup process thoroughly. By following these methods to clean up residual files after uninstalling Nvidia drivers, you can help prevent any potential conflicts and ensure a smooth installation of new drivers in the future.Restarting Your Computer
Once you have successfully shut down your computer to remove the Nvidia drivers, it is time to power it up again. Restarting your computer after uninstalling the drivers is an essential step to ensure that the changes take effect and that your system is ready for the next steps. Let’s go through the process step by step.
Shutting Down Your Computer
Before we restart the computer, let’s make sure that it is properly shut down first. Follow the steps below:
- Save any open documents or files you are currently working on.
- Close all open programs and applications.
- Click on the “Start” menu located at the bottom left-hand corner of your screen.
- From the Start menu, select the “Power” option. A drop-down menu will appear.
- Click on the “Shut down” option from the drop-down menu.
By following these simple steps, you ensure that your computer is properly shut down before proceeding to the next step.
Powering Up Your Computer
Now that your computer is shut down, it’s time to power it up again. Follow the steps below to restart your computer:
- Press the power button on your computer to turn it on. The power button is usually located on the front or top of the computer case.
- Wait for the computer to boot up. This may take a few moments as the system goes through its startup process.
- Once the computer has finished booting up, you will be brought to your desktop or login screen.
- Login to your computer using your username and password, if necessary.
Congratulations! You have successfully restarted your computer after uninstalling the Nvidia drivers. Your system is now ready for the next steps in the process of installing new drivers or troubleshooting any issues.
If you are encountering any difficulties restarting your computer or if it is not booting up properly, it is recommended to consult the troubleshooting guide provided by your computer manufacturer or seek assistance from a professional technician.
Reinstalling Nvidia Drivers
Uninstalling Nvidia drivers can be done by following a simple process that ensures a clean removal. This guide provides step-by-step instructions for safely uninstalling Nvidia drivers from your system.
Downloading The Latest Nvidia Drivers
To reinstall Nvidia drivers, you’ll first need to download the latest version from the official Nvidia website. Follow these steps to ensure you get the correct drivers without any unnecessary hassles:- Open your web browser and navigate to the official Nvidia website.
- Once on the homepage, locate the “Drivers” tab and hover over it.
- A drop-down menu will appear. Click on the “GeForce Drivers” option.
- On the GeForce Drivers page, you’ll find an option to manually search for drivers by selecting your graphics card’s details or clicking the “Automatic Driver Updates” button.
- If you choose to manually search, enter the necessary information, including your graphics card model and operating system version. Then click the “Start Search” button to begin the search process.
- After the search is complete, a list of available drivers will appear. Look for the latest driver version that matches your hardware and operating system.
- Click the “Download” button next to the driver version you want to install.
Installing The Drivers
Once you have successfully downloaded the latest Nvidia drivers, follow these steps to install them on your system:- Locate the downloaded file on your computer (usually in the “Downloads” folder) and double-click on it to start the installation process.
- When prompted, choose the installation language that suits you best, and then click “OK” to proceed.
- A license agreement will appear on the screen. Read through it, select the “I Accept” option, and click “Next” to continue.
- You may now choose the type of installation you prefer. The default “Express (Recommended)” option is suitable for most users. However, if you wish to customize the installation settings, select the “Custom (Advanced)” option and follow the on-screen instructions.
- Once you have selected your preferred installation type, the driver installation process will begin. This may take a few minutes, so please be patient.
- Once the installation is complete, you will be prompted to restart your computer. Save any important files and close any open applications before clicking “Yes” to restart.
Testing And Troubleshooting
Learn how to easily and efficiently uninstall Nvidia drivers for troubleshooting and testing purposes. This step-by-step guide will help you remove the drivers and resolve any issues you may be experiencing with your Nvidia graphics card.
Testing and Troubleshooting Navigating through the process of uninstalling Nvidia drivers can sometimes lead to various technical hurdles. This is when thorough testing and troubleshooting come into play to ensure a seamless and error-free driver uninstallation process. Whether you are checking for driver functionality or addressing common issues, the following steps are critical in the testing and troubleshooting phase.Checking For Driver Functionality
To begin, make sure to check the functionality of your Nvidia drivers. You can do this by accessing the Device Manager in your Windows operating system. Look for any indicators of malfunction or outdated drivers. Additionally, run a diagnostic test using Nvidia’s software to identify any performance issues.Resolving Common Issues
When faced with common issues during driver uninstallation, it is crucial to address them systematically. Look out for error messages and consult Nvidia’s support documentation for specific error codes. In some cases, manual removal of residual driver files may be necessary. Use an uninstaller tool to comprehensively remove all Nvidia driver components. Furthermore, ensure that your system is updated with the latest patches and service packs. This can resolve compatibility issues that may arise during the uninstallation process. Finally, a clean reinstall of the latest Nvidia drivers can also help resolve persistent issues. By thoroughly testing and troubleshooting the uninstallation process, you can ensure a smooth transition to updated or alternative drivers. Taking these proactive steps can help avoid driver conflicts and ensure optimal performance for your Nvidia graphics card.Recovering From Problems
Looking to uninstall Nvidia drivers? Recovering from problems with Nvidia drivers can be challenging, but it’s important to follow a few simple steps to ensure a smooth process. Start by accessing the Device Manager on your computer and locating the Nvidia drivers under the Display adapters section.
Then, right-click and select Uninstall to remove the drivers from your system.
Using A System Restore Point
To revert to a stable state, access System Restore in Control Panel.
Select a restore point prior to the driver installation and follow the steps.
Seeking Technical Support
If issues persist, contact Nvidia customer support for expert assistance.
They can provide tailored solutions to address driver-related concerns.
Maintaining Nvidia Drivers
Updating Nvidia Drivers
Periodically check for updates to keep drivers current and functioning optimally.
Performing Regular Driver Maintenance
Regularly remove old drivers to prevent conflicts and ensure smooth performance.
Credit: www.iobit.com
Frequently Asked Questions On How Do I Uninstall Nvidia Drivers
How Do I Uninstall Nvidia Drivers On Windows?
To uninstall Nvidia drivers on Windows, go to the Control Panel and select “Uninstall a program. ” Find Nvidia drivers in the list, right-click, and choose “Uninstall. ” Follow the instructions to complete the uninstallation process. Restart your computer for the changes to take effect.
Can I Uninstall Nvidia Drivers Without Losing Performance?
Uninstalling Nvidia drivers will remove the associated software, but it won’t affect your computer’s performance. However, you may experience issues with graphics-intensive tasks or gaming if you don’t install the appropriate drivers afterwards. Make sure to download and install the latest Nvidia drivers to optimize your system’s performance.
What Are The Consequences Of Not Uninstalling Nvidia Drivers Properly?
Not uninstalling Nvidia drivers properly can leave behind remnants of the software, causing conflicts and instability issues. It can also lead to driver version incompatibility, resulting in errors, crashes, and poor graphics performance. It’s crucial to completely uninstall old drivers before installing new ones to ensure optimal system functionality.
Conclusion
Uninstalling Nvidia drivers can seem daunting but it’s a straightforward process with the right guidance. By following the steps discussed, you can ensure a smooth and successful removal of the drivers from your system. Prioritize clearing out any remnants to prevent future issues, and remember to always download the latest drivers for optimal performance.
0 comments