
To add a printer to your Macbook, go to “System Preferences” and select “Printers & Scanners.” Click the “+” button to add the printer and follow the on-screen instructions.
Adding a printer to your Macbook is an easy process that can be done in just a few simple steps. By connecting your printer to your Macbook, you can easily print documents, photos, and other files without any hassle. This guide will provide you with the necessary steps to successfully add a printer to your Macbook and start using it in no time.
Whether you have a wireless or wired printer, you can follow these steps to seamlessly connect it to your Macbook and enjoy the convenience of printing from your device.
Checking Compatibility
In the process of adding a printer to your Macbook, the first essential step is to ensure compatibility between the printer and your device. Checking compatibility is crucial to guarantee seamless operation and prevent any potential issues. This involves assessing both the compatibility of the printer with your Macbook and vice versa. Below, we will delve into the necessary steps to check the compatibility of your printer and Macbook to ensure a successful setup.
Check Printer Compatibility
When adding a printer to your Macbook, it’s vital to confirm that the printer model is compatible with macOS. Not all printers are designed to work seamlessly with Mac operating systems. To ensure compatibility, check the printer’s specifications and verify its support for macOS. You can typically find this information on the manufacturer’s website or in the printer’s user manual.
Check Macbook Compatibility
Equally important is confirming that your Macbook is compatible with the printer. Some printers may not be compatible with certain Macbook models due to hardware or software restrictions. To validate compatibility from the Macbook end, consult the printer’s manual or the manufacturer’s website for a list of compatible devices. Ensure that your Macbook meets the specified requirements for seamless integration with the printer.
Connecting The Printer
To successfully connect the printer to your MacBook, you will need to locate the printer cable first.
Locate Printer Cable
- Search for the cable that came with your printer.
- It is usually a USB or power cable.
Connect Printer To Macbook
- Plug one end of the cable into the printer.
- Ensure it is securely connected.
- Insert the other end into your MacBook’s USB port.
- Wait for the system to detect the printer.
Connecting the printer to your MacBook is now complete. You can proceed with the setup process.
Installing Printer Software
Installing printer software on your MacBook is a crucial step to ensure that your printer functions seamlessly. Below are the simple steps to follow for downloading and installing the printer software on your MacBook.
Visit Printer Manufacturer’s Website
To start the process, visit the official website of your printer manufacturer. Look for the support or downloads section on the website.
Download And Install Printer Software
Download the specific printer software for your model from the website. Follow the instructions on the website to install the software on your MacBook.
Credit: support.apple.com
Adding The Printer
When it comes to adding a printer to your MacBook, the process may seem daunting at first, but it’s actually quite straightforward. By following a few simple steps, you can quickly and easily connect your printer to your MacBook, allowing for seamless printing from your device.
Go To System Preferences
To begin adding the printer to your MacBook, start by clicking on the Apple logo in the top-left corner of your screen and selecting “System Preferences” from the dropdown menu.
Click On Printers & Scanners
Once in System Preferences, locate and click on the “Printers & Scanners” icon. This will take you to the print settings for your MacBook.
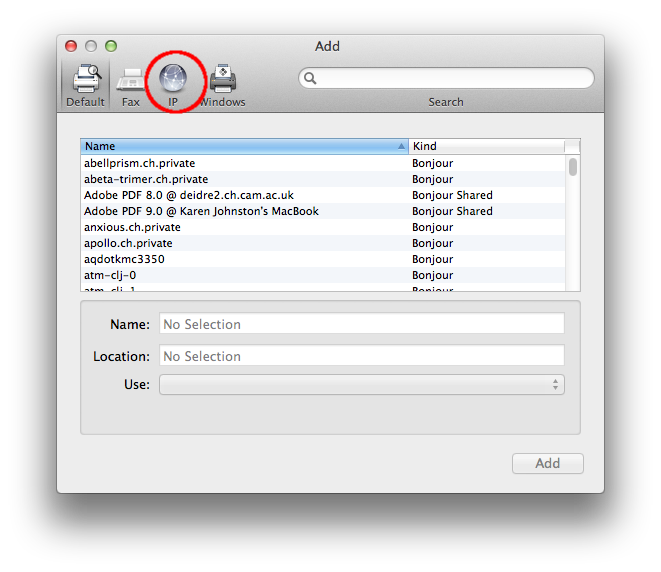
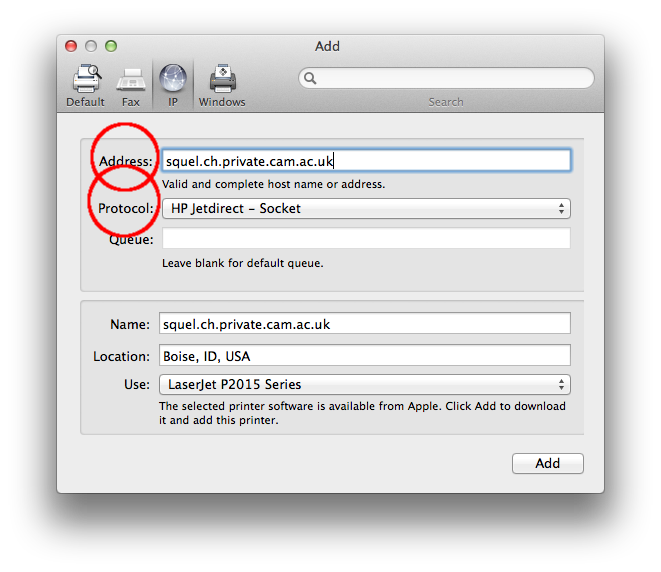
Click On ‘+’ Button
Next, click on the + button, which will allow you to add a new printer to your MacBook. This will prompt a window to appear, displaying a list of available printers on your network.
Select The Printer
From the list of available printers, select the one you wish to add to your MacBook. If your printer is connected directly to your MacBook, it should appear automatically in the list. Once selected, click “Add” to add the printer to your device.
Configuring Printer Settings
After successfully adding a printer to your MacBook, it’s important to configure your printer settings to ensure optimal performance and efficiency. By configuring settings such as the default printer and adjusting printer preferences, you can customize your printing experience to suit your specific needs.
Set Default Printer
To set a default printer on your MacBook, follow these straightforward steps:
- Click on the Apple menu located in the top-left corner of your screen.
- Select “System Preferences” from the drop-down menu.
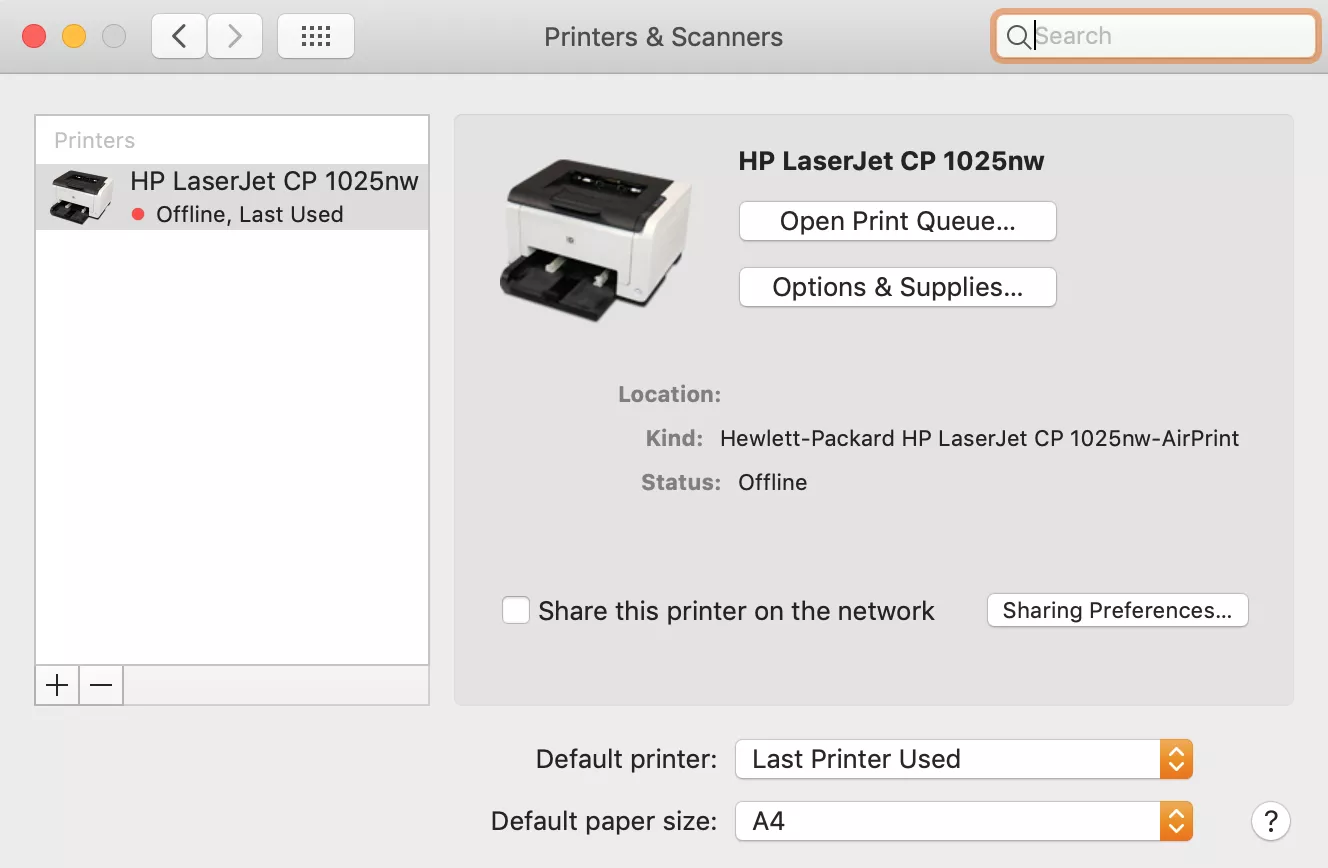
- In the System Preferences window, click on “Printers & Scanners”.
- Choose your desired printer from the list on the left-hand side.
- Click on the “Set default printer” button.
Note: Ensure that your chosen printer is connected and turned on for it to be available as the default printer.
Adjust Printer Preferences
Adjusting the printer preferences allows you to customize the printing options according to your preferences. Here’s how you can do it:
- Access the “System Preferences” window by clicking on the Apple menu at the top-left corner.
- Select “Printers & Scanners”.
- Choose the printer you want to adjust the preferences for from the list on the left-hand side.
- Click on the “Options & Supplies” button.
- From the tabs at the top of the window, select “Driver” to adjust printer-specific preferences.
- Make the desired changes to the available options, such as paper size, print quality, or duplex printing.
- Click “OK” to save the changes.
By manually configuring the printer preferences, you can optimize the output to match your specific printing needs.
Troubleshooting
Encountering issues while trying to add a printer to your MacBook can be frustrating. However, with a little troubleshooting, you can quickly resolve these difficulties and start printing smoothly. In this section, we will explore some common troubleshooting steps that can help you get your printer up and running in no time.
Check Printer Connection
Before diving into complex solutions, it’s essential to start with the basics. Ensure that your printer is properly connected to your MacBook. Check if the printer’s power cable is securely plugged into a power source, and the USB or Wi-Fi connection between your printer and MacBook is intact. A loose or faulty connection can often be the root cause of printing issues.
Restart Printer
Sometimes, simply restarting your printer can resolve minor glitches that may be hindering its functionality. To restart your printer, follow these quick and easy steps:
- Turn off the printer by pressing the power button.
- Wait for a few seconds.
- Press the power button again to turn on the printer.
Restarting your printer helps reset its internal settings and can often solve temporary issues.
Update Printer Software
Outdated printer software can cause compatibility problems and prevent your MacBook from recognizing the printer. To ensure seamless printing, it’s crucial to keep your printer software up to date. Follow these steps to update your printer software:
- Go to the official website of your printer’s manufacturer.
- Search for the latest software or driver updates specific to your printer model.
- Download the updated software or driver.
- Follow the installation instructions provided by the manufacturer.
Updating the printer software allows your MacBook to communicate effectively with the printer, reducing compatibility issues and improving overall performance.
Printing A Test Page
To ensure that your printer is successfully connected to your MacBook and ready to print, you can print a test page. This process helps verify the printer’s functionality and the connection between your MacBook and the printer.
Open A Document Or Image
The first step is to open a document or image that you want to print. Simply locate the file on your MacBook and open it using the respective software.
Select Print Option
Once the document or image is open, click on the File menu at the top-left corner of the screen and select the Print option from the dropdown menu. Alternatively, you can use the keyboard shortcut Command + P to open the print dialog.
Print Test Page
After selecting the print option, a print dialog box will appear. Look for the button that allows you to print a test page. The specific location of this button may vary depending on the printer model and the software you are using. Click on the Print Test Page button to initiate the test printing process. Once the test page is successfully printed, you can assess the quality and ensure that the printer is properly configured with your MacBook.
Credit: www.ch.cam.ac.uk
Updating Printer Firmware
Updating your printer’s firmware is important to ensure optimal performance and compatibility with your Macbook.
Visit Printer Manufacturer’s Website
Go to the official website of your printer manufacturer to access the latest firmware updates.
Check For Firmware Updates
- Search for the ‘Support’ or ‘Downloads’ section on the website to find firmware updates specific to your printer model.
- Look for the latest firmware version available for download.
Download And Install Firmware Updates
- Click on the download link for the firmware update file.
- Follow the on-screen instructions to install the firmware update on your printer.
- Restart your printer to apply the firmware update successfully.
Additional Tips
Additional Tips:
Keep Printer Drivers Updated
Regularly updating printer drivers ensures compatibility and smooth operation with your Macbook.
Ensure Printer Network Connectivity
Make sure your printer is connected to the network to enable seamless printing from your Macbook.
Credit: mackeeper.com
Frequently Asked Questions For How To Add Printer To Macbook
How Do I Add A Printer To My Macbook?
To add a printer to your Macbook, go to the Apple menu, select System Preferences, then click on Printers & Scanners. Click the “+” button to add a printer, select the printer from the list, and click Add. Your Macbook will automatically install the necessary drivers and set up the printer for you.
Can I Connect A Wireless Printer To My Macbook?
Yes, you can connect a wireless printer to your Macbook. Make sure your Macbook is connected to the same Wi-Fi network as the printer. Go to System Preferences, then click on Printers & Scanners. Click the “+” button, select the printer from the list, and click Add.
Your Macbook will automatically detect and connect to the wireless printer.
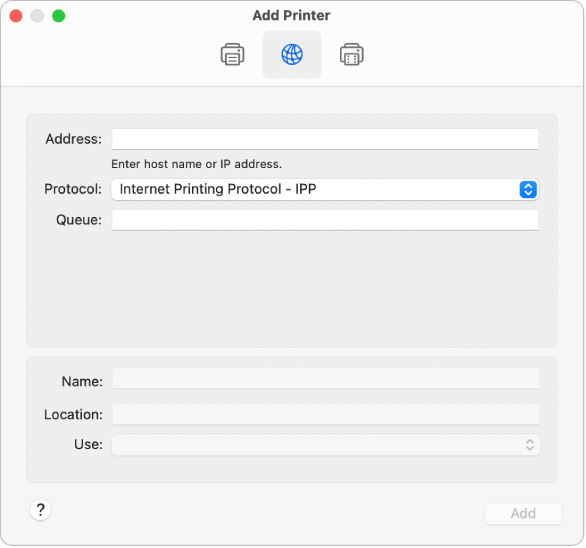
How Do I Find The Ip Address Of My Printer On A Macbook?
To find the IP address of your printer on a Macbook, go to the Apple menu, select System Preferences, then click on Printers & Scanners. Select your printer from the list, then click on Options & Supplies. Click on the General tab, and you will find the IP address listed next to “Location.
“
What Do I Do If My Macbook Is Not Recognizing The Printer?
If your Macbook is not recognizing the printer, first make sure it is properly connected to your Macbook and turned on. Check if the printer appears in the Printers & Scanners section of System Preferences. If it doesn’t, try restarting both your Macbook and the printer.
If the issue persists, update your Macbook and printer software, or try reinstalling the printer driver.
Conclusion
In just a few simple steps, you can successfully add a printer to your MacBook. With the help of this guide, you have the knowledge and confidence to seamlessly connect your printer and begin printing. Say goodbye to any printing woes and hello to a hassle-free printing experience on your MacBook.
0 comments