
Key Highlights
- Applying thermal paste is crucial for efficient heat transfer between the CPU and its cooler, maximizing your computer’s performance and lifespan.
- Proper application means cleaning off old thermal paste with isopropyl alcohol before adding a fresh, pea-sized amount in the center of the CPU.
- Using too much or too little thermal compound negatively impacts cooling and can risk CPU damage or mess.
- Choosing the right type of thermal interface material—such as paste or liquid metal—depends on your hardware and experience.
- Always check compatibility and follow step-by-step instructions to avoid common mistakes in thermal paste application.
Introduction
Thermal paste is very important for keeping your CPU cool and working well. When you build or upgrade a PC, the application of thermal paste helps move heat from the processor to the cooler. If you skip this or do it the wrong way, your CPU can get too hot. This can make your computer slow down. In this guide, you will learn how to use thermal paste on your CPU. The steps will be easy and good for both new and experienced builders. The methods we show work for all types of PC setups and make sure your CPU and cooler work well together.
Understanding Thermal Paste and Its Importance
Thermal paste, also known as thermal interface material, is used to help with heat transfer from a CPU to its cooler. Both the CPU and the cooler may look smooth, but if you look close, there are tiny gaps that keep them from touching perfectly. These small spaces trap air, and that can stop heat from moving out fast. By using thermal paste, these cracks get filled, so the heat can leave your CPU better and keep it at the right temperature.
If you do not use thermal paste the right way, or you pick the wrong way to put it on, your cooling will not work well. This can make your CPU slow down, act strange, or sometimes even break. If you ask, “Why should I use thermal paste on my cpu and what will happen if I don’t?” the answer is clear. Your CPU might get too hot, lower its speed, or turn off to keep from breaking for good.
What is Thermal Paste and How Does It Work?
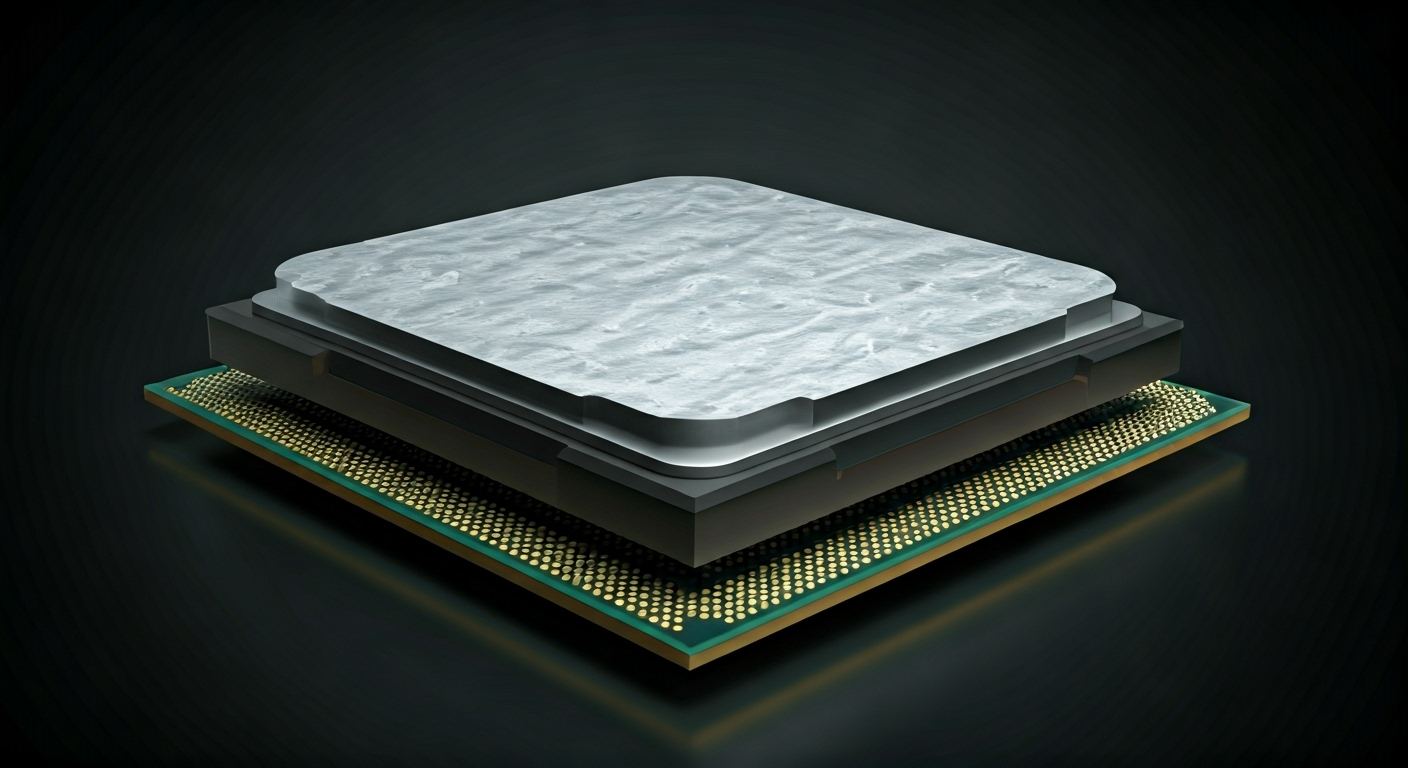
Thermal paste is a silvery-gray paste you put between the lid of the CPU and the cooler’s base plate. At the microscopic level, the lid of the CPU and the cooler are not flat. There are tiny bumps and gaps. These spots trap air, and that air does not move heat well. The thermal paste gets into these small gaps and takes the place of air, letting heat move better.
The main job of thermal paste is to let heat from the CPU go quickly to the cooler. If you do not use this thermal interface material, your CPU will get much hotter, because air does not do a good job when you need heat transfer.
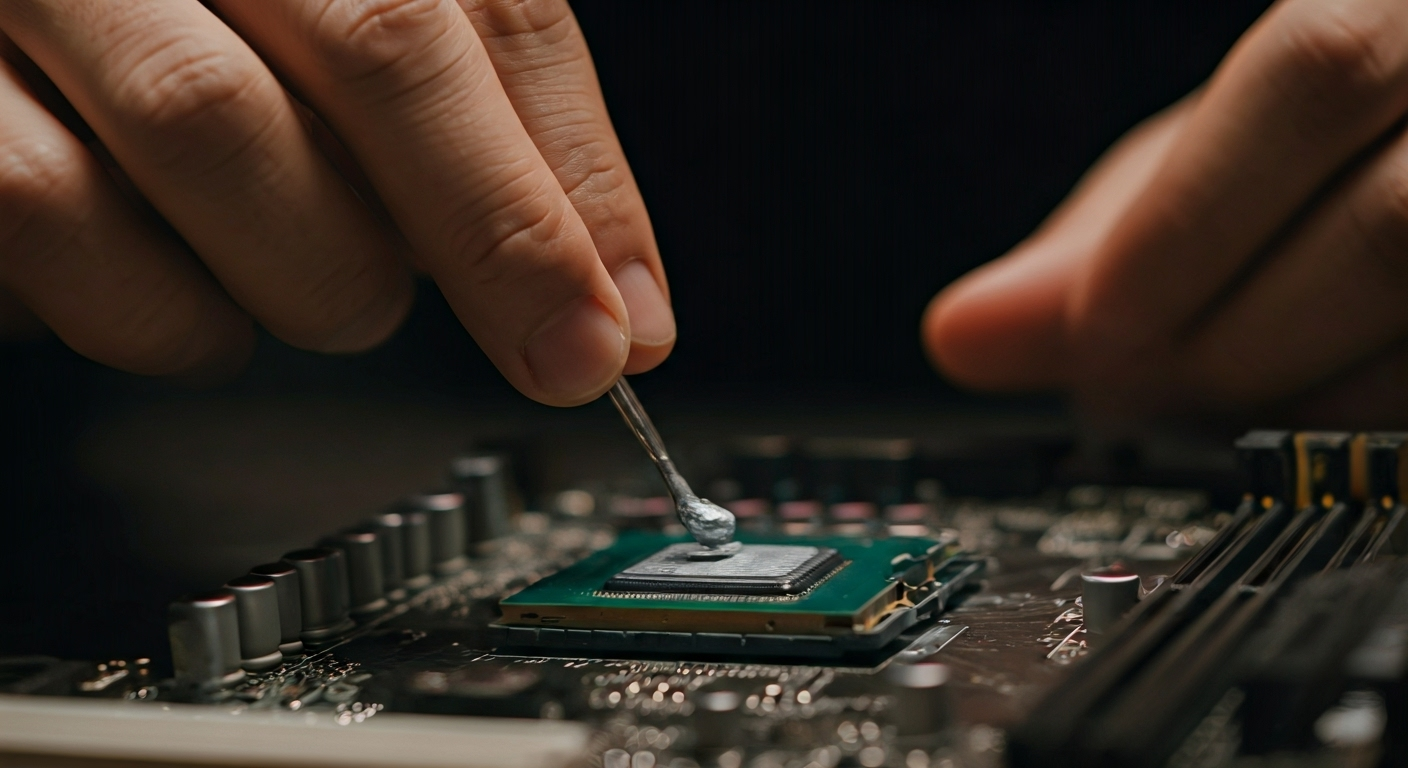
You do not need much paste. Use just enough to cover the center of the CPU. Most people say it is good to use an amount about the size of a pea. Put this small dot of paste right in the center of the CPU. When you put the cooler on top, it spreads the paste in the right way and helps heat move out fast.
Why Proper Application Matters for Your CPU
Getting the application right is important to keep your CPU cool. Using too much paste puts a thick layer on the CPU. This can trap heat and sometimes the extra paste flows out and goes on the motherboard, which can lead to damage. Experts like Noctua say that too much paste lowers how well it works.
If you use too little paste, it does not fill all the space. This leaves small air pockets. Air does not help in heat transfer, so the CPU gets hotter. When the processor gets too hot, it may slow down or even turn off for protection.
Using the correct way helps your system run well. You should put the right amount—a small bit, about the size of a pea—in the center of the CPU. The cooler will press down and spread the paste to cover the area. If you are not sure how much to use, it is best to pick a pea-sized drop and let the CPU cooler do the rest.
Types of Thermal Paste and Choosing the Right One
There are a few main types of thermal paste. Some are ceramic, some are metal-based, and some use liquid metal. Each type of thermal compound has its own good sides and bad sides. The one you pick will depend on your hardware and how much you know about using it. Liquid metal paste moves heat the best, but you need to be very careful because it can carry electricity. Traditional pastes are safer and easier for most people to use.
When you pick a thermal compound, you should think about how well it works with your cpu and cooler. You should also check if there is already paste on your hardware and think about how comfortable you are with using the paste. This guide will help you know about the common types of paste and help you choose the right one for better heat transfer.
Common Types of Thermal Compounds
Thermal compounds come in a variety of formulations, each suited to different needs. The most popular types are ceramic-based, metal-based, and liquid metal. Ceramic and silicon pastes are non-conductive, making them safe for new builders and general use. Metal-based pastes, often containing silver or aluminum, offer improved conductivity but require careful handling to avoid shorts.
Liquid metal, while delivering the best thermal performance, is electrically conductive and challenging to apply. It’s recommended only for advanced users who understand the associated risks.
|
Type of Thermal Compound |
Conductivity |
Safety |
Application Difficulty |
Typical Use Case |
|---|---|---|---|---|
|
Ceramic/Silicon Paste |
Good |
Non-conductive |
Easy |
Everyday users, general builds |
|
Metal-Based Paste |
Very good |
May be conductive |
Moderate |
High-performance, experienced users |
|
Liquid Metal |
Excellent |
Electrically conductive |
Difficult |
Overclockers, advanced users |
Does the brand or type of thermal paste make a significant difference? For everyday builds, most reputable brands perform similarly, but high-end pastes may drop temperatures a few extra degrees in extreme setups.
Factors to Consider When Selecting a Thermal Paste
There are a few things that you need to think about when you pick a thermal interface material. You should know that not all pastes are the same. The details of your build also matter a lot.
First, check if the cooler that you have already has paste on it. If not, look for a thermal compound that will work with both your cpu and your heat sink. Some pastes are made for certain hardware or for very strong use. Others are good for most people.
You should think about these things:
- Thermal conductivity: When the number is higher, the paste will give better heat transfer, but it can be more risky if it is conductive.
- Ease of application: Thick pastes are simple to use and control. Liquid metals need you to be exact when you put them on.
- Longevity: Some kinds of paste will last a lot longer before you need to change them.
- Safety: If you are new to this, it is better to pick non-conductive paste. This helps keep you and the cpu safe from any short circuits.
If you ask, “What tools or things do I need to use thermal paste on my cpu the right way?” — you just need a few easy items, as you will see in the next section. These will help you get the best results for heat transfer between the cpu and heat sink.
Essential Tools and Materials Needed
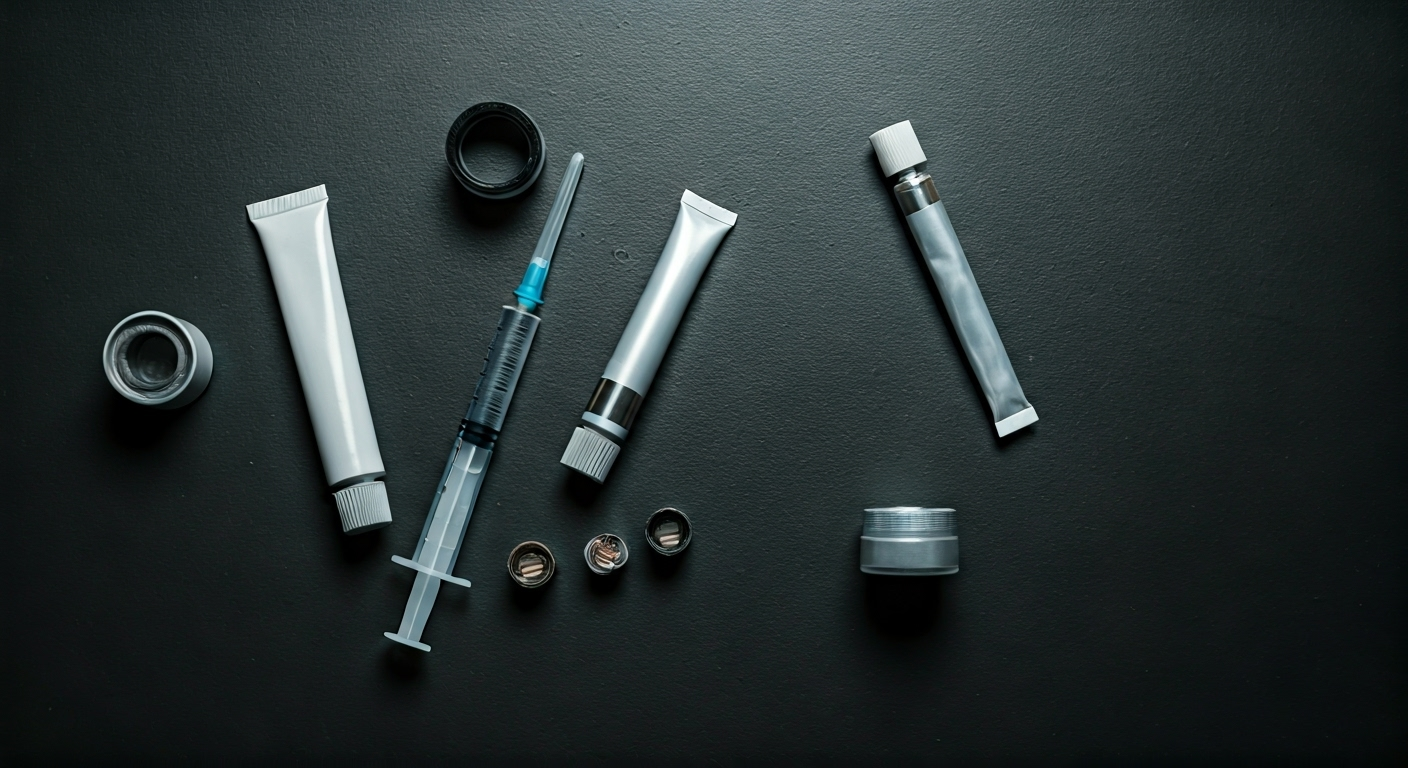
Before you start to put on thermal paste, make sure you have the right things with you. You will need the thermal paste, some isopropyl alcohol that is at least 90%, lint-free cloths or coffee filters, and maybe a plastic card to help clean. These things will help you get rid of any old residue and let you put on the new paste the right way.
Using the right tools keeps old paste from getting on your cpu or motherboard. It protects the parts and helps you stay organized as you work. Now let’s look at the full list of what you need and some easy safety tips before you begin.
List of Tools Required for Application
A good job with thermal paste starts when you use the right tools. Getting ready the right way makes things easier and helps you not make mistakes.
First, be sure you work in a place with no static. Make sure you can reach all your parts. You will need:
- Thermal paste (pick a known brand that works with your CPU)
- Isopropyl alcohol (use one that is 90% or stronger to clean off old paste or residue)
- Lint-free cloth or coffee filter (this helps keep small bits or fibers off your CPU)
- Plastic card or spatula (optional, you can use this for spreading paste or for cleaning if you want)
- Gloves (optional, for extra care and to keep things clean)
People ask, “What tools or things do I need to put thermal paste on my CPU the right way?” These basic things help you do the job well, use the paste and isopropyl alcohol right, and stay away from problems.
Recommended Safety and Preparation Tips
Safety and getting ready matter as much as putting on the paste. Doing these steps will help keep your cpu, cooler, and motherboard safe. It will also give good results with the thermal paste.
First, turn off the computer. Unplug it from the wall. Touch a metal part of the case. This will let any static electricity go out of your body. Take out the motherboard if you need to. It can help you get to the socket and parts without trouble. This also stops you from pushing down hard by accident.
Keep these tips in mind:
- Don’t rush—take your time and be careful. It will keep the cpu and the motherboard safe.
- Double-check orientation and make sure you point the cooler the right way.
- Don’t force components—the parts should go in with no need to push hard.
- Keep your workspace clean so nothing gets in the paste or on the cpus.
“Are there any differences in applying thermal paste for Intel vs AMD CPUs?” Yes, the amount of paste and how to put it on can change. You will learn more about it later. But it is always important to use these safety tips for both types of cpus with any socket.
Step-by-Step Guide: How to Apply Thermal Paste to Your CPU
Ready to put on the thermal paste? It does not matter if you have done this before or not. When you follow clear steps, the job will be simple. This easy guide takes you through each part, like cleaning the cpu, adding the paste, putting on the cooler, and checking that the paste covers well.
Doing it this way helps you not make mistakes and makes sure your cpu gets good heat transfer. If you are building a computer for the first time and think, “Can you show me each step to use thermal paste on a cpu?” — these instructions will tell you just what to do.
Step 1: Clean the CPU and Cooler Surfaces
Start by shutting down your system. Next, unplug the power cable. Carefully take off the cooler, and gently twist it back and forth if you need to break the seal. Do not pull straight up, as this might make you take the cpu out of the socket by accident.
After you take the cooler off, look for old thermal paste. You will usually find some on both the cpu lid and cooler base. Do not use this old thermal paste. The old paste dries out, does not work as well, and may leave air bubbles. Get a lint-free cloth or coffee filter. Put some isopropyl alcohol on it. Then, wipe away any paste and other residue from both surfaces. Be very gentle so that you do not scratch the metal.
Let the cpu and cooler dry all the way before you move to the next step. Should you reuse old thermal paste or put on new paste every time you reseat the cooler? You should always clean off the old compound and put a new layer of thermal paste to stop air pockets and get the best result.
Step 2: Apply the Correct Amount of Thermal Paste
After you clean your surfaces, you need to add the new thermal paste. Take off the cap on the tube. Hold it above the center of the CPU’s heat spreader. Squeeze out a small dot of paste about the size of a pea or a grain of rice. This much paste is enough for most CPUs.
If you ask, “How much thermal paste do I need when I put on a CPU cooler?” the answer is a pea-sized dot in the center. That is the best way for most CPUs. But some bigger CPUs like Intel’s LGA1700 or AMD’s Threadripper might need a few small dots instead. This is what the makers suggest.
Do not spread the paste with your hand. The cooler, once you mount it, will push the paste evenly. If you use too much paste, it can go out the sides. This can make a mess or might hurt your CPU parts. If you use too little paste, it will not spread all over, and heat transfer will not be as good.
Step 3: Mount the CPU Cooler and Check Coverage
With thermal paste on the CPU, take the cooler and line it up with the mounting holes. Lower it straight down onto the heat spreader. Press lightly and evenly to make good contact. Follow the right tightening pattern for your cooler. This is often a diagonal or “X” shape. Tighten each screw a little at a time. This keeps the pressure even.
If you wonder how to know if you put on too much or too little paste, check the sides after you mount the cooler. You should not see thermal paste squeezing out. If it does, take off the cooler and clean off the extra paste. Then use less paste and try again. To make sure the application is right, you can take the cooler off once and look. The heat spreader should have a thin, even layer of paste.
After everything is back on and plugged in, turn on your system. Watch your CPU temperatures for the next few days. If the temps stay in normal ranges, your thermal paste application worked well.
Conclusion
To sum up, putting thermal paste the right way is important for your CPU to work well and stay cool. You need to know about the types of thermal paste out there and follow each step in the guide. Doing this will help your CPU run better. It does not matter if you are new to this or have done it before. Taking time to apply the paste to your cpu can really boost how your system works. If you have questions or need help with your setup, you can always ask for a free consultation. Give your cpu the care it needs!
Frequently Asked Questions
How do I know if I’ve used too much or too little thermal paste?
If you see thermal paste coming out from the sides of the CPU after you put on the cooler, it means you used too much. Using too little paste leaves some parts of the heat spreader uncovered. This can give bad cooling and make the CPU too hot or leave residue.
Are there different techniques for applying thermal paste, and which one is best?
There are a few ways to put paste on your CPU. People often use dots, lines, crosses, or spread it around. The best way is to put a small pea-sized dot right in the center of the CPU. When you add the cooler, the pressure will spread the paste over the surface. This way, you get good coverage, no air bubbles, and it helps the CPU work well.
Should I always clean off old thermal paste before reapplying?
You need to always take off the old thermal paste before you put new thermal paste on your CPU. The best way to do this is by using isopropyl alcohol. This step helps the new paste stick well, which makes heat transfer better and helps with cooling. Cleaning away old thermal paste also stops dirt or anything else from getting in the way and hurting how well the cooling works.
How often should I replace the thermal paste on my CPU?
You should change the thermal paste every 2 to 3 years. You should also do this anytime you take off the cooler. If you notice that the cpu gets hotter or does not work as well, it might be time to put on new paste. This helps keep the cooling good.
How to tell if you applied thermal paste correctly?
When you put thermal paste the right way, it should cover the whole heat spreader in a thin and even layer. This helps the heat move well from the cpu to the cooler. Check your cpu temperatures. If they stay steady when you use it, your paste was used the right way and you got good heat transfer.
0 comments