
Key Highlights
- Delidding a CPU involves removing the integrated heat spreader (IHS) to replace the thermal interface material (TIM) with higher-quality options, like liquid metal.
- This process can significantly lower CPU temperatures, offering performance benefits for overclockers and enthusiasts.
- Using specialized delidding tools and following anti-static precautions is essential to avoid damaging the CPU.
- Not every CPU model is safe to delid; checking compatibility and manufacturer policies is crucial.
- Delidding will void your warranty, and careful resealing is needed for long-term reliability.
- Testing and proper TIM application are key steps to maximizing your post-delidding performance gains.
Introduction
Delidding is when you take off the integrated heat spreader (IHS) from a CPU to help it stay cooler. As CPUs get hotter and have more cores, especially when you do a lot of overclocking, many people use delidding for better cooling. The process may look hard and brings some risk, but new delidding tools have made it safer and easier for people to try. This guide will talk about how you can delid a CPU without any harm. It will show the tools you need, how to be ready, and each step you should follow so you do not make the most common mistakes.
Understanding CPU Delidding and Its Purpose
Delidding a CPU is a popular thing for those who want better thermal performance. This process is about taking off the IHS, which is a metal cover on top of the cpu die. People do this to swap out the thermal paste that brands use and put in a better one. Overclocking fans like this because lower temperatures can help the cpu run at faster and more stable speeds. This can make your system more reliable.
If you want to know more about how delidding works at the technical level, the next parts will talk about what delidding is and why you should think about it for builds that focus on top cpu performance.
What Is CPU Delidding?
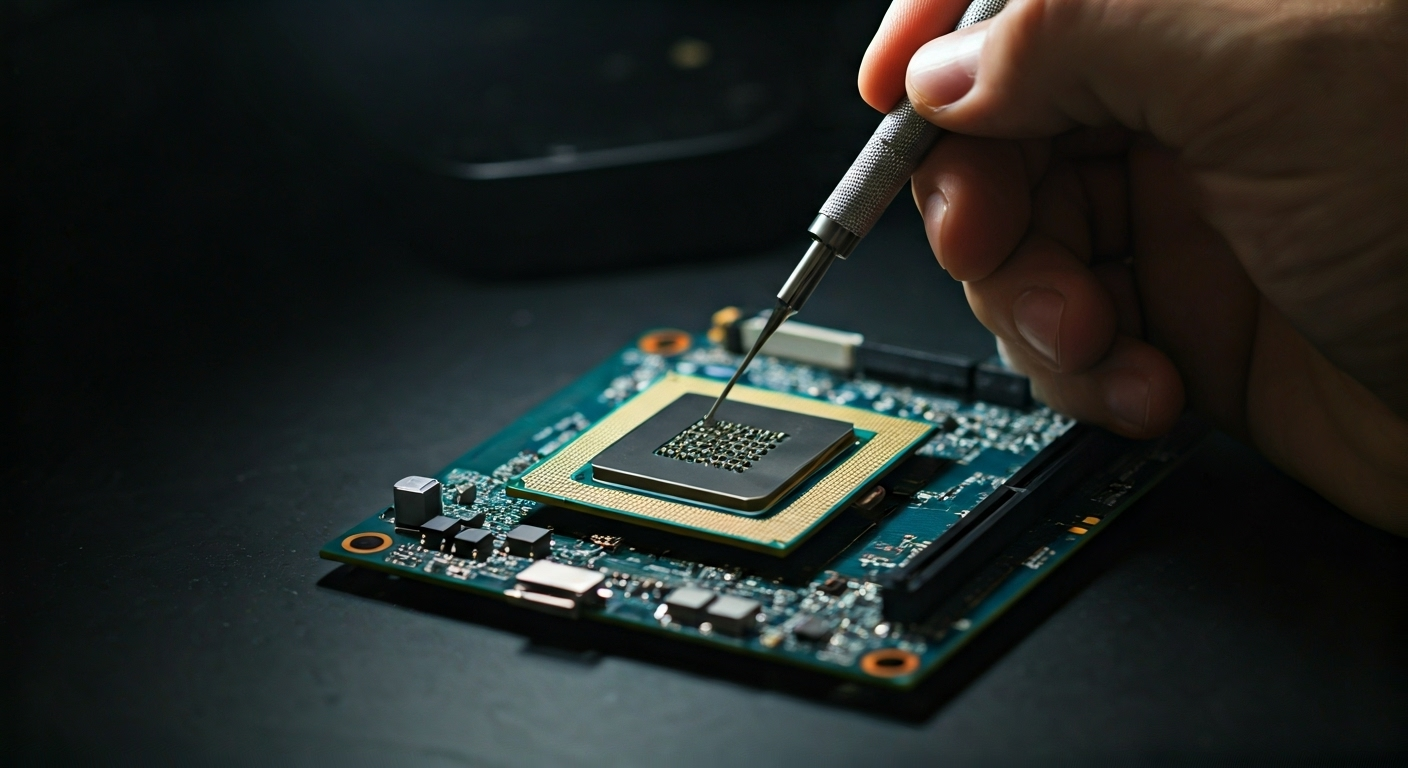
CPU delidding means you take off the integrated heat spreader (IHS) from the top of the CPU. The IHS helps move heat from the CPU die to the cooler. But the thermal interface material that the maker uses may hold back the best performance.
In the past, people used methods like razor blades to do delidding, but this could hurt the silicon in the CPU. Now, with special delidding tools like the der8auer Delid Die Mate series, the delidding process is much safer. These delidding tools help you lift the IHS from the top of the CPU without breaking any of the small parts inside.
So, what are the safest ways to delid a CPU by yourself at home? You should start by putting your CPU in a delidding tool, making sure it lines up right on the top of the CPU, and then slowly use pressure to lift the IHS. Do not use blades or anything homemade—delidding tools are the safest way to go when you want to keep your CPU safe during the process.
Reasons Enthusiasts Choose to Delid Their CPUs
Enthusiasts often delid their cpus to get lower temperatures and better overclocking. When you swap the factory thermal interface material for good paste or liquid metal, cooling improves a lot.
The main reasons people delid cpus are:
- They want lower temperatures, mainly when pushing overclocks or doing tough tasks.
- They try to get better and more reliable overclocks for more performance.
- They need to take out the poor thermal interface material the maker uses and put in better paste or liquid metal.
- They want to make the cpu last longer and work better with good heat control.
How much better will your cpu be after the delid? Most people see the temperature go down 3 to 5°C with good paste, or 8 to 15°C with liquid metal. This is true when you put the cpu under load or when you push overclocks. Lower heat helps keep your system stable and may help your cpu work for more years.
Assessing Whether Your CPU Should Be Delidded
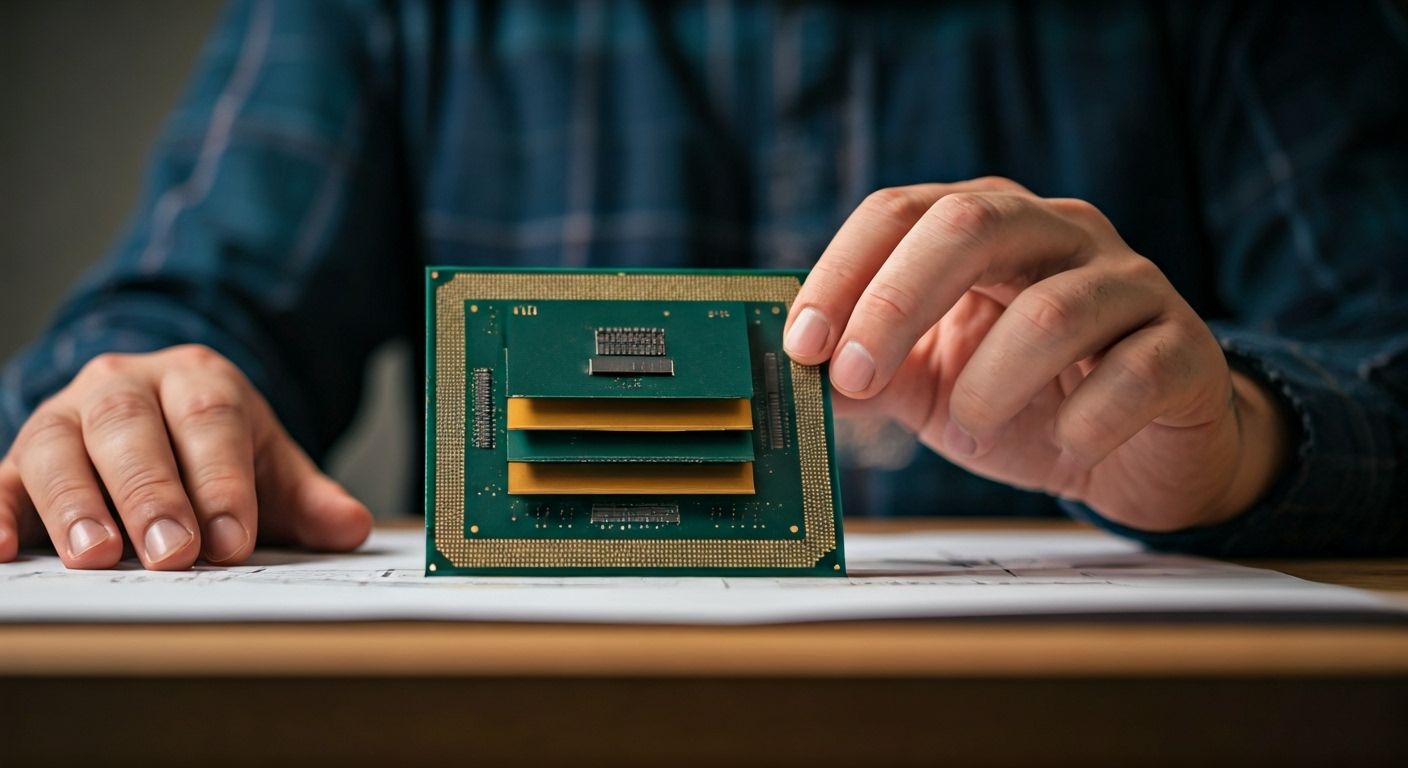
Not every CPU can be delidded, so you need to check the way your model is made. An Intel Core CPU and an AMD Ryzen CPU are put together in different ways. For some, the IHS is stuck on with glue, while others are soldered. This has a big effect on if you can delid the CPU or not. If you use an older Intel or AMD CPU, it’s good to be sure if it’s even possible to delid before you start.
Let’s go over which CPUs are usually okay for delidding, and also what risks or rules from the maker you should think about before you use your tools.
Identifying Safe-to-Delid Models (Intel, AMD, and Others)
Some CPU models work better for the delidding process than others. For example, Intel Core and AMD Ryzen CPUs can have better heat control after you do a delid, because of the type of thermal interface material and integrated heat spreader (IHS) they use. Many overclockers look at certain years or generations because some of the new models from Intel or AMD use a stronger glue or a special design that can make the delidding process harder. Before you start, it is a good idea to look up guides or check what other people say about your cpu model online. This can help you know if your CPU is good for delidding, and show you the right tools you need to get the best results.
Risks and Manufacturer Policies You Need to Know
Delidding your CPU is risky. The biggest risk is that you will lose your CPU’s warranty. Intel and AMD have clear rules. If you change your CPU in any way, such as delidding, they will not support or cover it anymore. There is glue or even solder under the IHS, which can be hard to take off. If you use too much force, you can break the cpu die or the pcb.
How do you know if the warranty will be gone? If you take off the IHS or change the processor, you have no warranty. Always read your product’s documents to know about these policies before you start.
If you care about long-term support, you need to think about it. Having lower temperatures is great, but you may lose your warranty for good. Most people will only do this if they need more performance or if heat is the top problem for them.
Essential Tools and Preparation for Safe Delidding

Proper preparation is key for a safe delidding process. To get ready, you need to have all the right delidding tools. Do not use things like knives or screwdrivers instead. These can be risky for your cpu.
Make sure to set up your workspace in a clean area. The place should also be free from static. Take anti-static steps to keep your cpu safe, as this helps stop harm from static electricty.
Having the right tools and making your area safe will help you get good results. Next, you will see what you have to use and how to get your workspace ready for this cpu delidding job.
Recommended Delidding Tools and Brands
When you want to do delidding, it’s very important to have the right tools. Good quality tools help you avoid damage to your CPU. A specialized delidding tool makes the job safer. Experts suggest using popular brands like der8auer’s Delid Die Mate 2, which is for Intel LGA1151, and Delid Die Mate-X for bigger chips.
The essential items to have:
- A delidding tool that goes with your type of CPU (for example, the der8auer Delid Die Mate series)
- High-quality liquid metal TIM, such as Thermal Grizzly Conductonaut
- Non-conductive thermal paste, like Noctua NT-H1, as a safer choice
- Alcohol wipes or 99% isopropyl alcohol for cleaning
- A credit card or a paste spreader for putting on TIM
What tools will you need to safely delid a cpu? Always use known kits that are right for your socket, and do not use homemade solutions. As Roman “der8auer” Hartung says, “Safety and precision start with the right gear.”
Workspace Setup and Anti-Static Safety Measures
Creating a safe place to work is very important. Pick a spot that is clean and has good light. Make sure there is no mess or clutter around. Put an anti-static mat on the table, and always wear an anti-static wrist strap that is connected to something metal on the ground. This helps stop static electricity from hurting your cpu or motherboard.
When you are about to touch the processor, you should ground yourself. You can do this by touching something metal first. Keep tools and all the parts in order. Doing this will help you not to drop things or have them slip by accident. Do not work on carpets, and stay away from rooms that are dry or have heat and lots of static electricity.
What should you do to stop static and other risks? Use your anti-static gear. Keep food and drinks away from where you are working. Hold the cpu gently by the edges only. Taking these steps will lower the chance of ESD damage or problems during the delidding process.
Step-by-Step Guide to Safely Delidding a CPU
Ready to begin? Delidding takes time, care, and a close eye for detail. With this process, you take off the heatspreader, clean it, apply new TIM, and then seal the cpu again to keep it safe for use. You need to be careful at each step, as the parts are thin and easy to break.
The guide here gives you clear steps on how to remove the ihs in a safe way, and how to get your cpu ready to work better. Now, let’s start with the best way to lift the ihs without hurting anything.
Detailed Method for Removing the IHS Without Damage
Removing the IHS is the most important step. The delidding tool is made to stop any pressure on the CPU die. Here is how you can do it:
- First, secure your cpu in the delidding tool and line up the markers, like the gold triangle, so you get the right side up.
- Put the IHS remover in place and slowly turn the clamp or bolt until it rests flat on the top of the cpu.
- Use the key or handle that comes with the kit and put steady, even pressure—you might hear a small click when the glue starts to let go.
- When it is loose, lift the IHS from the top of the cpu with care.
- Use your fingernail or a soft tool to get any glue left off the cpu and the IHS.
If you want to delid your cpu safely at home, always go with a delidding tool that is made for this job. Do not use screwdrivers or sharp blades to pry it open. Always move slow and pay attention while you work.
Cleaning, Reapplying TIM, and Resealing the CPU
Once you take the IHS off, you need to clean both the CPU die and the heatspreader well. Use alcohol wipes or some 99% isopropyl alcohol with a soft cloth or a swab. Wipe away all the old thermal interface material.
After you finish delidding, it’s important to use new TIM. High-quality liquid metal, like Thermal Grizzly Conductonaut, works best for moving heat. Put only a little bit right to the die, and spread it out. You can use the swab that comes with it or a credit card. Be careful, as liquid metal has things inside that can move electricity.
To reseal the CPU, put a small line of heatproof, waterproof glue around the edge where the IHS will sit. Line up the IHS well, press it down, and use the clamp from your delidding tool to hold it tight until the glue dries. Resealing helps keep the CPU die safe and makes sure the cooler touches well.
Common Mistakes and How to Avoid Them
While the delidding process has some good benefits, small mistakes can harm the CPU fast. Many people do not take their time, use the wrong tools, or forget steps to stop static, and that can cause real trouble. A lot of overclockers have seen why you have to be careful and pay attention to every part of this work.
The next parts talk about usual mistakes people make during delidding. There are also simple tips you can use. This will help make sure your CPU will keep working well for a long time.
Typical Errors During the Delidding Process
Mistakes when you do delidding can do damage that you can’t fix. Here are some common things people do wrong:
- They use blades, knives, or any things that are not a real delidding kit.
- They push too hard. This can make the cpu die break or make the pcb snap.
- They do not get rid of all the glue left. This stops the ihs from sticking well.
- They forget about anti-static steps. This can give your cpu esd harm.
- They use too much thermal paste, or they use paste that moves electricity, which may cause a short.
What are the main risks when you try to delid your cpu and how can you lower them? Always grab the right tool for your cpu die and do not rush. Always check each thing you do before you start the next step. Don’t try to skip making your space safe. Keep all things that let out electricity away from is. If you take your time, work in a safe space, and use the things that are meant for this job, you keep your cpu, pcb, glue, ihs, and paste safe and more likely to work after you finish.
How to Minimize Damage and Ensure Long-Term Reliability
To help your CPU last longer after delidding, you need to be careful with every step of the process. Be gentle when you handle the silicon. Do not touch the die with anything metal, and never push down right on top of the exposed part. When you put the glue back on and reseal it, check that your cooler fits evenly. This keeps the pressure on your CPU level.
Use only the right amount of liquid metal or TIM so it does not spill out. If you are not sure, try a non-conductive choice, as this can be safer. Let the glue dry all the way before you put the cpu back in for use.
People ask, “What are the biggest risks, and how do you reduce them?” You will stop most issues if you have patience, and you pay close attention to each step. Keep checking your cpu right after delidding. Watch its performance, and look at how hot it gets. As Roman “der8auer” Hartung says, “A careful approach today ensures peak reliability tomorrow.”
Post-Delidding: Testing, Performance, and Resealing
After you take the top off (delidding) your CPU, you should check how it works and see if it runs cooler. This helps you know if the paste you used (TIM) and putting it back together worked well. Watch the heat levels when you run stress tests. This will tell you if everything was done right. Write down your test results before and after delidding so you can see the difference.
The next parts will show you what you could gain by delidding your CPU. You will also see why sealing the CPU properly and checking it again matters for keeping its good performance and making sure it stays safe.
Temperature and Performance Gains to Expect
Delidding can really help, mainly when you use liquid metal. Real-world tests show the following:
- With liquid metal, you get 8-15°C lower peak temperatures, even when you put a lot of stress on the device or overclock it.
- You get better turbo performance or higher all-core speeds, thanks to the lower temperatures.
- You see an improvement of 3-5°C with top-quality paste that isn’t metal-based.
- You get better stability if you do a lot at once or when you play games.
If you want to know what changes to expect, here’s an example using the Intel Core i9-7900X. When it’s just using the normal settings, the temperature after delidding dropped from 62°C to 55°C during heavy tests. If the CPU was overclocked, temperatures went down from 80°C to 67°C. Lower temperatures like these can help these Intel CPUs keep high speeds for longer. This means smoother use for you and maybe a longer life for the hardware.
Importance of Resealing and Final Checks
Resealing your CPU after the delidding process keeps the silicon safe and helps the heat move well to the heatsink. You need to use a thin and even layer of heatproof glue. Be sure to line up the IHS the right way, and then clamp it gently until it is set. This helps block dust and moisture from getting in. It also keeps the thermal contact steady, so your cpu works its best.
After your cpu is resealed, put it into your motherboard. Next, attach the cooler, and run tests to check for problems. Watch the temps for any sudden spikes or if the system acts unstable. Doing these checks helps make sure your system is safe to use for a long time and that the delidding process works the way you wanted.
If you want to know why resealing is needed after the delidding process, it is important for both protection and good performance. Skipping this step could leave your cpu open to damage and stop it from keeping cool as well as it should.
Conclusion
Successfully taking the lid off a cpu can help lower its heat a lot. But, you have to plan well and follow each step with care. In this guide, you will see how to check if your cpu is right for delidding and learn what mistakes you should not make. With the right steps, you can get good results and still keep your hardware safe. It is important to get ready, have the right tools, and set up a safe space to work. These things will really help you. If you have any more questions or want more help with delidding your cpu, you can always ask for expert tips. Good luck with your delidding!
Frequently Asked Questions
Will delidding void my CPU warranty?
Yes, if you decide to try delidding your CPU, you will void the manufacturer’s warranty. Taking off the integrated heat spreader or making any change to the CPU is a change that Intel, AMD, and other CPU makers do not cover under warranty. Go ahead with delidding only if you are okay with this risk.
Is replacing the thermal interface material necessary?
Replacing the thermal interface material is important right after you have done delidding. The old paste or thermal interface material comes off during this step. So, you need to put on new liquid metal or a non-conductive paste. This helps the heat move out well and keeps the cpu safe while it is working.
Are there step-by-step guides or videos for first-time delidders?
Yes, there are many step-by-step guides and videos to show first-time cpu delidders what to do. Good places like Tom’s Hardware and some YouTube experts use clear instructions and lots of pictures or videos to help you go through each step the right way. Always use a guide that matches your cpu model.
0 comments