
To remove a hard drive from a laptop, first power off the device and disconnect all cables. Locate the hard drive compartment and unscrew it to reveal the drive.
Disconnect the drive from the laptop’s motherboard and remove it carefully. It is important to handle the hard drive with care to avoid damage. Additionally, ensure that you have a suitable anti-static bag to store the drive during removal. Following these steps will allow you to successfully remove the hard drive from your laptop without any issues, enabling you to upgrade or replace it as needed.
Preparing For Removal
Shut Down The Laptop
Before removing the hard drive from your laptop, it’s crucial to shut down the system properly. Click on the “Start” menu and select “Shut Down.” Ensure that all your data is saved and the laptop is completely turned off before proceeding with the removal process.
Disconnect Power Source
Once the laptop is shut down, ensure that the power source is disconnected. Unplug the charger or remove the battery to eliminate any risk of electric shock during the hard drive removal process.
Ground Yourself
As a precaution against static electricity, it’s vital to ground yourself before handling the internal components of the laptop. This can be done by touching a metal object such as a doorknob or using an anti-static wrist strap to discharge any built-up static energy from your body.

Credit: m.youtube.com
Accessing The Hard Drive Bay
Locate the Hard Drive Bay: To begin, find the hard drive bay on your laptop.
Remove the Access Panel or Battery: Next, take out the access panel or battery to reach the hard drive.
Identify the Hard Drive: Once the panel or battery is removed, locate the hard drive within the bay.
Removing The Hard Drive
When it comes to removing the hard drive from a laptop, you need to follow a few simple steps. Here’s how you can remove the hard drive:
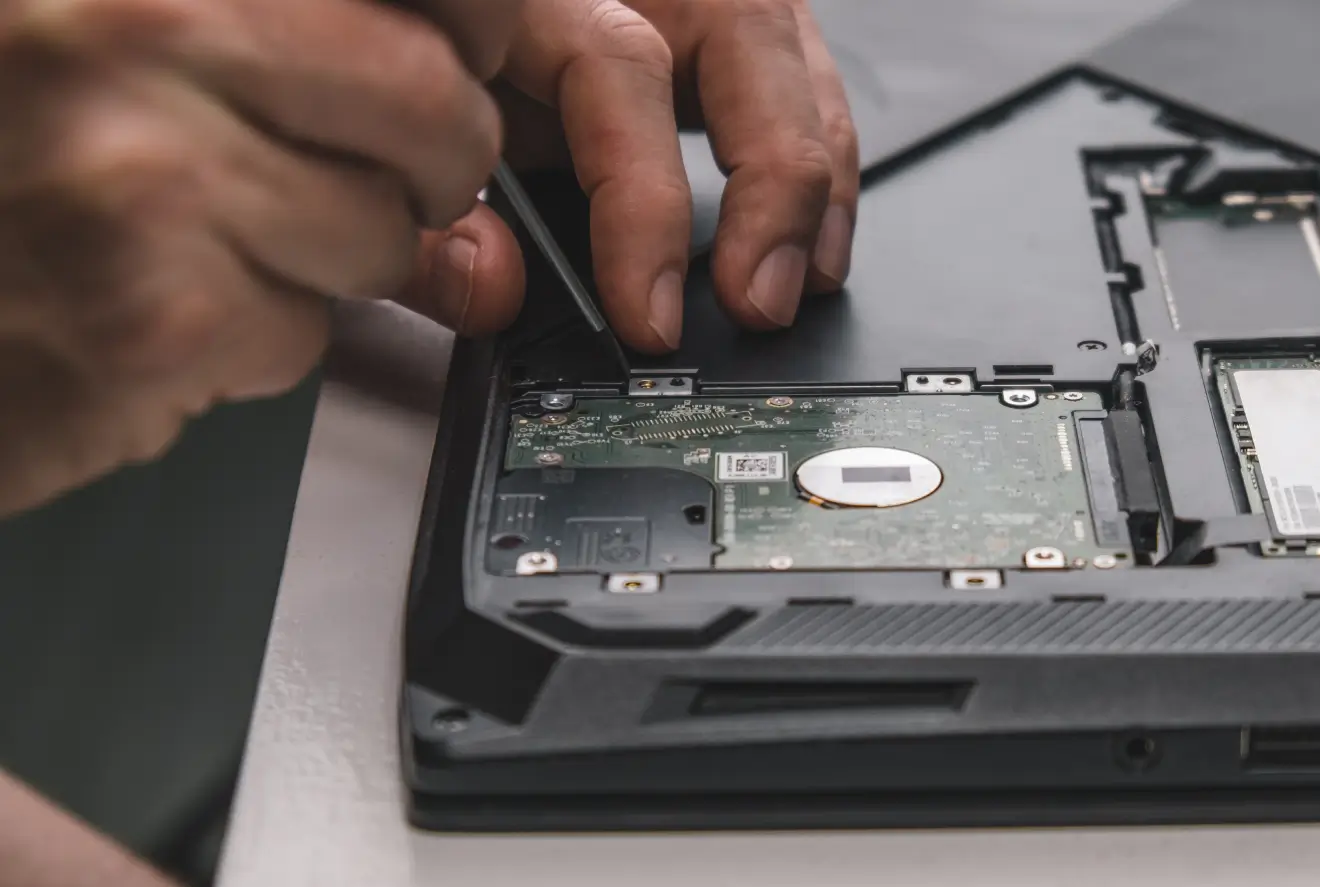
Disconnect Cables And Connectors
Start by disconnecting all the cables and connectors attached to the hard drive.
Unscrew The Hard Drive Bracket
Use a screwdriver to unscrew the bracket holding the hard drive in place.
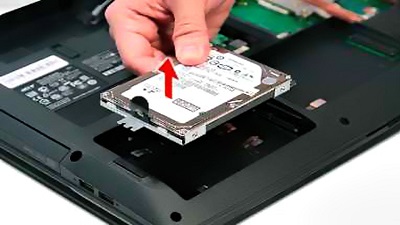
Slide Out The Hard Drive
Once the bracket is removed, carefully slide out the hard drive from its slot in the laptop.
By following these steps, you can safely remove the hard drive from your laptop with ease.
Handling The Hard Drive
Handling the hard drive of a laptop requires careful consideration to ensure that the process is completed without causing any damage to the internal components. Proper handling is crucial to ensuring the safety and functionality of the hard drive during removal or replacement.
Hold The Hard Drive Properly
When removing the hard drive from a laptop, it is essential to hold it properly to avoid any mishandling. Carefully grasp the hard drive from the sides, ensuring that your fingers do not come into contact with the exposed connectors or circuitry. Use a gentle but firm grip to prevent accidental slips or drops during the process.
Avoid Touching The Internal Components
It is important to avoid touching the internal components of the hard drive during the removal process. Refrain from making direct contact with the circuit board, connectors, or any delicate parts of the hard drive. Excessive force or accidental contact with these components can lead to irreversible damage and data loss.
Installing A New Hard Drive
To remove the hard drive from a laptop, start by powering off the device and disconnecting any cables. Then, locate the hard drive compartment, unscrew it from the laptop, and carefully remove it. Finally, place the new hard drive into the compartment, secure it with screws, and reassemble the laptop.
Selecting The Right Replacement Drive
When it’s time to replace the hard drive in your laptop, selecting the right replacement drive is crucial. The new drive should not only meet your storage needs but also be compatible with your laptop’s specifications. To find the perfect match, consider the following:
- Storage Capacity: Determine how much storage space you require. If you frequently work with large files or store a lot of media, opt for a higher capacity drive. Otherwise, a standard-size drive should suffice.
- Interface Type: Identify the interface type supported by your laptop, which could be SATA, IDE, or the newer PCIe. Make sure the replacement drive supports the same interface to ensure compatibility.
- Form Factor: Check your laptop’s form factor to ensure that the replacement drive matches. The most common laptop hard drive form factors are 2.5 inches and M.2.
- Speed: Consider the speed of the replacement drive, as faster speeds can significantly enhance your laptop’s performance. Solid-state drives (SSDs) usually offer quicker speeds compared to traditional hard disk drives (HDDs).
Connect The Cables To The New Drive
After selecting the appropriate replacement drive, it is time to connect the necessary cables. Follow the steps below to ensure a successful connection:
- Power Off: Before proceeding, ensure your laptop is powered off and disconnected from the power source.
- Locate the Hard Drive Bay: Find the hard drive compartment on the bottom of your laptop. It is often secured with screws or latches.
- Remove the Housing: Carefully remove the housing or panel covering the hard drive bay. Use a screwdriver or follow the manufacturer’s instructions if needed.
- Disconnect the Cables: Identify the cables attached to the old hard drive — the SATA data cable and the power cable. Gently unplug them from the connectors.
- Connect the New Drive: Take the new hard drive and connect the SATA data cable and power cable into the corresponding connectors. Ensure a secure fit without applying excessive force.
Secure The New Hard Drive
To prevent any movement of the new hard drive and ensure its longevity, securely fasten it in place using the following steps:
- Reattach the Housing: Place the housing or panel back onto the hard drive bay. Align the screw holes or latches and firmly secure them.
- Perform a Test: Double-check that all connections are secure and that the new hard drive is properly installed. Now, it’s time to power on your laptop and test the new drive.
- Reinstall the Operating System: If you have installed a blank hard drive or SSD, you will need to reinstall the operating system using your recovery disk or USB.
- Transfer Data (Optional): If you have transferred data from the old drive, follow the necessary steps to migrate or copy your files to the new drive.
Replacing The Access Panel Or Battery
To replace the access panel or battery on your laptop, follow these steps: locate the access panel, remove the screws, carefully detach the panel, disconnect the battery connector, replace the battery if necessary, and reassemble the laptop. Ensure your laptop is powered off and unplugged before attempting any repairs.
When it comes to removing the hard drive from a laptop, one of the essential steps is replacing the access panel or battery. This section will guide you through the process of reattaching the access panel or battery to ensure a proper fit. Follow the steps below to complete this crucial step successfully:
Reattach The Access Panel Or Battery
- Locate the access panel or battery slot: Begin by identifying the correct location for reattaching the access panel or battery. It may be on the bottom or back of your laptop, depending on the model.
- Line up the panel or battery: Align the access panel or battery with its designated slot. Ensure that all the necessary connectors and screws are properly matched.
- Press firmly and secure: Gently press the access panel or battery into place. Apply a steady amount of pressure to ensure a secure fit. You should hear a click or feel it snap into position.
- Tighten screws, if applicable: If your laptop requires screws to secure the access panel or battery, use the appropriate screwdriver to tighten them. Be careful not to overtighten, as it may damage the laptop or strip the screws.
Ensure Proper Fit
Confirming that the access panel or battery is correctly reattached to your laptop is vital for the seamless functioning of the hard drive. Take the following precautions to guarantee a proper fit:
- Check for any protrusions: After securing the access panel or battery, carefully inspect the laptop to ensure that nothing is sticking out or not aligned correctly. This step helps avoid any potential damage to the hard drive or other components.
- Test the panel or battery: Give the access panel or battery a gentle wiggle to check if it firmly stays in place. If it moves or feels loose, double-check the alignment and attachment.
- Power on your laptop: Once you have reattached the access panel or battery, power on your laptop and check if it starts up without any issues. If everything runs smoothly, you have successfully ensured a proper fit.
By carefully reattaching the access panel or battery, you ensure that the hard drive remains securely in place and functions optimally for your laptop. Continue following the additional steps in this guide to complete the process of removing your hard drive.
Powering On And Testing
Welcome to the crucial stage of the hard drive removal process – Powering On and Testing. After successfully removing the hard drive from your laptop, it’s essential to reconnect the power source, turn on the laptop, and run diagnostics to ensure everything is in perfect working order.
Reconnect Power Source
To start the testing phase, reconnect the power source to your laptop. Carefully plug in the power cable and ensure it is securely connected to the power outlet.
Turn On The Laptop
After reconnecting the power source, proceed to turn on the laptop. Press the power button and observe the startup process. Listen for any abnormal sounds and pay attention to the display to ensure it lights up properly.
Run Diagnostics
To confirm that the laptop’s components are functioning well, it’s important to run diagnostics. Use the built-in diagnostic tools or specialized software to check the hard drive, memory, processor, and other important hardware components.
Data Transfer And Backup
Transferring Data From Old To New Drive
1. Save old drive data to a new folder on your laptop.
2. Connect the new drive, copy over data, and disconnect old drive.
Creating A Backup For Future
1. Regularly back up important files to an external hard drive.
2. Utilize cloud storage services like Google Drive or Dropbox.
Additional Tips And Safety Precautions
Looking to remove the hard drive from your laptop? Here are some additional tips and safety precautions to keep in mind. Safely shut down your laptop before starting, use proper tools and equipment, and handle the hard drive with care to avoid any damage.
It’s crucial to follow additional tips and safety precautions when removing a hard drive from a laptop.Label Cables And Screws
Always label the cables and screws before detaching them from the hard drive to avoid confusion later.Protect The Hard Drive
Use an anti-static bag to protect the hard drive from static electricity during removal and storage.Handle Electronics With Care
Handle the hard drive and other electronics with gentle care to prevent damaging sensitive components. Remember, proper handling and precautions are essential in safely removing a hard drive from a laptop.
Credit: www.wikihow.com
Credit: 4ddig.tenorshare.com
Frequently Asked Questions On How To Remove Hard Drive From A Laptop
How Do You Remove A Hard Drive From A Laptop?
To remove a hard drive from a laptop, first, power off the laptop and disconnect all cables. Locate the access panel or bottom cover where the hard drive is located. Unscrew and remove the panel, and gently disconnect the hard drive cables.
Finally, carefully slide the hard drive out of its slot.
Is It Difficult To Remove The Hard Drive From A Laptop?
Removing a hard drive from a laptop is not difficult if you follow the proper steps. It requires basic technical knowledge and caution to avoid any damage. If you are unsure, it is always recommended to seek professional assistance or refer to the laptop’s user manual.
What Tools Do You Need To Remove A Laptop’s Hard Drive?
To remove a laptop’s hard drive, you typically need a small screwdriver (such as a Phillips or Torx) to remove the access panel or cover. Additionally, anti-static precautions like an anti-static wristband or mat can help protect the sensitive components from static electricity.
Can I Remove The Hard Drive From A Laptop Without Losing Data?
If the laptop’s hard drive is still functioning properly, you can remove it without losing data. However, it is crucial to handle the hard drive with care and avoid any physical damage during the removal process. It is recommended to back up your data regularly to prevent data loss.
Conclusion
In wrapping up, removing a hard drive from a laptop is a manageable task with the right tools and guidance. By following these steps, you can safely extract the hard drive and either replace it or use it for data retrieval.
Making sure to handle the hardware with care and attention, this process can be completed smoothly and efficiently.
0 comments