
To change font size on Macbook Air, go to System Preferences, click on Displays, then adjust the resolution. Are you looking to personalize your Macbook Air’s font size for better readability and customization?
Changing the font size can make a big difference in how you interact with your device, especially for those with visual impairments or specific preferences. By following a few simple steps, you can easily modify the font size on your Macbook Air to suit your needs and enhance your overall user experience.
We will guide you through the process of adjusting the font size on your Macbook Air with ease and efficiency. Let’s get started!
Credit: osxdaily.com
Methods For Changing Font Size
Changing the font size on your Macbook Air can help improve visibility and overall user experience. There are several methods you can use to adjust the font size, ensuring that it fits your preferences and needs. Below are the three main methods for changing font size on a Macbook Air.
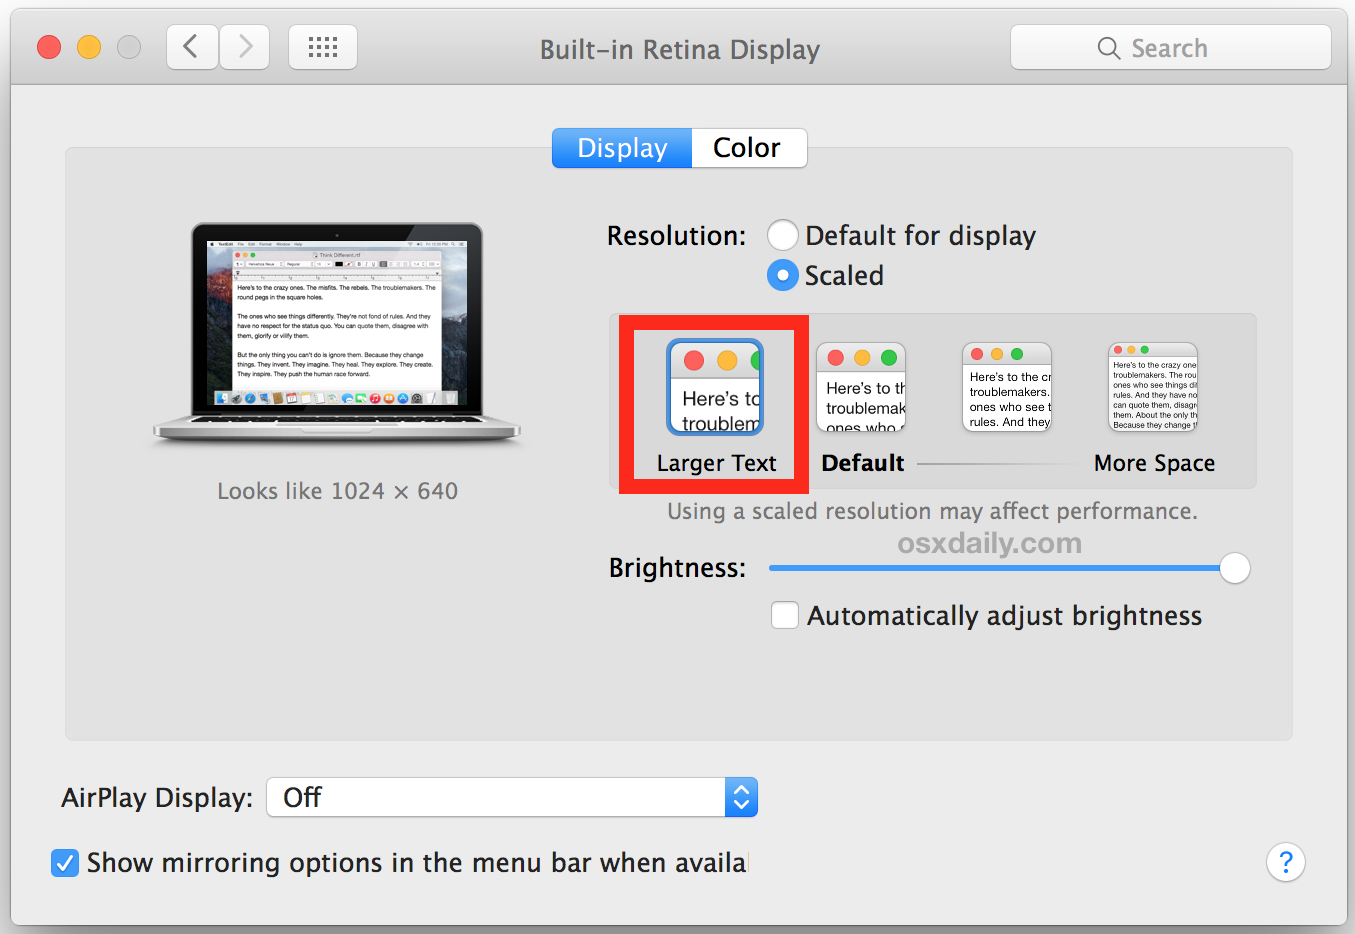
System Preferences provides a straightforward way to customize the font size on your Macbook Air. Follow these simple steps to make adjustments:
- Click on the Apple logo in the top-left corner of the screen and select System Preferences from the dropdown menu.
- Click on Displays.
- Choose Display to access the font size settings.
- Use the slider bar to adjust the font size according to your preference.
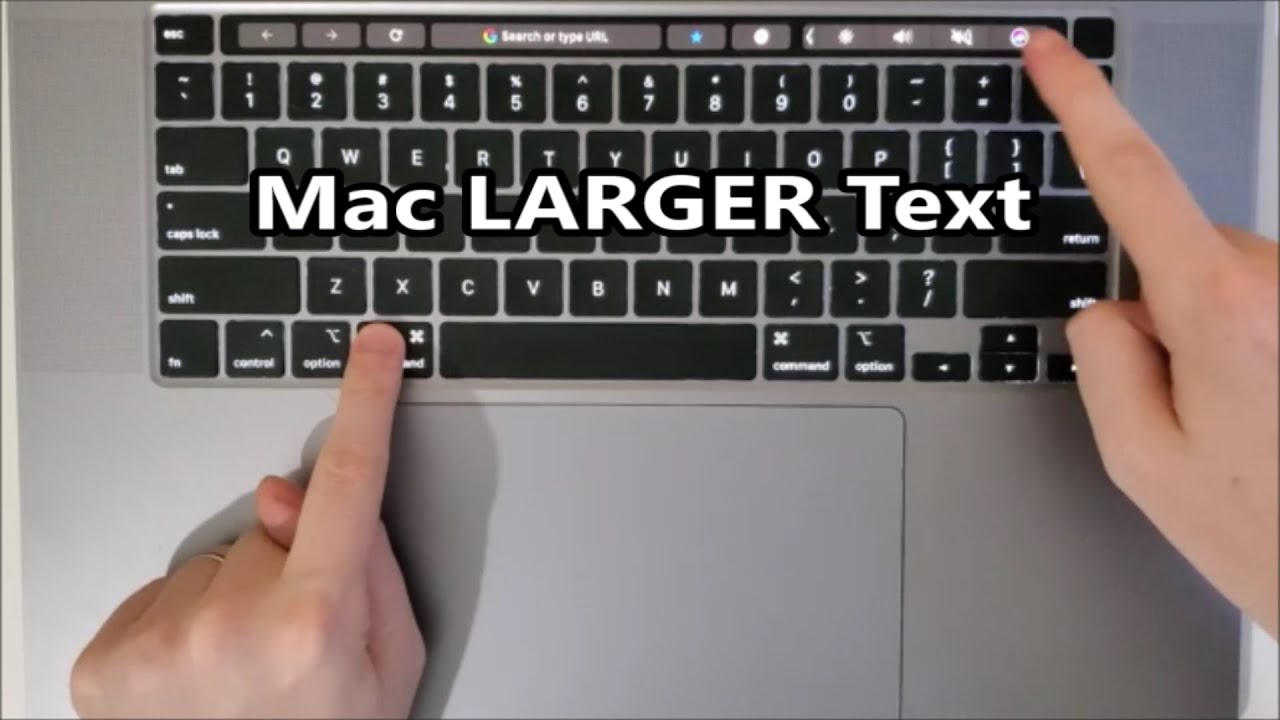
Keyboard shortcuts offer a quick and efficient way to modify font size without navigating through various menus. Here’s how you can do it:
- Press and hold the “Command” key.
- While holding the “Command” key, press the “+” key to increase the font size or the “-” key to decrease the font size.
- Release the keys once the desired font size is reached.
Accessibility options on a Macbook Air provide additional font size customization for users with visual impairments. To utilize this feature:
- Go to System Preferences.
- Choose Accessibility.
- Click on Display in the left sidebar.
- Adjust the slider under Cursor & Pointer Size to modify font size.
Using System Preferences
Accessing System Preferences:
To change the font size on your Macbook Air, start by accessing the System Preferences.
Adjusting Font Size:
To adjust the font size, follow these simple steps:
- Click on the Apple logo in the top-left corner of your screen.
- Select “System Preferences” from the dropdown menu.
- Choose “Displays” from the System Preferences window.
- Click on the “Display” tab.
- Adjust the font size slider to your desired setting.
Using Keyboard Shortcuts
Changing the font size on Macbook Air can be easily accomplished by utilizing keyboard shortcuts. Here’s how you can adjust the font size using the keyboard shortcuts.
Using The Command And + Keys
To increase the font size on your Macbook Air, press the Command key together with the Plus (+) key.
Using The Command And – Keys
To decrease the font size on your Macbook Air, press the Command key along with the Minus (-) key.
Credit: m.youtube.com
Using Accessibility Options
When it comes to changing font size on a Macbook Air, using Accessibility Options can make it easier for users with visual impairments to adjust settings for better readability. This feature provides a range of options to customize the display, including enabiling zoom and adjusting zoom options, making the content easier to read.
Enabling Zoom
To enable zoom on your Macbook Air, follow these simple steps:
- Go to the Apple menu at the top left corner of the screen.
- Select “System Preferences” to open the System Preferences window.
- Click on “Accessibility” to access the accessibility settings.
- Choose “Zoom” from the options on the left side of the Accessibility window.
- Check the box next to “Use keyboard shortcuts to zoom” to enable the zoom feature.
Adjusting Zoom Options
Once zoom is enabled, you can easily adjust the zoom options to change the font size on your Macbook Air:
- Press the specified keyboard shortcuts to zoom in or out:
Option-Command-8to toggle zoom on or off,Option-Command-Plus (+)to zoom in, andOption-Command-Minus (-)to zoom out. - Alternatively, use the trackpad or mouse to navigate to the Accessibility settings and fine-tune the zoom levels to your preference.
Resetting Font Size To Default
Learn how to easily reset the font size to default on your Macbook Air with these simple steps. Customize your reading experience and improve readability with just a few clicks.
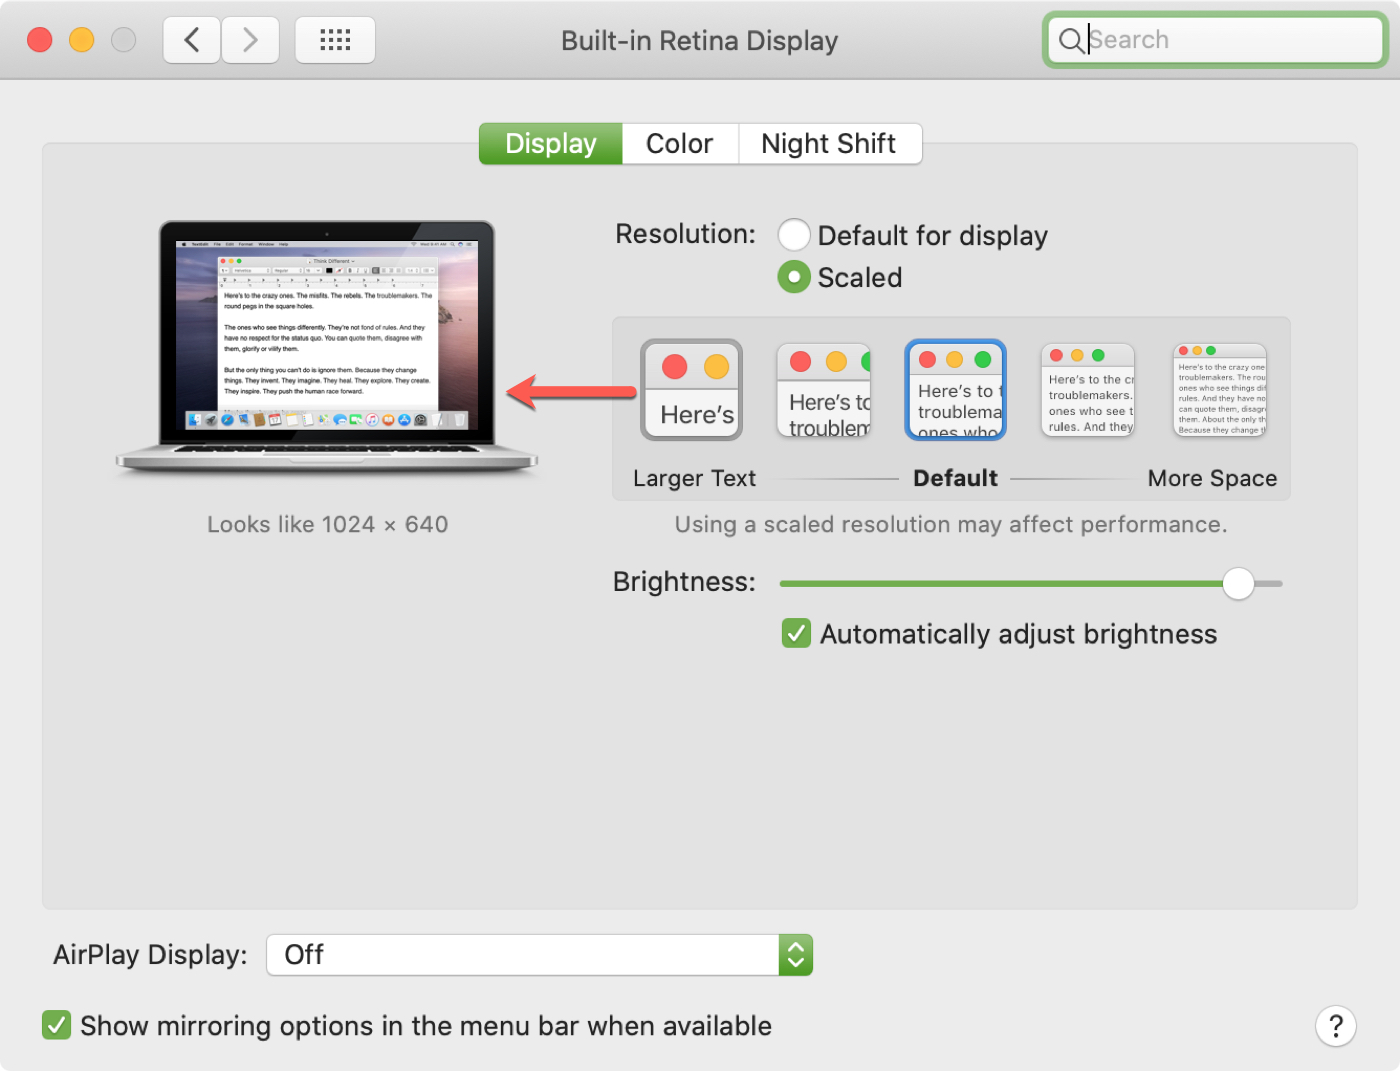
To reset the font size to its default settings on your Macbook Air, you can use the System Preferences option. Here’s how you can do it:
- Click on the Apple menu in the top-left corner of your screen.
- Select “System Preferences” from the drop-down menu.
- In the System Preferences window, click on “Displays.”
- Choose the “Display” tab.
- Look for the “Default for display” option and click on it.
- That’s it! Your font size will now be reset to its default setting.
Another convenient way to reset the font size to default on your Macbook Air is by using keyboard shortcuts. Follow these steps:
- Open the document or webpage where you want to reset the font size.
- Press and hold the “Command” key (⌘) on your keyboard.
- While holding the “Command” key (⌘), press the “0” (zero) key.
- Your font size will now reset to the default setting.
By utilizing these simple methods, you can easily reset the font size to its default on your Macbook Air. Whether you prefer using the System Preferences option or the keyboard shortcuts, you have the flexibility to choose the method that suits you best. Enjoy the optimal font size experience on your Macbook Air!
Credit: www.idownloadblog.com
Frequently Asked Questions Of How To Change Font Size On Macbook Air
How Do I Change The Font Size On My Macbook Air?
To change the font size on your Macbook Air, go to the Apple menu, select “System Preferences,” then “Displays. ” From there, you can adjust the resolution to increase or decrease font size on your Macbook Air.
Can I Change The Font Size In Specific Applications?
Yes, you can change the font size in specific applications on your Macbook Air. Simply open the application, go to the preferences or settings menu, and look for the option to adjust font size. Different applications may have different ways of accessing this setting.
What Is The Keyboard Shortcut For Changing Font Size On Macbook Air?
To quickly change the font size on your Macbook Air, use the keyboard shortcut “Command” and the “+” or “-” keys. Pressing “Command” and “+” will increase the font size, while pressing “Command” and “-” will decrease it. This shortcut works in most applications on your Macbook Air.
Conclusion
In a few simple clicks, you can customize the text to your preference. Changing font size on your Macbook Air is a straightforward process that can enhance your reading and visual experience. By following the steps outlined in this guide, you can easily adjust the font size to suit your needs.
With these tips, you can optimize your Macbook Air for a more comfortable and personalized usage.
0 comments