
To clean a projector lens, use a microfiber cloth and lens cleaner. Gently wipe the lens in circular motions.
Cleaning your projector lens regularly is essential for maintaining the quality of your projected images. Dust, smudges, and dirt can accumulate on the lens over time, affecting the clarity and sharpness of your projections. By following the proper cleaning techniques, you can ensure that your projector lens remains in top condition and prolong its lifespan.
We will discuss the steps you need to take to clean your projector lens effectively and safely. Let’s delve into the process of cleaning your projector lens to enhance the performance of your projector and improve the overall viewing experience.

Credit: m.youtube.com
Preparation
When cleaning a projector lens, proper preparation is essential to ensure that the cleaning process is effective and safe. Before you begin, gather the necessary supplies, and find a clean workspace to work in.
Gather The Supplies
Before cleaning the projector lens, it is essential to gather the necessary supplies to avoid any interruptions during the process. The following items are essential for cleaning the projector lens:
- Lens cleaning solution
- Microfiber cloth
- Canned air or lens cleaning brush
- Cotton swabs or lens cleaning wipes
Find A Clean Workspace
Choose a clean and well-lit workspace to clean the projector lens. Ideally, it should be a dust-free environment with minimal air circulation to prevent dust particles from settling on the lens during the cleaning process.

Credit: m.youtube.com
Power Off And Unplug The Projector
Before cleaning the lens of your projector, it’s crucial to follow the necessary safety precautions. This will not only protect you from any potential accidents but also safeguard the device from any damage. The first step in initiating the cleaning process is to power off and unplug the projector. This will ensure that you can safely proceed with the cleaning without risk of electric shock or any damage to the device.
Shut Down The Projector
To begin, shut down the projector using the power button or the remote control. This will initiate the process of turning off the device and prepare it for the next steps of the cleaning process.
Unplug The Power Cord
After shutting down the projector, the next step is to unplug the power cord from the electrical outlet. This crucial step will guarantee that the device is completely disconnected from any power source, ensuring your safety as you commence the cleaning process.
Remove The Dust
Looking to clean your projector lens? Follow these simple steps to remove dust and improve the image quality of your projector.
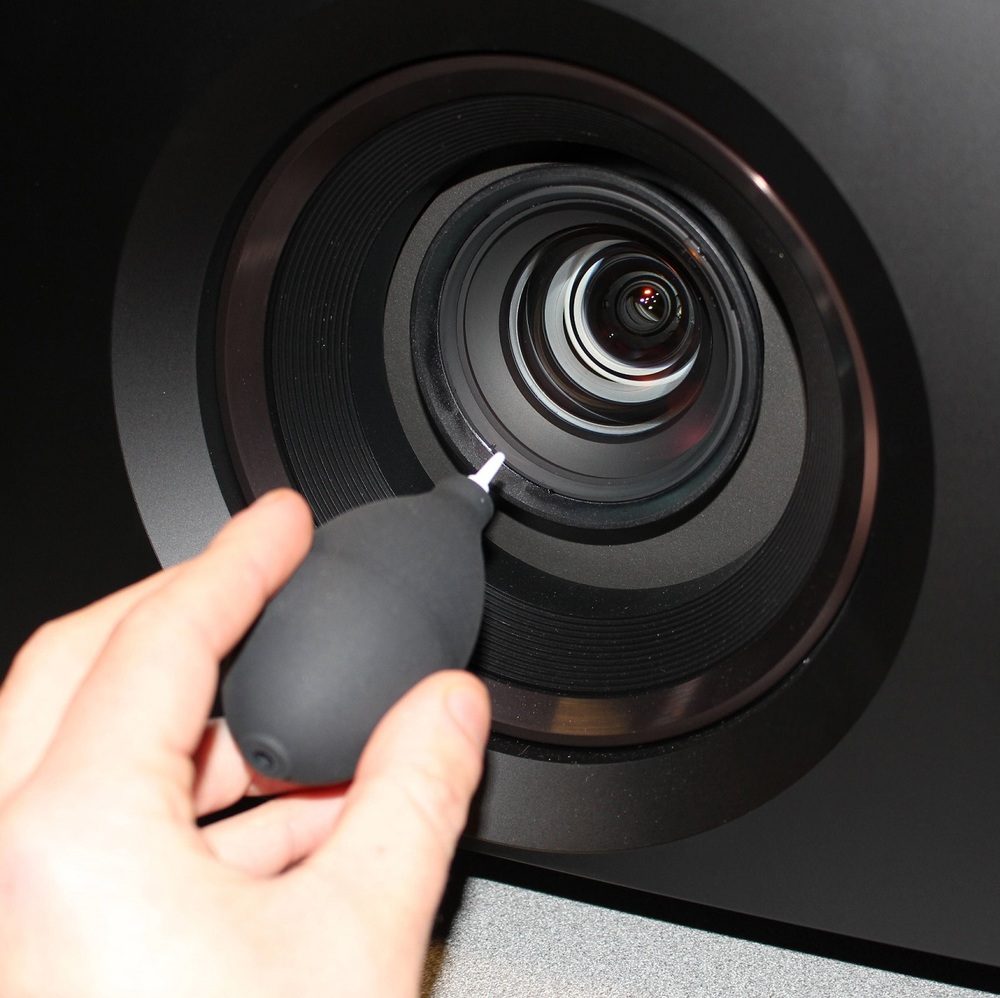
Use A Blower Brush
Removing dust from the projector lens is crucial for optimal performance. To start, use a blower brush to gently dislodge any visible dust particles.Wipe With A Microfiber Cloth
Next, wipe the lens with a clean microfiber cloth to ensure any remaining dust or smudges are removed. Be sure to use gentle, circular motions. Also, avoid using harsh chemicals or rough materials that could damage the lens. Projector lenses are delicate and require careful cleaning techniques to avoid scratches or other damage. Additionally, regularly cleaning your projector lens can help to maintain picture clarity and overall image quality. Do not underestimate the importance of properly cleaning your projector lens for optimal performance.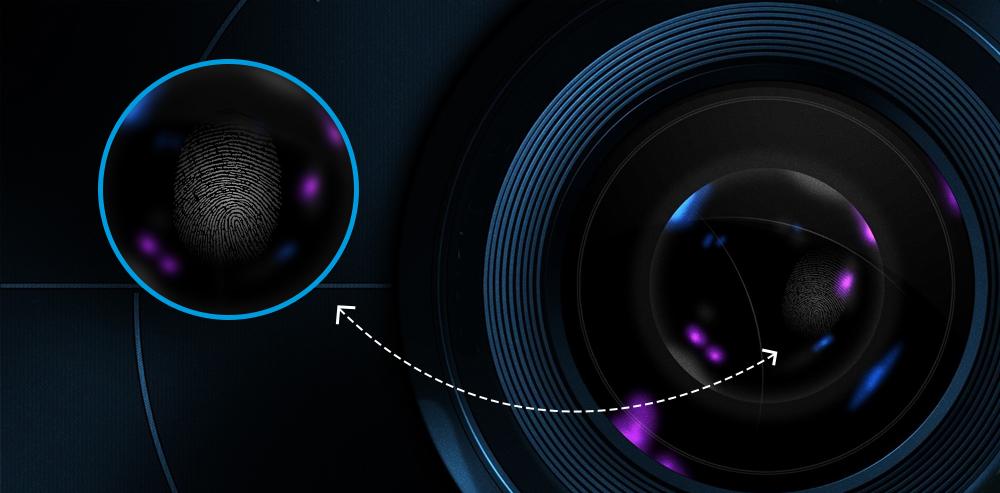
Credit: ivankyo.com
Clean The Lens
When it comes to keeping your projector’s performance at its best, cleaning the lens is crucial. A clean lens ensures sharper images and prevents any distortion caused by dust or dirt. Here’s how you can effectively clean the lens of your projector:
Apply Lens Cleaning Solution
Start by applying a small amount of lens cleaning solution specifically designed for optical surfaces. Make sure the solution is free from any abrasive substances that could damage the lens. Apply a gentle spray or a drop of the solution onto a microfiber cloth.
Use A Lens Cleaning Cloth
Using a lint-free lens cleaning cloth, gently wipe the lens in a circular motion, starting from the center and working your way outwards. Avoid using excessive pressure as it may result in scratches on the lens surface. Ensure that the entire surface area is cleaned thoroughly.
Clean The Housing And Vents
To clean a projector lens effectively, it is crucial to clean both the housing and vents. Regularly cleaning these areas helps enhance the overall performance of the projector and provides clearer and sharper images.
Use A Soft Brush
To effectively clean the housing and vents of your projector, one of the key tools you’ll need is a soft brush. Choose a brush with bristles that are gentle enough to avoid scratching the surface of the projector but effective enough to remove any dust or debris. A soft brush will help you reach into the nooks and crannies of the housing and vents where dirt tends to accumulate. Gently brush the surfaces, making sure to remove any visible particles or buildup. This simple step will pave the way for clearer and sharper images projected by your device.Blow Air Into The Vents
In addition to using a soft brush, blowing air into the vents is another crucial step in cleaning your projector lens thoroughly. This method helps dislodge any stubborn dust or debris lodged deep inside the vents. To perform this task, you can use a can of compressed air, which is readily available in most electronic stores. Hold the can upright and direct the nozzle towards the vents, ensuring a steady stream of air is blown into the openings. The force of the air will help loosen and remove any particles that may affect the performance and clarity of your projector. By following these two simple steps of cleaning the housing and vents, you can significantly improve the lifespan and functionality of your projector. Taking the time to properly maintain your device will not only enhance its image quality but also prevent potential damage caused by dust accumulation. Incorporating these cleaning practices into your routine will ensure your projector continues to deliver optimal performance, creating an immersive and enjoyable viewing experience every time.Reassemble The Projector
Once you have successfully cleaned the projector lens, it’s time to reassemble the projector and get it ready for use again. Follow these simple steps to put everything back together and connect the necessary cords.
Put The Lens Cover Back On
Start by locating the lens cover that you removed earlier in the cleaning process. Carefully align the cover with the projector lens, making sure it fits snugly into place. Gently press it down until you hear a clicking sound, indicating that it is secure. This will help protect the lens from dust and scratches when the projector is not in use.
Connect The Power Cord
After securing the lens cover, it’s time to connect the power cord. Locate the power input on the projector, which is usually located on the back or side. Take the power cord and plug it into the corresponding power input, ensuring a secure connection. Once connected, plug the other end of the power cord into a wall outlet or surge protector.
Note: It is recommended to use a surge protector to protect your projector from power surges and voltage fluctuations.
When connecting the power cord, make sure that it is not twisted or tangled to avoid any potential damage.
Once the power cord is securely connected, you can proceed to turn on the projector and verify that it is functioning properly. If you have any additional cords or connections for other devices, such as HDMI or audio cables, make sure to connect them according to the manufacturer’s instructions.
Congratulations! You have successfully cleaned the projector lens and reassembled the projector. It’s now ready to be used for your next presentation, movie night, or gaming session. Enjoy the clear and crisp visuals that your clean projector lens will provide!
Test The Projector
Before cleaning the projector lens, it’s important to test the projector to ensure it’s functioning properly. Testing the projector allows you to identify any issues with the image quality and address them accordingly. Here are two important steps to follow when testing the projector:
Power On The Projector
To power on the projector, locate the power button on the projector or its remote control. Press the power button to turn on the projector, ensuring that it is connected to a power source. Wait for the projector to boot up completely before proceeding to the next step.
Check For Image Quality
After powering on the projector, check the image quality by displaying content on the screen. Look for any distortions, discolorations, or blurry areas in the projected image. Ensure that the projected content is clear and properly aligned. If you notice any issues with the image quality, troubleshoot the problem before proceeding with the cleaning process.
Regular Maintenance Tips
Proper maintenance of your projector lens is crucial for optimal performance. Use a soft brush or air blower to remove dust and debris, and a microfiber cloth with lens cleaning solution for stubborn spots. Avoid using harsh chemicals and excessive pressure, as this can damage the lens coating.
Regular cleaning will ensure a clear and sharp image projection.
Keeping your projector lens clean is essential for maintaining optimal performance. Follow these Regular Maintenance Tips to ensure your projector lens stays in top condition.
Keep The Area Dust-free
- Dust can easily accumulate and affect the lens quality.
- Regularly clean the area around the projector to prevent dust build-up.
- Use a soft-bristled brush to gently remove any dust particles.
Clean The Lens Regularly
- Turn off the projector and allow it to cool down before cleaning.
- Use a lens cleaning solution or a mix of water and isopropyl alcohol.
- Gently wipe the lens in a circular motion with a microfiber cloth.
- Avoid using harsh chemicals or abrasive materials that can damage the lens.
Get Professional Help
When dealing with a delicate projector lens, it is essential to consider professional assistance for optimal care and maintenance.
Contact The Manufacturer
Directly reach out to the projector manufacturer for guidance on lens cleaning procedures.
Consult A Repair Service
If unsure about cleaning the lens yourself, consult a trusted repair service for expert assistance.
Frequently Asked Questions Of How To Clean Projector Lens
How Often Should I Clean My Projector Lens?
It is recommended to clean your projector lens every 3-6 months, depending on usage. Dust and dirt can accumulate over time and affect image quality. Regular cleaning ensures optimum performance and extends the lifespan of your projector.
What Is The Best Way To Clean A Projector Lens?
To clean a projector lens, use a soft brush or lens cleaning solution specifically designed for optics. Gently remove dust and smudges in a circular motion. Avoid using harsh materials or excessive force as it may damage the lens. Always refer to your projector’s manual for specific cleaning instructions.
Can I Use Compressed Air To Clean My Projector Lens?
No, using compressed air to clean a projector lens is not recommended. It can blow dust particles onto the lens surface, potentially causing scratches or other damage. Stick to using a soft brush or lens cleaning solution for safe and effective cleaning.
How Do I Prevent Dust From Accumulating On My Projector Lens?
To prevent dust from accumulating on your projector lens, store the projector in a clean and dust-free environment when not in use. Keep the lens cap on when the projector is not in operation. Avoid placing the projector near air vents or sources of dust and ensure proper ventilation for the device.
Conclusion
To conclude, maintaining a clean projector lens is crucial for optimal performance. Regular cleaning with proper tools and techniques can enhance image clarity and prevent damage. By following the steps outlined in this guide, you can ensure that your projector lens remains free from dust, smudges, and debris, prolonging its lifespan and maintaining top-notch image quality for your viewing pleasure.
0 comments