
To clone HDD to SSD, use software like Macrium Reflect or EaseUS Todo Backup for seamless data migration. These tools ensure a smooth transfer process and minimize the risk of data loss.
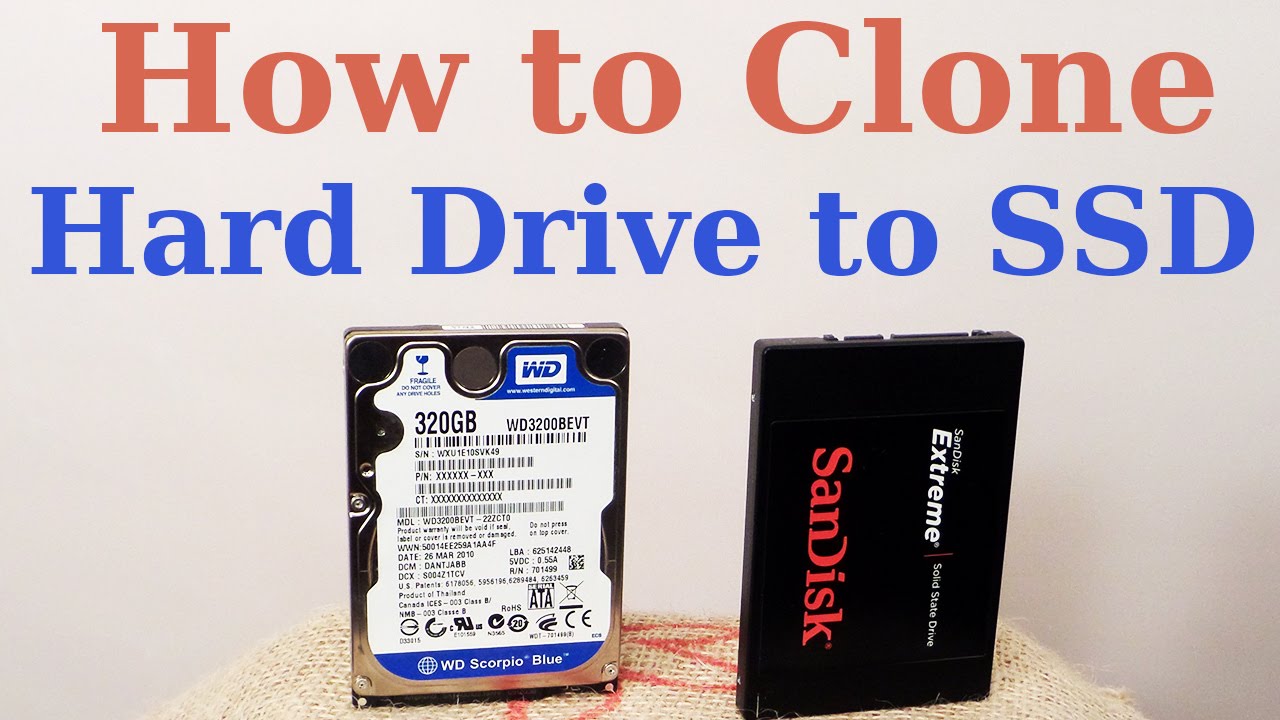
When upgrading your computer’s storage system, transferring data from an HDD to an SSD is a common task. Whether you are looking to boost your system’s performance or simply replace an old drive, cloning HDD to SSD can be the solution.
By following the right steps and using reliable software, you can efficiently clone your data without any hassle. In this guide, we will explore the process of cloning HDD to SSD and provide you with the necessary information to ensure a successful data migration.
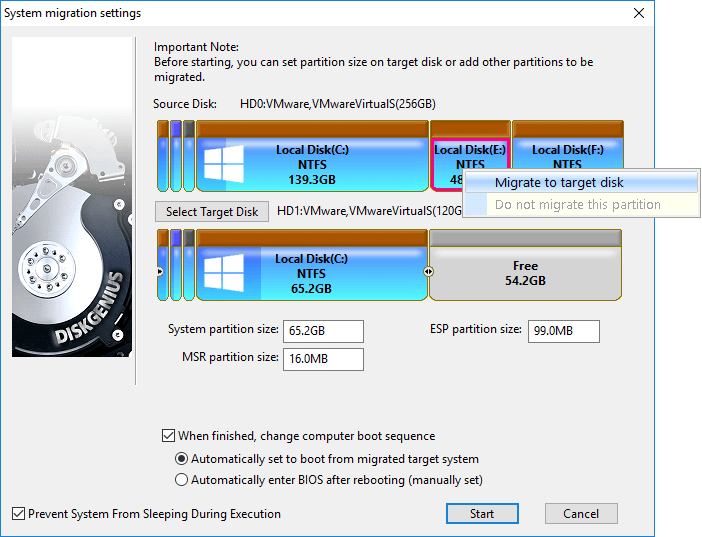
Credit: www.diskgenius.com
Checking System Compatibility
When it comes to upgrading your storage from HDD to SSD, one crucial step is to ensure the compatibility of your system. This involves checking the minimum requirements and the compatibility of the SSD with your system. Without this step, you may encounter issues during the cloning process or even render your new SSD unusable. In this section, we will discuss the essential aspects of checking system compatibility before proceeding with the cloning process.
Minimum Requirements
Before initiating the HDD to SSD cloning process, it’s vital to ensure that your system meets the minimum requirements for SSD installation. The main considerations include the operating system, available SATA ports, and sufficient power supply. Refer to the manufacturer’s guidelines for the minimum system requirements to guarantee smooth installation and functionality.
Checking Ssd Compatibility
When considering an SSD upgrade, it’s important to verify the compatibility of the SSD with your system. Some SSDs may not be compatible with older systems, and some may require specific firmware updates. Checking the SSD compatibility with your system’s specifications such as form factor, connection interface, and storage capacity is essential to avoid any compatibility issues.
Credit: www.youtube.com
Preparing Ssd For Cloning
Preparing your SSD for cloning is an essential step to ensure a smooth and successful transfer of data from your HDD. This process involves formatting and partitioning the SSD to optimize its performance and compatibility.
Formatting The Ssd
To begin, format the SSD to erase any existing data and prepare it for the cloning process. Use a compatible formatting tool like Disk Management on Windows or Disk Utility on Mac to perform this task.
Partitioning The Ssd
Next, partition the SSD to allocate space for the operating system and other data. Create a primary partition for the OS and additional partitions for files and programs to improve organization and efficiency.
Choosing The Right Cloning Method
Cloning Software Options
Cloning software options determine the efficiency of the cloning process.
Differences Between Disk Cloning And Imaging
Understanding the variance between disk cloning and imaging is crucial for success.
- Acronis True Image: User-friendly interface for seamless cloning.
- Clonezilla: Open-source software for cost-effective solutions.
- Macrium Reflect: Swift and secure software with customization options.
- Disk Cloning: Creates an exact replica of data onto a new drive.
- Imaging: Saves data into a compressed file to restore when required.
Creating A Clone Of The Hdd
Creating a Clone of the HDD is an essential step for transferring all data and settings from your old hard drive to a new SSD. By creating a clone, you can ensure that all your files, applications, and operating system are seamlessly transferred to the SSD without the need to reinstall everything from scratch. In this guide, we will walk through the process of creating a clone from your HDD to SSD.
Selecting Source And Destination Drives
To begin the cloning process, you need to select the source HDD (the drive you want to clone) and the destination SSD (the drive where the clone will be created). Ensure that the SSD has enough storage capacity to accommodate all the data from the HDD. Make sure the SSD does not contain any crucial data, as the cloning process will erase all existing data on the destination drive.
Starting The Cloning Process
Once you have selected the source and destination drives, you can begin the cloning process using a reliable cloning software such as Acronis True Image or EaseUS Todo Backup. Install the cloning software and follow the instructions to initiate the cloning process. Be cautious and double-check the source and destination drives to avoid any data loss during the cloning. The process may take some time depending on the size of the data being cloned. Once the cloning is complete, the SSD will contain an exact replica of your HDD, allowing you to seamlessly transition to the new drive with all your data and settings intact.
Updating The Bios And Drivers
When it comes to upgrading your HDD to an SSD, updating the BIOS and drivers is an essential step to ensure compatibility and optimal performance. The BIOS (Basic Input/Output System) is responsible for controlling the basic functions of your computer, while drivers are software that allows communication between the operating system and hardware devices.
Upgrading Bios
To upgrade your BIOS, follow these simple steps:
- Start by identifying your computer’s current BIOS version. You can find this information by accessing the BIOS menu during the booting process or by using system information tools provided by your operating system.
- Visit the manufacturer’s website and search for the latest BIOS update for your specific model. Download the update and save it to a USB drive.
- Restart your computer and enter the BIOS menu. Refer to your computer’s manual or manufacturer’s website for the appropriate key to press during startup.
- In the BIOS menu, navigate to the “Update” or “Flash BIOS” section. Select the option to update the BIOS using the USB drive containing the update file.
- Follow the on-screen instructions to complete the BIOS update. Be sure to avoid any interruptions during the process, as these can potentially damage your system.
- After the update is complete, restart your computer and check the BIOS version to ensure it has been successfully upgraded.
Updating Drivers
Updating drivers is equally important for a smooth transition to an SSD. Here’s how you can update your drivers:
- Identify the hardware components that require driver updates. This includes but is not limited to the motherboard, graphics card, sound card, and network adapter.
- Visit the manufacturer’s website for each component and search for the latest driver updates. Make sure to download the drivers that are compatible with your operating system.
- Once the driver updates are downloaded, double-click on the installation files and follow the on-screen instructions to install them. It is recommended to restart your computer after each driver installation.
- Alternatively, you can use driver update software to automatically scan your system and download the latest drivers for you.
By upgrading your BIOS and updating drivers before cloning your HDD to an SSD, you can ensure a seamless and efficient transition to your new drive. Remember to back up important data and create a system restore point before making any changes to your computer’s settings. Following these steps will help optimize your system’s overall performance and maximize the benefits of your new SSD.
Replacing The Hdd With The Cloned Ssd
Upgrade your storage with a seamless transition from HDD to SSD by cloning the drive. Easily transfer data and boost performance without losing any files or settings. Say goodbye to slow loading times and hello to a faster, more efficient system.
Physically Swapping Drives
Once you have successfully cloned your HDD to the SSD, the next step is to physically replace the old HDD with the newly cloned SSD. This process involves opening up your computer and carefully swapping the drives.
Before you begin, make sure you have the necessary tools on hand, such as a screwdriver and an anti-static wrist strap to protect your components from electrostatic discharge. Follow these steps to replace the HDD with the cloned SSD:
- Shut down your computer and unplug any power cables.
- Open the case of your computer. The process may vary depending on your computer model, so refer to the manufacturer’s instructions or seek guidance online.
- Locate the old HDD. It is usually secured with screws or brackets. Carefully remove these screws or brackets and disconnect any cables connected to the HDD. Remember to handle the drive with caution to avoid any damage.
- Take out the old HDD from its bay and set it aside.
- Now, take the newly cloned SSD and position it correctly in the empty bay, aligning the screw holes.
- Secure the SSD with screws or brackets, ensuring it is firmly in place.
- Reconnect any cables that were previously connected to the old HDD to the cloned SSD.
- Close the case of your computer and secure it with the appropriate screws.
Booting From The Cloned Ssd
After physically swapping the drives, the next step is to ensure that your computer boots from the cloned SSD instead of the old HDD. Here’s what you need to do:
- Restart your computer.
- While the computer is booting up, press the key indicated on the screen to access the BIOS or UEFI settings. This key varies depending on your computer model, but it is typically F2, Del, or Esc.
- In the BIOS or UEFI settings, navigate to the “Boot” or “Boot Order” section.
- Find the option that lists your drives and prioritize the cloned SSD as the boot drive. This will ensure that the computer boots from the SSD instead of the old HDD. Use the instructions within the BIOS or UEFI interface to make this change.
- Save your changes and exit the BIOS or UEFI settings.
- Your computer will now reboot, and it should start up using the cloned SSD as the primary drive.
- To confirm that you are indeed booting from the cloned SSD, you can check your computer’s system information or use disk management software to verify the drive being used.
Now that you have successfully replaced the HDD with the cloned SSD and set it as the boot drive, you can enjoy faster boot times and improved performance on your computer.
Verifying And Optimizing The Cloned Ssd
When it comes to ensuring the success of your HDD to SSD cloning process, verifying and optimizing the cloned SSD is crucial. Following the cloning process, it’s important to confirm that the data has been accurately transferred and take the necessary steps to maximize the performance of the newly cloned SSD. In this section, we’ll delve into the essential tasks of verifying cloned data and optimizing SSD performance.
Verifying Cloned Data
After cloning your HDD to SSD, it’s essential to verify that all the data has been accurately transferred. This involves performing a thorough check to ensure that all files, programs, and settings have been successfully replicated onto the SSD. You can use file comparison software to verify the integrity of the cloned data by comparing the files and folders on the original HDD with those on the SSD.
Optimizing Ssd Performance
Optimizing the performance of your newly cloned SSD can significantly enhance the overall experience. One of the crucial steps is to ensure the SSD is properly aligned for optimal performance. This involves checking and, if necessary, aligning the SSD partition to match the physical structure of the SSD. Additionally, enabling TRIM support is essential for maintaining the SSD’s performance over time by allowing the operating system to inform the SSD which blocks of data are no longer in use and can be wiped internally.
:max_bytes(150000):strip_icc()/11-how-to-clone-hdd-to-ssd-in-windows-4775671-57a6438d638a42059887668dae292424.jpg)
Credit: www.lifewire.com
Frequently Asked Questions On How To Clone Hdd To Ssd
How Do I Clone My Hdd To Ssd?
To clone your HDD to SSD, you can use software like Acronis True Image or EaseUS Todo Backup. These programs allow you to create an exact copy of your HDD’s data and transfer it to the SSD. Simply connect the SSD, launch the software, and follow the step-by-step instructions provided.
Why Should I Clone My Hdd To Ssd?
Cloning your HDD to SSD offers several benefits. SSDs are faster and more reliable than HDDs, resulting in faster boot times, improved overall system performance, and reduced loading times for applications. Additionally, SSDs have no moving parts, making them more durable and less prone to physical damage.
Can I Clone My Hdd To Ssd Without Reinstalling Windows?
Yes, you can clone your HDD to SSD without reinstalling Windows. By using cloning software, you can transfer your entire operating system and data from the HDD to the SSD seamlessly. This ensures that all your settings, applications, and files remain intact, saving you the hassle of reinstalling everything from scratch.
Conclusion
Cloning HDD to SSD is a straightforward process that can greatly improve your computer’s performance. By following the steps outlined in this guide, you can seamlessly transfer all your data and applications to a new SSD, resulting in faster boot times and improved overall system responsiveness.
Don’t hesitate to upgrade to an SSD and experience the benefits for yourself.
0 comments