
To connect a Blink camera to Wi-Fi, ensure it’s powered up, open the Blink app, follow the on-screen instructions. Connecting your Blink camera to Wi-Fi is a simple process that allows you to monitor your home remotely.
By following a few easy steps, you can have your camera up and running in no time. This guide will walk you through the process, ensuring a seamless connection to your Wi-Fi network. With a stable and secure connection, you can stay informed and keep your home safe with your Blink camera system.
Let’s dive into the steps needed to connect your Blink camera to Wi-Fi and begin monitoring your space effortlessly.
Credit: support.blinkforhome.com
Gathering The Required Materials
To successfully connect your Blink Camera to Wifi, gathering the necessary materials is essential. Make sure you have your Blink Camera, a stable wifi connection, and your smartphone or computer ready for the setup process.
Blink Camera
Wifi Router
Mobile Device
Before you can start using your Blink camera, you need to gather a few essential materials to ensure a smooth setup process. These materials include the Blink camera itself, a reliable wifi router, and a mobile device to complete the setup.
Let’s take a closer look at each of these materials:
Blink Camera
The Blink camera is a compact, wireless security camera that offers users the convenience of monitoring their homes or offices remotely. With its sleek design and easy installation process, the Blink camera is an ideal choice for anyone looking to enhance their security system.
| Pros | Cons |
| Compact and wireless design | Requires a reliable wifi connection |
| Easy installation process | Vulnerable to power outages |
| Remote monitoring capabilities | May require additional accessories for optimal performance |
Wifi Router
Your wifi router serves as the bridge between your Blink camera and the internet. It provides the necessary wireless connection for your camera to stream live footage, send alerts, and receive updates. To ensure a seamless setup and reliable performance, it’s important to have a stable internet connection and a capable wifi router.
- Tips for choosing a wifi router:
- Opt for a dual-band router for better speed and coverage.
- Consider routers with advanced security features for added protection.
- Check the maximum number of supported devices for potential future expansions.
- Position the router in a central location to minimize signal interference.
- Regularly update the router’s firmware for optimal performance.
Mobile Device
Your mobile device, whether it’s a smartphone or tablet, plays a crucial role in the setup process. It serves as your control center, allowing you to configure your Blink camera, adjust settings, and receive real-time notifications. Before proceeding with the setup, ensure that your mobile device is compatible with the Blink camera system and has a stable internet connection.
Now that we’ve covered the necessary materials, you’re one step closer to successfully connecting your Blink camera to wifi. With these essentials in hand, you’ll be ready to enjoy the convenience and peace of mind that the Blink camera system brings to your home or office.
Preparing The Blink Camera
When it comes to connecting your Blink camera to Wi-Fi, properly preparing the camera is the first step to ensure a smooth and successful setup. Before proceeding with the connection process, make sure to follow the necessary steps to prepare the Blink camera for a seamless Wi-Fi connection.
Powering On The Camera
To begin, ensure the Blink camera is powered on and in a ready state by inserting the batteries provided in the package. Confirm that the batteries are properly installed, and the camera’s LED light is blinking, indicating that it is ready for setup. Properly inserting the batteries and confirming the blinking LED light is crucial for a successful connection process.
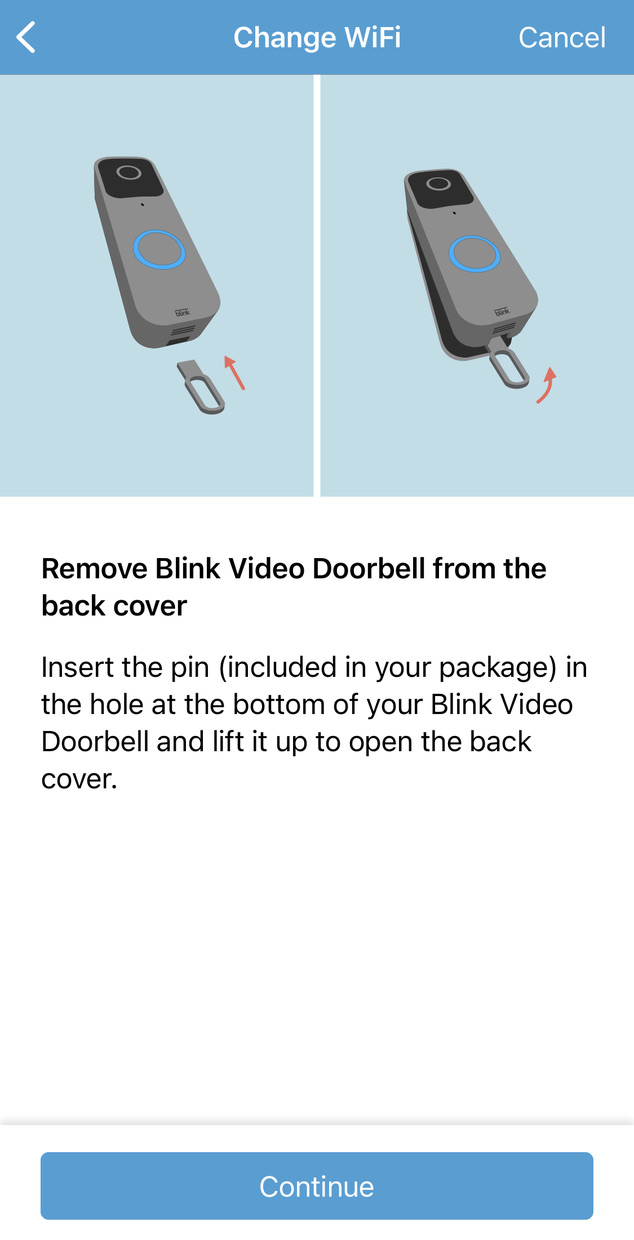
Resetting The Camera
If you encounter any issues with the initial setup or if the camera has been previously used, it may be necessary to reset the device. Resetting the camera can resolve any prior configuration conflicts and ensure a fresh start for the Wi-Fi setup process. To reset the Blink camera, locate the small reset button on the back of the device. Gently press and hold the reset button for 10 seconds until the LED light turns off and back on again, indicating that the reset is complete. This step will clear any existing settings and prepare the camera for a new Wi-Fi connection.
Connecting The Camera To The Blink App
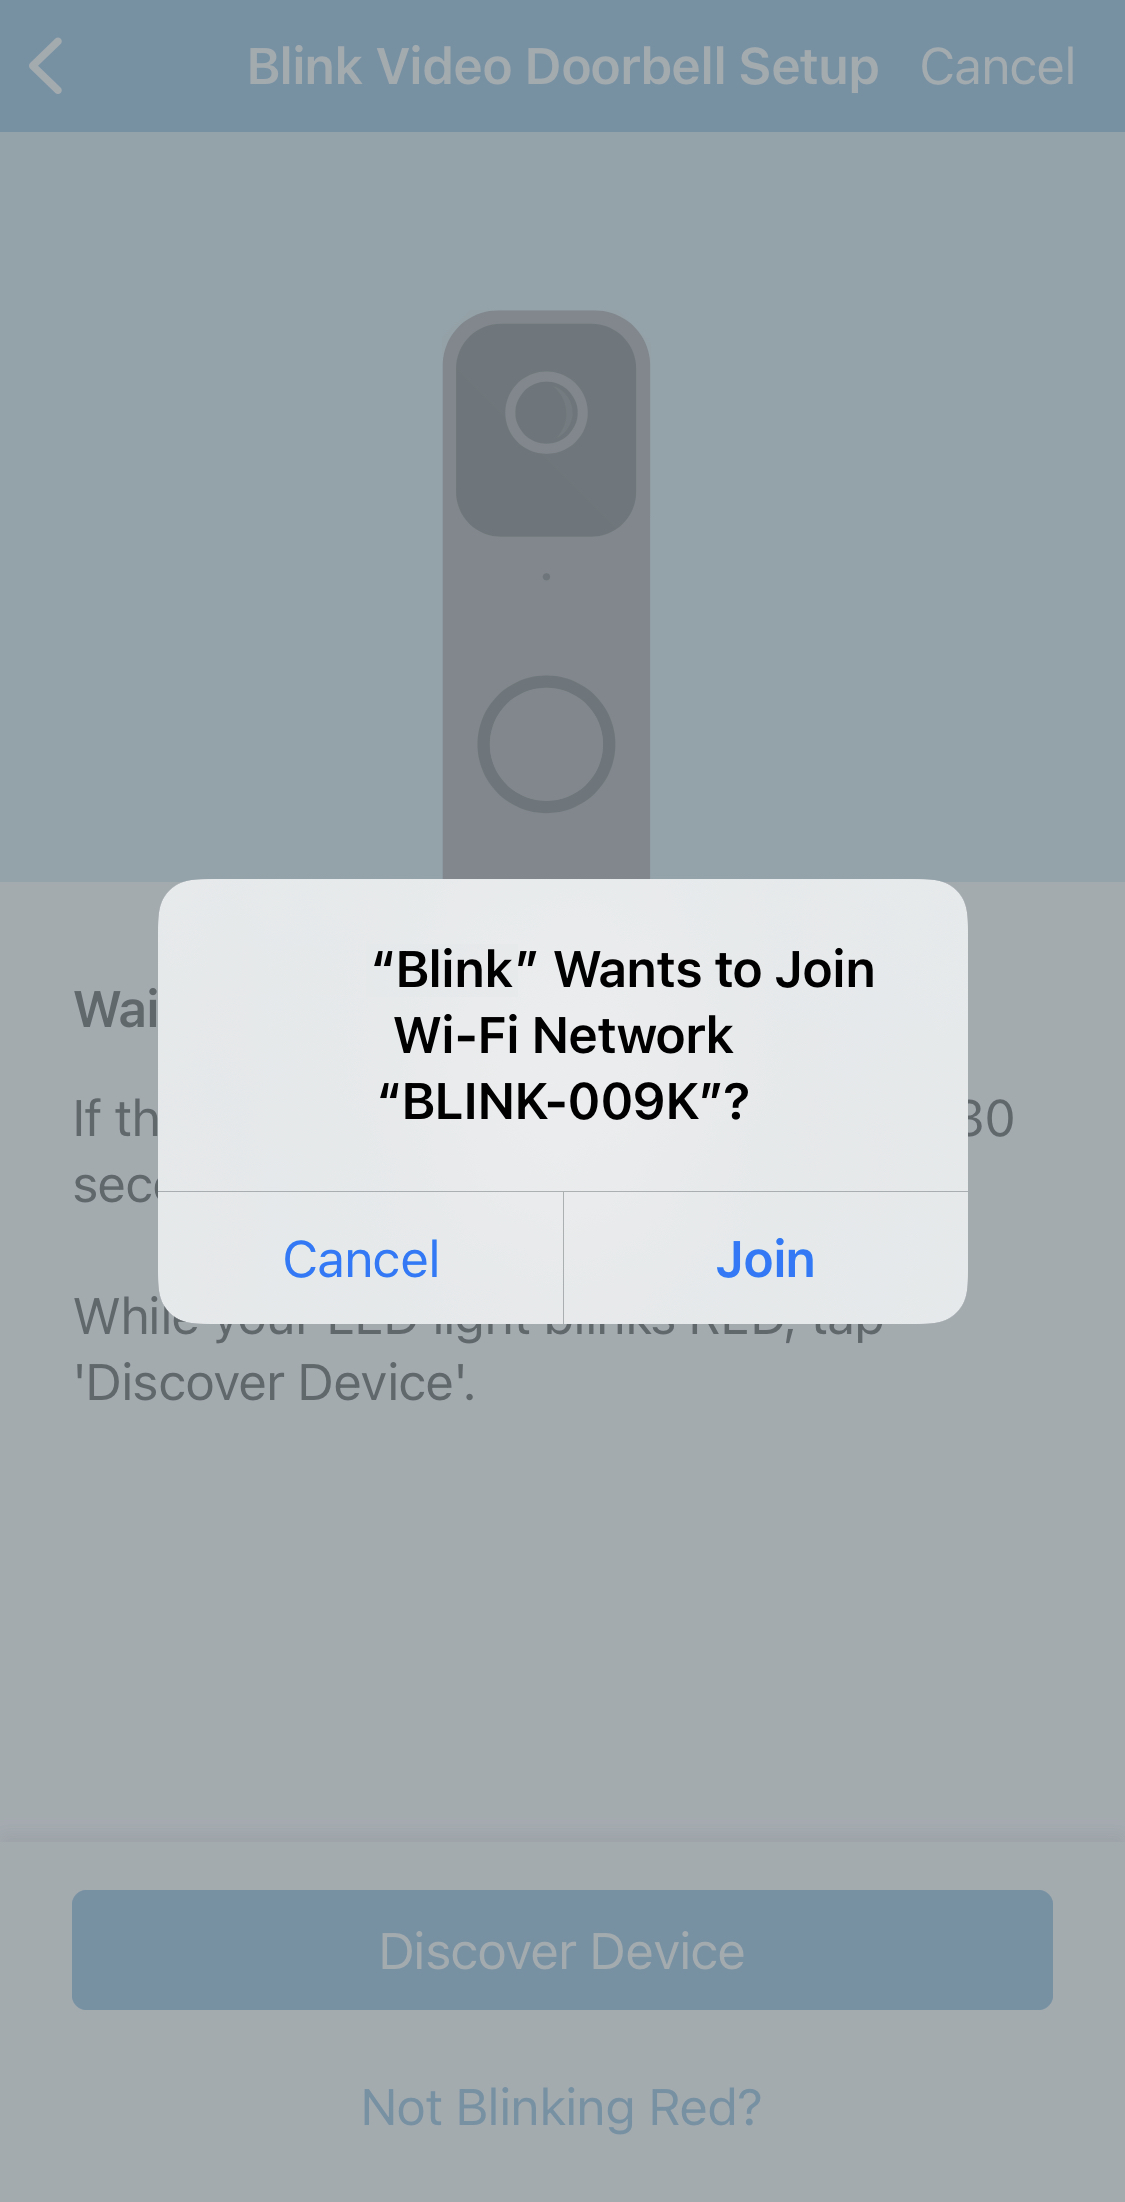
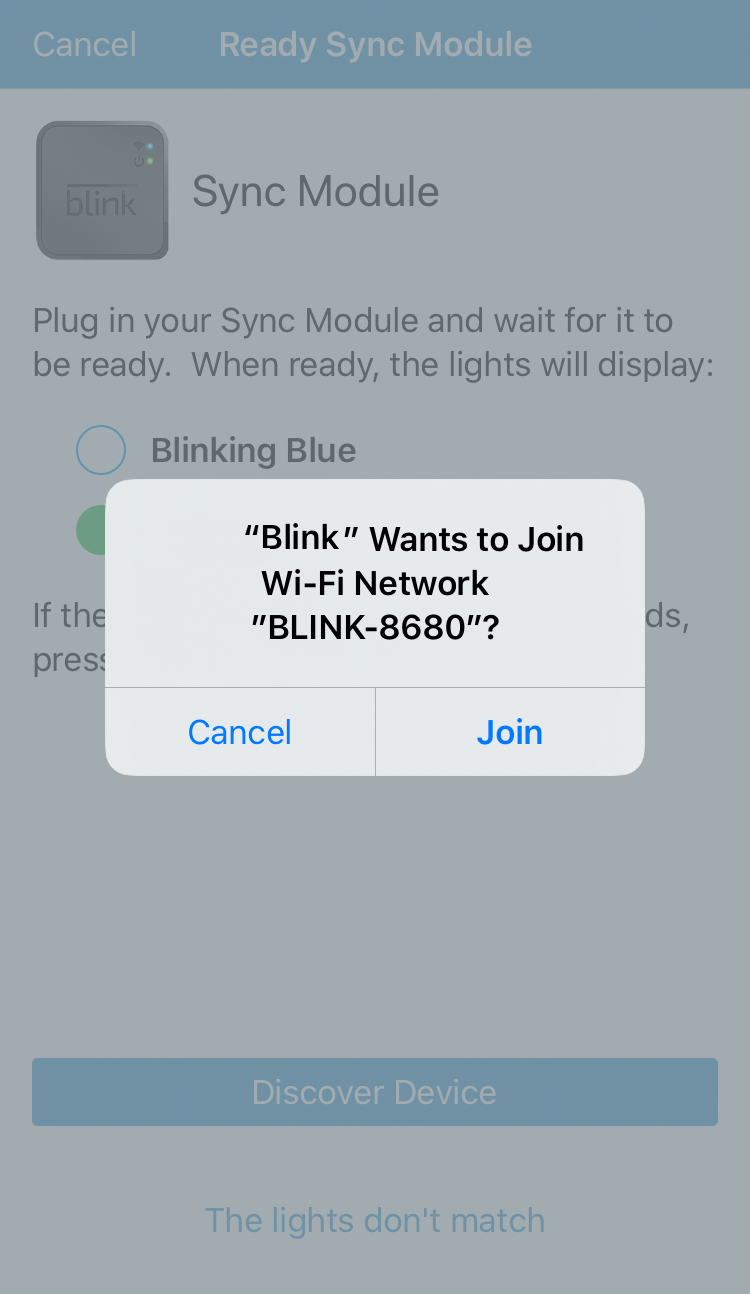
To connect your Blink camera to wifi, simply open the Blink app, go to the Camera settings, and select “Add new Blink camera” option to begin the setup process. Follow the on-screen instructions to connect the camera to your wifi network seamlessly.
Download And Install The Blink App
Visit the app store, search for Blink App, and tap Download.
After installation, open the app on your device to start setting up.
Creating A Blink Account
Tap on Sign Up within the app to create your account quickly.
Fill in your email and create a password for secure access.
Verify your email address to confirm account creation.
Adding The Camera To The App
Open the Blink app and tap on the “+” sign to add the camera.
- Choose Camera as the device type from the options.
- Follow the on-screen instructions to connect the camera to your WiFi.
- Scan the QR code on the camera to link it to your app.
Credit: support.blinkforhome.com
Connecting The Camera To Wifi
Setting up your Blink camera to connect to WiFi is a crucial step to ensure seamless operation. Follow these simple steps to get your camera up and running in no time.
Placing The Camera Near The Wifi Router
Choose a location for your Blink camera that is within good range of your WiFi router. Ensure there are no obstacles between the camera and the router for a solid connection.
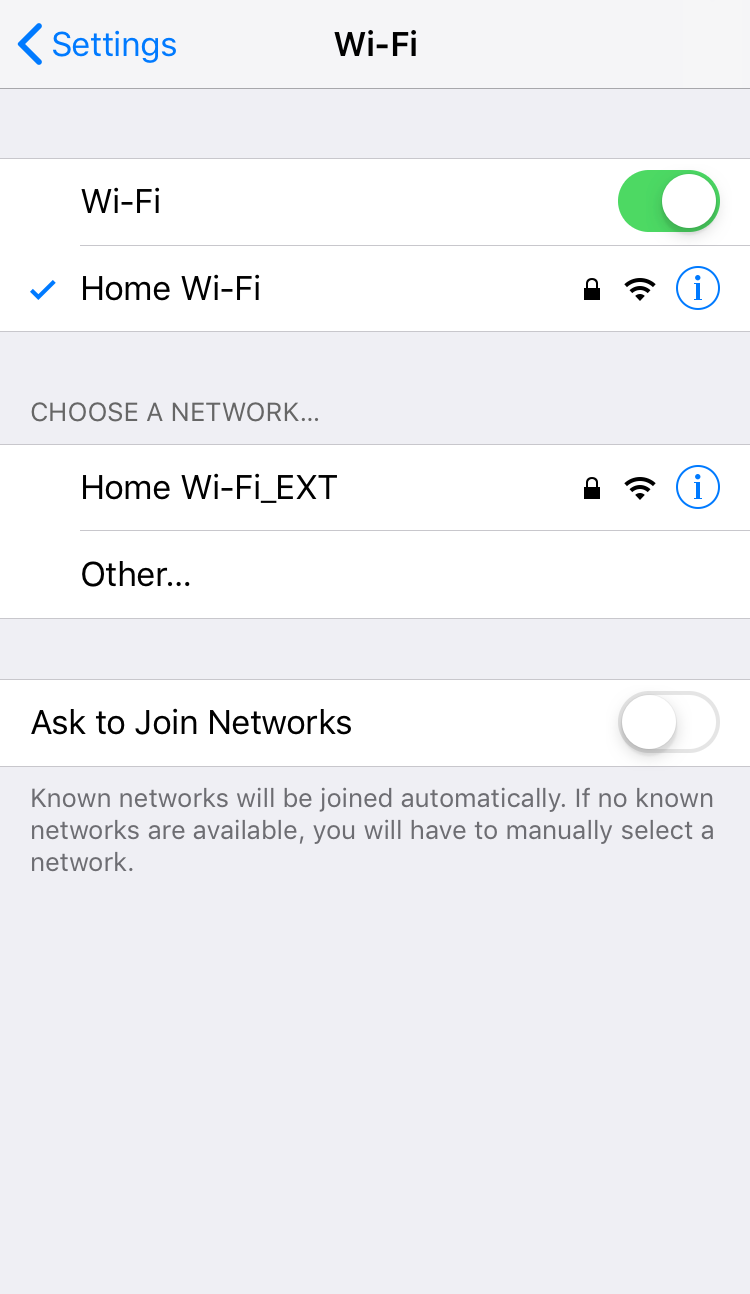
Entering Wifi Credentials On The App
Once the camera is powered on, open the Blink app on your smartphone. Navigate to the settings menu and select “Add a Device.” Follow the on-screen prompts to enter your WiFi network credentials.
Verifying The Connection
Once you have successfully connected your Blink camera to Wi-Fi, it’s crucial to verify the connection to ensure that everything is working as it should. Below, we will walk you through the steps to check the camera status on the app and test the camera functionality.
Checking Camera Status On The App
1. Open the Blink app: Launch the Blink app on your mobile device and log in to your account.
2. Tap on the camera icon: After logging in, tap on the camera icon to access the live view of your Blink camera.
3. Verify the camera status: Ensure that the camera status displays as ‘Online’ to confirm that the connection to Wi-Fi is successful.
Testing Camera Functionality
1. Live view test: Click on the live view to check if the camera displays a live feed, confirming that it is functioning properly.
2. Motion detection test: Move in front of the camera and check if the motion detection feature is triggering recordings or notifications.
3. Two-way audio test: If your camera supports two-way audio, test the functionality by speaking through the app and listening through the camera.
4. Remote arming and disarming test: Arm and disarm your camera remotely using the app to ensure that the commands are being executed effectively.
By following these steps, you can ensure that your Blink camera is successfully connected to Wi-Fi and functioning as expected. If you encounter any issues during the verification process, refer to the troubleshooting section in the user manual or contact Blink support for assistance.
Credit: support.blinkforhome.com
Troubleshooting
Having trouble connecting your Blink Camera to Wifi? Follow these steps to troubleshoot your connection: Check your Wifi network settings, ensure your camera is within range, and reset both your camera and Wifi router if needed. Ensure the network password is correct and restart the setup process if problems persist.
Checking Wifi Signal Strength
If you’re experiencing connectivity issues while trying to connect your Blink camera to wifi, the first thing you should do is check the strength of your wifi signal. A weak signal can cause intermittent connection problems or prevent the camera from connecting completely.
- Place your camera and the wifi router closer together to improve the signal strength.
- Make sure there are no physical obstructions, such as walls or large objects, blocking the wifi signal between the camera and the router.
- If possible, connect the camera to a different wifi network to determine if the issue is with your current network.
Restarting The Camera
If checking the signal strength didn’t resolve the issue, the next step is to restart the Blink camera. This simple troubleshooting step can often resolve common connectivity problems.
- Unplug the power adapter from the camera.
- Wait for about 10 seconds.
- Plug the power adapter back into the camera.
- Allow the camera a few moments to restart and try to establish a new wifi connection.
Contacting Support
If you’ve tried both checking the wifi signal strength and restarting the camera without success, it may be time to contact support for further assistance.
You can reach out to Blink’s support team via their website or by phone. Be prepared to provide them with specific details about your setup and the troubleshooting steps you’ve already taken. They will be able to guide you through additional troubleshooting, offer solutions, or determine if there may be a hardware issue with your camera.
Conclusion
Connecting your Blink camera to Wi-Fi is a simple process that enhances your home security. By following the steps outlined in this guide, you can ensure a seamless connection and enjoy the benefits of remote monitoring and alerts. Stay connected and secure with your Blink camera system.
0 comments