

To connect a MacBook to a projector, use an HDMI or USB-C cable for video and audio transmission. After connecting the cable, select the appropriate input source on the projector and MacBook settings.
Connecting your MacBook to a projector allows you to share presentations, videos, or other content on a larger screen for better visibility. By following these simple steps, you can easily set up the connection and ensure a seamless projection experience.
Whether for work presentations or movie nights, this simple process enables you to enjoy your MacBook content on a bigger display without any hassle. Let’s dive into the details of how you can easily connect your MacBook to a projector and start projecting in no time.
Determine The Projector Connection Type
Determine the Projector Connection Type is the first step to connect your MacBook to a projector. This process involves checking the available ports on the projector and identifying the appropriate adapter for your MacBook.
Checking The Projector’s Available Ports
Before connecting your MacBook to a projector, check the ports available on the projector. Common ports include HDMI, VGA, and USB. Some newer projectors may also feature wireless connectivity options. Knowing the ports available will help you determine what type of adapter you need for your MacBook.
Identifying The Appropriate Adapter For Your Macbook
Once you’ve identified the available ports on the projector, it’s time to find the right adapter for your MacBook. Different MacBook models come with different connection ports, such as USB-C, Thunderbolt, or Mini DisplayPort. In some cases, you may need a specific adaptor to connect your MacBook to the projector’s port.
Gather The Required Cables And Adapters
Before connecting your MacBook to a projector, you need to have the necessary cables and adapters on hand.
Getting The Right Hdmi, Vga, Or Usb-c Cable
Choose the correct cable type based on the ports available on your MacBook and the projector.
Purchasing The Necessary Adapter
Ensure you have the appropriate adapter to bridge any port incompatibilities between your MacBook and the projector.
Prepare Your Macbook
To connect your MacBook to a projector, start by locating the appropriate port on your laptop and the matching input on the projector. Use the appropriate cable to connect the two devices, then adjust the display settings on your MacBook to extend or mirror the display onto the projector.
Ensuring Your Macbook Is Charged
Make sure your MacBook is fully charged before connecting it to the projector.
Adjusting The Display Settings
To adjust the display settings on your MacBook for the projector, follow these steps:
- Go to Apple menu
- Select System Preferences
- Click on Displays
- Choose Arrangement tab
- Check Mirror Displays
- Set the Resolution to match the projector
Connect The Cables And Adapters
Welcome to our guide on how to connect your MacBook to a projector! In this section, we will walk you through the process of connecting the necessary cables and adapters to establish a seamless connection between your MacBook and the projector.
Connecting The Cable To The Projector
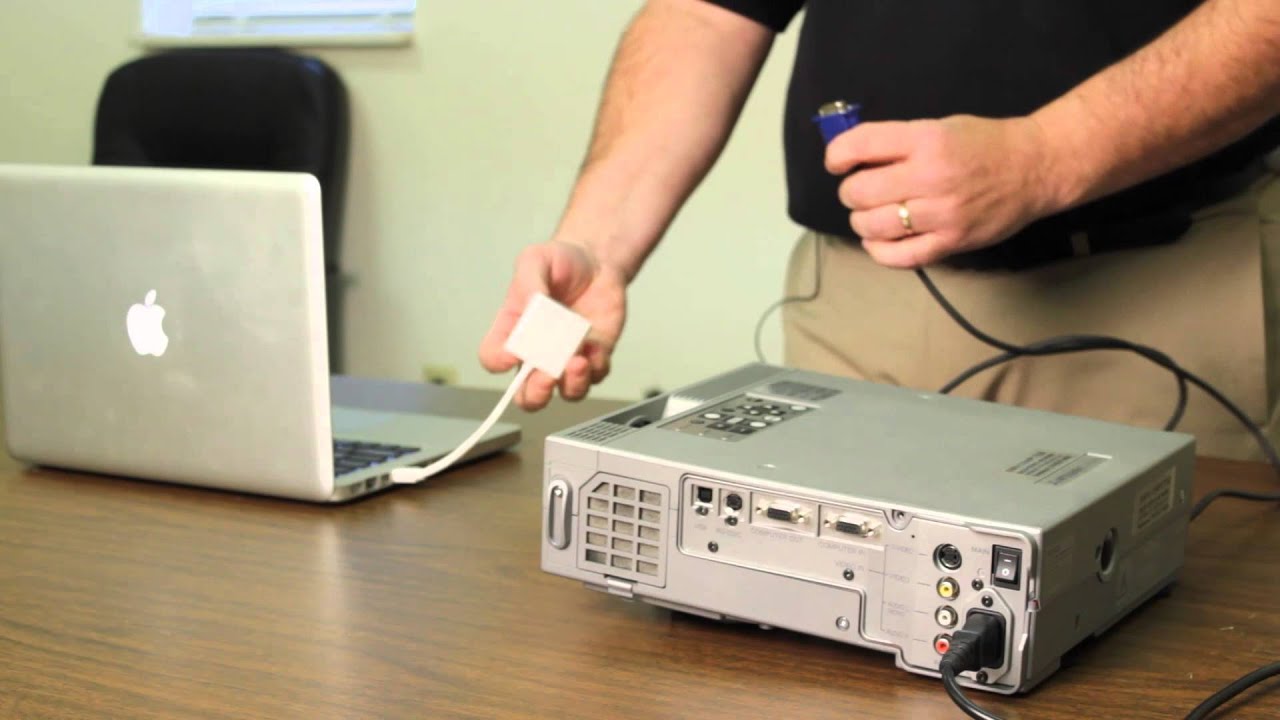
First, locate the HDMI, VGA, or USB port on your projector, and identify the corresponding cable that is compatible with your MacBook. Then, insert one end of the cable into the designated port on the projector. Ensure that the connection is secure and properly aligned to avoid any signal disruptions during your presentation or viewing experience.
Plugging The Other End Into Your Macbook
Next, take the other end of the cable and find the matching port on your MacBook. Depending on your MacBook model, this may be a Thunderbolt 3 (USB-C) port, an HDMI port, or an adapter if your MacBook has a different port type. Insert the cable into the port, making sure it is firmly connected. Once again, a secure connection is vital to ensure the transfer of audio and video signals without interruptions.
Set Up The Projector
In order to connect your Macbook to a projector, you will first need to set up the projector correctly. This involves several steps, including powering on the projector and adjusting its settings. By following these steps, you can ensure a seamless connection between your Macbook and the projector, allowing you to display your screen on a larger scale. Let’s dive into the details of each step.
Powering On The Projector
Before connecting your Macbook to the projector, you need to power on the projector itself. To do this, locate the power button on the projector, which is usually found on the top or side. Press the power button and wait for the projector to start up. It may take a few seconds for the projector to fully power on, so be patient.
Adjusting The Projector Settings
Once your projector is powered on, you will need to adjust its settings to ensure optimal display quality. Most projectors have an on-screen menu that allows you to access these settings. To access the menu, look for a button on the projector or its remote control labeled “Menu” or “Settings.” Press this button to open the on-screen menu.
Once the menu is displayed, navigate through the options using the arrow buttons on the projector or remote control. Look for settings related to display, resolution, and input source. You may need to refer to the projector’s user manual to locate these settings.
When adjusting the projector settings, it’s important to match the resolution and aspect ratio of the projector to that of your Macbook. This ensures that the display will be properly formatted and prevents any distortion or stretching of the image.
Additionally, you should select the correct input source on the projector menu. If you are connecting your Macbook via HDMI, choose the HDMI input. If you are using a VGA or DVI cable, select the corresponding input option. Make sure the input source on the projector matches the cable you are using.
After making any necessary adjustments to the settings, exit the on-screen menu and your projector should be ready to receive the signal from your Macbook.
:max_bytes(150000):strip_icc()/001-how-to-connect-a-mac-to-a-projector-4580363-aafaa5e8a16546878916dc6a664c7d71.jpg)
Credit: www.lifewire.com
Configuring Display Preferences
Configuring display preferences is an essential step in connecting your Macbook to a projector. By configuring the display settings, you can ensure that the projection is seamless and matches your specific needs. In this article, we will guide you through the process of configuring your display preferences, featuring the subheadings: Choosing the Appropriate Display Mode and Arranging the Screens.
Choosing The Appropriate Display Mode
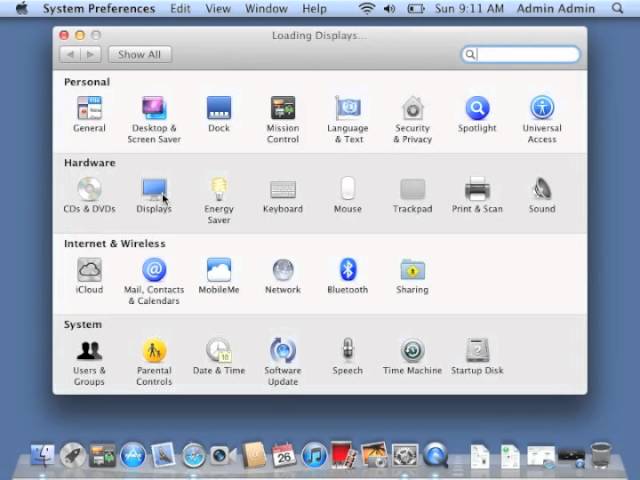
When connecting your Macbook to a projector, it is crucial to select the appropriate display mode for optimal projection. To navigate to the display settings, follow these simple steps:
- Click on the Apple menu in the top-left corner of your screen.
- Select “System Preferences.”
- Choose the “Displays” option.
Once you have accessed the display preferences, you can choose from different display modes that suit your needs:
- Mirror Displays: This mode duplicates your Macbook screen onto the projector, allowing the audience to see the same content as you.
- Extend Desktop: With this mode, your Macbook screen extends to the projector, providing additional workspace.
Arranging The Screens
After selecting the desired display mode, you can proceed to arrange the screens in a way that ensures a smooth projection. Follow these steps to adjust the screen arrangement:
- Go back to the “System Preferences” and choose “Displays.”
- Click on the “Arrangement” tab.
Here, you will be presented with a visual representation of your Macbook and the projector. To arrange the screens:
- Click and drag the screens to position them according to their physical placement in the room.
- If needed, you can also adjust the positioning by clicking on the white bar and dragging it to align the screens.
Remember to ensure that the main screen, which represents your Macbook, is easily accessible and visible to you during the presentation.
Troubleshooting Connection Issues
When setting up a presentation or watching a movie, connecting your MacBook to a projector is essential. However, sometimes you might encounter connection issues that can disrupt your workflow or viewing experience. Troubleshooting these connection issues can help you identify and resolve the problem swiftly, allowing you to seamlessly connect your MacBook to the projector. Here are the steps you can take to troubleshoot common connection issues.
Checking The Cable Connections
Ensure that all the cable connections are secure and properly plugged in. Check both the HDMI or VGA cable connecting the MacBook to the projector and the power cable for the projector. Loose connections can cause signal interruption and hinder the projection process.
Restarting The Macbook Or Projector
If checking the cable connections didn’t resolve the issue, try restarting both your MacBook and the projector. Turn off the devices, wait for a few seconds, and then power them on again. This simple step can often clear up any temporary glitches or conflicts that were causing the connection issue.
Credit: m.youtube.com
Disconnecting The Macbook
When the presentation is over, it’s essential to disconnect your MacBook from the projector properly.
Safely Ejecting The Cable
Click on the Apple icon, select ‘Eject’ next to the connected projector to safely disconnect the cable.
Turning Off The Projector
Press the power button on the projector and wait for it to power down before unplugging the cable from your MacBook.
Tips And Best Practices
When connecting your Macbook to a projector, following some tips and best practices can make the process smoother.
Using A Projector-friendly Background
Choose a simple background to avoid distractions during presentations.
- Avoid busy wallpapers or cluttered desktops.
- Opt for a solid color or a subtle pattern.
Preparing For Presentations In Advance
Be sure to prepare and organize your content ahead of time.
- Check compatibility and test connections prior to the presentation.
- Save your presentation files in a easily accessible location.
- Have a backup plan in case of technical difficulties.
Credit: m.youtube.com
Frequently Asked Questions Of How To Connect Macbook To Projector
How Do I Connect A Macbook To A Projector?
Connecting a Macbook to a projector is simple. Use an HDMI cable or a VGA adapter to connect the Macbook to the projector. Once connected, go to the System Preferences on your Macbook, select “Displays,” and choose the appropriate settings for the projector.
Can I Connect A Macbook To A Projector Wirelessly?
Yes, you can connect a Macbook to a projector wirelessly. Use the built-in AirPlay feature on your Macbook or connect to a wireless HDMI transmitter. Ensure that the projector supports wireless connectivity and follow the instructions for wireless projection on your device.
What Are The Steps To Mirror Macbook Screen To A Projector?
To mirror your Macbook screen to a projector, connect it using an HDMI cable or VGA adapter. Then go to System Preferences, select “Displays,” click on the “Arrangement” tab, and check the box that says “Mirror Displays. ” Your Macbook screen will now be mirrored on the projector.
Is It Possible To Connect A Macbook To A Projector Without An Adapter?
In most cases, you will require an adapter to connect a Macbook to a projector, as Macbooks usually feature USB-C ports. However, if the projector supports HDMI, you can connect directly using an HDMI cable. In other cases, you may need a USB-C to HDMI or VGA adapter.
Conclusion
Connecting your MacBook to a projector is a simple process that can greatly enhance your presentation experience. By using the appropriate cables and settings, you can easily mirror or extend your screen onto the projector, giving your audience a clear and engaging view of your content.
With this knowledge, you can confidently tackle any presentation or multimedia project with ease.
0 comments