
To install a PCIe SSD, open your computer case, locate an available PCIe slot, insert the SSD firmly, secure with a screw, and boot up your system. Upgrading your PC with a PCIe SSD can significantly improve your system’s speed and performance.
As technology advances, PCIe SSDs have become a popular choice for users seeking faster data transfer speeds and quicker load times. With simple installation steps, you can enhance your computer’s capabilities and experience noticeable improvements in overall efficiency. Whether you are a gamer looking to reduce loading times or a professional needing faster data access, installing a PCIe SSD can be a worthwhile investment for your PC setup.
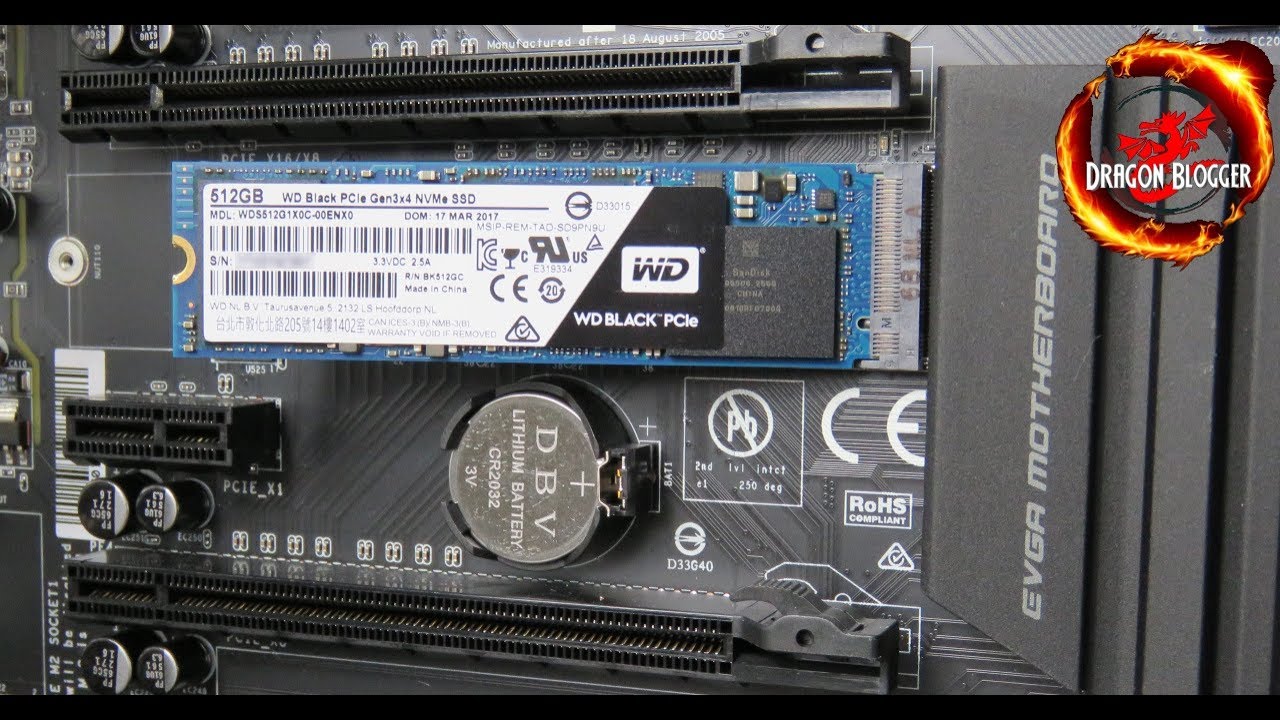
Credit: www.techradar.com
Choosing The Right Pcie Ssd
When it comes to choosing the right PCIe SSD, there are a few key factors to consider. PCIe (Peripheral Component Interconnect Express) SSDs offer faster data transfer speeds and improved performance compared to traditional hard drives, making them a popular choice for many users. To ensure you select the best PCIe SSD for your needs, it’s important to consider the capacity and speed of the drive.
Capacity
When choosing a PCIe SSD, the capacity is an important factor to consider. PCIe SSDs are available in various storage capacities, ranging from 128GB to 2TB or more.
Speed
Another crucial factor to consider when selecting a PCIe SSD is the speed. PCIe SSDs offer faster read and write speeds compared to traditional SATA SSDs, allowing for quicker data access and better overall system performance.
Credit: www.seagate.com
Checking Compatibility
When Installing a PCIe SSD, it is crucial to begin by checking compatibility with your system to ensure a smooth setup process.
Motherboard Compatibility
Check your motherboard’s specifications to confirm it supports PCIe SSD installation.
Available Pcie Slots
Determine if you have an available PCIe slot on your motherboard for the SSD to be installed.
Preparing For Installation
To install a PCIe SSD, begin by gathering the necessary tools and checking the motherboard compatibility. Next, shut down the computer and open the case. Insert the SSD into a vacant PCIe slot and secure it with screws, then reassemble the computer and boot up to complete the installation.
Gathering Required Tools
Before you begin installing your PCIe SSD, make sure you have all the necessary tools handy.
- Screwdriver – you will need a screwdriver to open your computer and secure the SSD in place.
- Anti-static wrist strap – to prevent any static electricity damage to the SSD.
- User manual – refer to the user manual that came with your computer or the SSD for specific instructions.
Backing Up Data
Prior to installing the PCIe SSD, it is crucial to back up all your important data to prevent any loss during the installation process.
- External hard drive – copy all your files to an external hard drive for safekeeping.
- Cloud storage – consider using a cloud storage service to store your data securely.
Opening The Computer Case
To install a PCIe SSD, begin by opening the computer case. This can be done by unscrewing the case panels and carefully removing them. Once the case is open, locate the PCIe slots on the motherboard and properly insert the SSD into the available slot.
Opening the Computer Case Before you can install a PCIe SSD, it’s crucial to first open the computer case. This involves powering off the computer and then removing the case panels. Powering Off the Computer To begin, make sure to power off the computer completely. This can be done by shutting down the operating system and then turning off the power supply. It’s important to ensure that the computer is completely powered off to prevent any electrical mishaps during the installation process. Removing the Case Panels After powering off the computer, the next step is to remove the case panels. These panels are typically located on the sides and/or top of the computer case. You may need to use a screwdriver to remove any screws holding the panels in place. Once the screws are removed, carefully slide or lift off the panels to expose the internal components of the computer. By following these steps, you are now ready to proceed with installing the PCIe SSD into your computer.Installing The Pcie Ssd
Installing a PCIe SSD is a straightforward process. Begin by opening your computer’s case, locating the PCIe slot, and gently inserting the SSD. Secure it with the screw provided, close the case, and power on your computer. Enjoy the improved speed and performance of your new SSD.
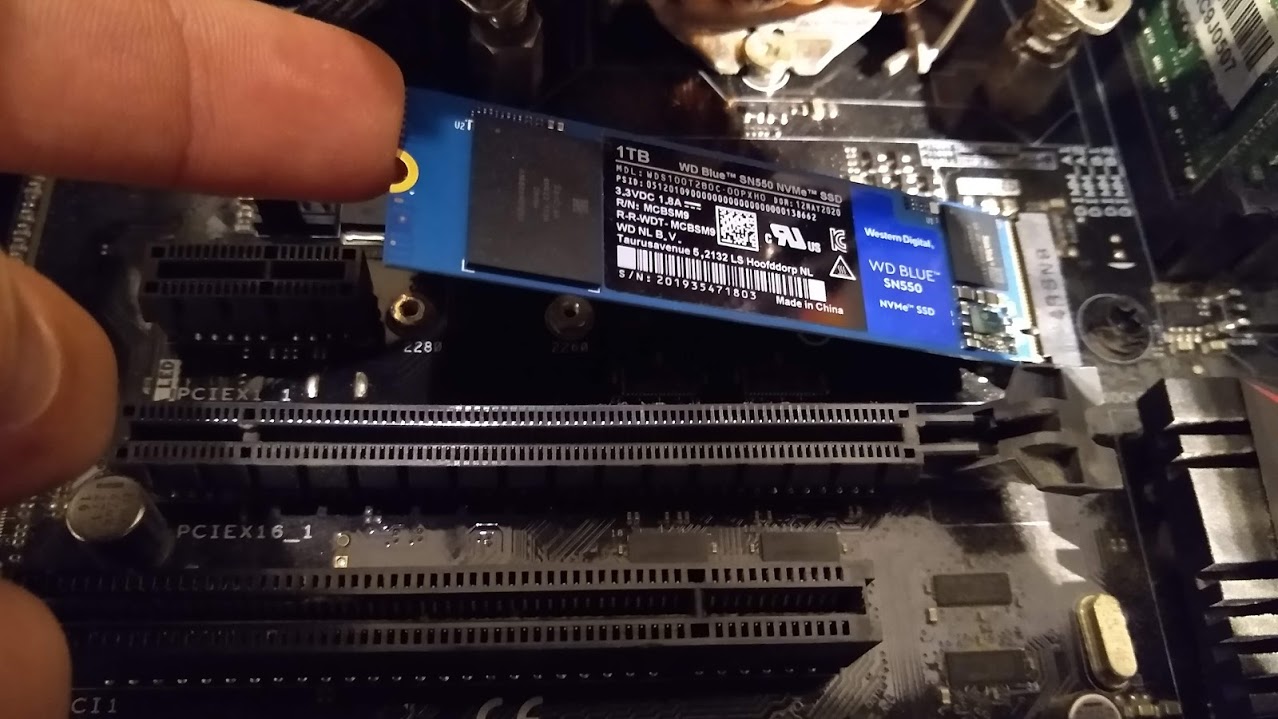
Installing the PCIe SSD is a relatively simple process that can greatly enhance the performance and storage capacity of your computer. In this section, we will walk you through the steps to successfully install a PCIe SSD into your system. From inserting the SSD into an available PCIe slot to securing it in place, we’ll cover everything you need to know to get your new SSD up and running smoothly.Inserting The Ssd Into An Available Pcie Slot
To begin the installation process, locate an available PCIe slot on your motherboard. PCIe slots are typically long and narrow, with a small plastic latch on one end. Open the latch by gently pressing down on it, then carefully align the notches on the SSD’s connector with the slots in the PCIe slot. Once aligned, insert the SSD firmly into the slot, ensuring that it is seated properly. You should feel a slight click when the SSD is fully inserted. If you encounter any resistance, double-check the alignment and try again.Securing The Ssd In Place
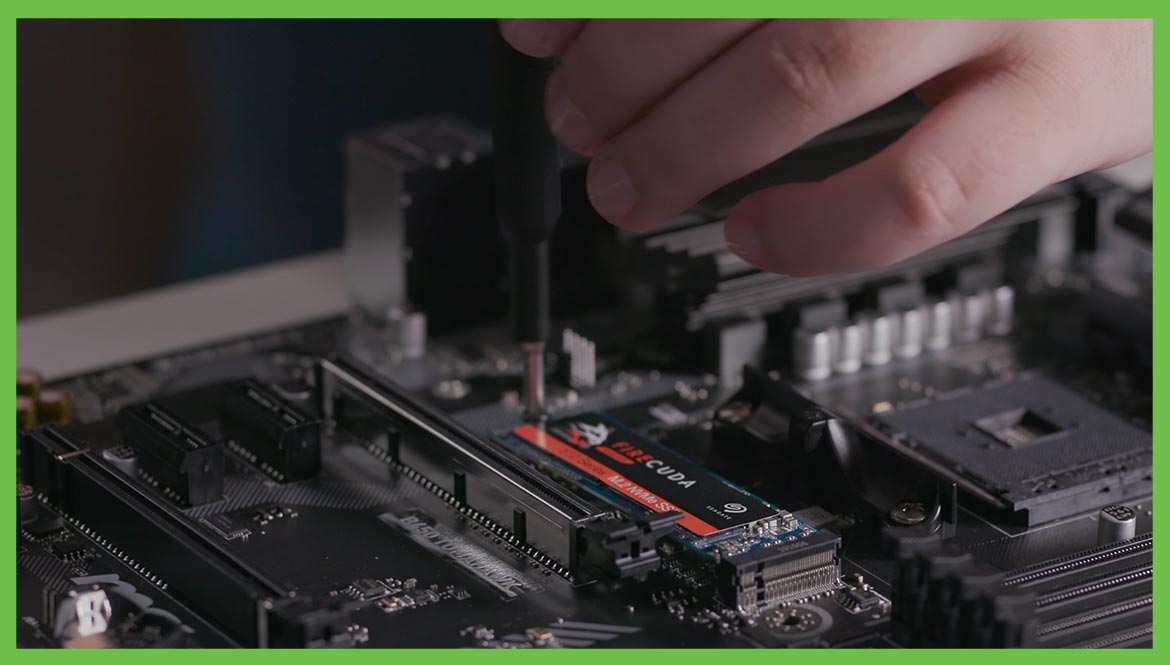
After inserting the SSD into the PCIe slot, it’s important to secure it in place to prevent any movement or disconnection during use. This can be done by using the small screw provided with the SSD or with a compatible screw from your computer’s supply. Locate the small hole on the SSD’s bracket near the PCIe slot and line it up with the corresponding hole on your computer’s chassis. Insert the screw into the hole and tighten it gently until it is snug, but be careful not to overtighten as this can damage the SSD or the motherboard. Remember to consult your motherboard’s manual for detailed instructions on installing a PCIe SSD, as the exact process may vary slightly depending on the make and model. By following these steps, you can ensure a successful installation and enjoy the increased speed and storage capacity that a PCIe SSD offers.| Pros of Installing a PCIe SSD: | Cons of Installing a PCIe SSD: |
|
|
Connecting The Pcie Ssd
Once you have successfully installed your PCIe SSD into the appropriate slot in your motherboard, the next step is to connect the necessary cables to ensure proper power and data transmission. In this section, we will guide you through the process of attaching power cables and connecting data cables to your PCIe SSD.
Attaching Power Cables
Powering your PCIe SSD is crucial to its functionality. To do this, you will need to connect the appropriate power cables from your power supply unit (PSU) to the PCIe SSD. Follow these steps to attach the power cables:
- Locate the designated power connectors on your PCIe SSD. These connectors are typically located on the side or the end of the SSD.
- Identify the appropriate power cables from your PSU. These cables usually have SATA or Molex connectors.
- Align the connectors on the power cable with the corresponding connectors on the PCIe SSD.
- Gently push the connectors together until they are firmly connected.
Note: It is important to ensure that the connectors are inserted securely to avoid any power-related issues.
Connecting Data Cables
In addition to providing power, you will also need to connect data cables to your PCIe SSD to enable data transfer. Follow these steps to connect the data cables:
- Identify the appropriate data cable for your PCIe SSD. Depending on your motherboard, you may need to use a SATA cable or an M.2 cable.
- Align the connectors on the data cable with the corresponding connectors on the PCIe SSD.
- Gently push the connectors together until they are firmly connected.
Note: It is essential to ensure that the data cables are securely connected to enable accurate and efficient data transmission.
You are now ready to move on to the next step, configuring your PCIe SSD in your system’s BIOS. Stay tuned for our upcoming blog post on how to configure your newly installed PCIe SSD and unleash its full potential!
Closing The Computer Case
After installing the PCIe SSD into your computer, the next step is closing the computer case. To ensure that your PCIe SSD is properly secured and protected, it’s crucial to follow the correct procedure for closing the case. Here’s how to do it:
Attaching The Case Panels
First, locate the side panels that need to be attached to the computer case. Carefully align the panels with the grooves on the case, ensuring that they fit snugly. Fasten the screws to secure the panels in place, making sure they are tightened properly. Check for any gaps to ensure the panels are flush with the case.
Powering On The Computer
Once the case panels are securely attached, it’s time to power on the computer. Connect the power cable to the power supply unit and plug it into a power source. Press the power button to start the computer. Ensure that all the fans and lights are working properly, indicating that the system has been successfully powered on.
Initializing The Pcie Ssd
Before you can start using your PCIe SSD, you’ll need to go through some essential initialization steps. This process includes accessing the BIOS, formatting, and partitioning the SSD to ensure it is ready for use.
Accessing The Bios
To access the BIOS on your computer, restart the system and press the designated key (often Del, F2, or F12) during startup to enter the BIOS setup utility.
Formatting And Partitioning The Ssd
- Once in the BIOS, locate the storage configuration settings to identify the PCIe SSD.
- Next, format the SSD by selecting it as the target drive and initializing it.
- After formatting, you can proceed to partition the SSD into logical drives for data organization.
Verifying The Installation
After successfully installing your PCIe SSD, the next crucial step is verifying whether the installation was done correctly. This ensures that the SSD is detected by your system and is operating at the expected speed. In this section, we will cover two essential tasks—Checking SSD Detection and Running Speed Tests.
Checking Ssd Detection
To verify whether the PCIe SSD is detected by your system:
- Access the BIOS settings by restarting your computer and pressing the designated key (often Del or F2).
- Navigate to the storage configuration or system information section to check if the SSD is recognized.
- Confirm that the PCIe SSD is listed among the storage devices connected to your system.
Running Speed Tests
Ensure your PCIe SSD is performing optimally by conducting speed tests:
- Download and install a reputable benchmarking tool like CrystalDiskMark or AS SSD Benchmark.
- Run the benchmarking tool and select the PCIe SSD as the target drive for testing.
- Review the results provided by the benchmarking tool to assess the read and write speeds of your SSD.
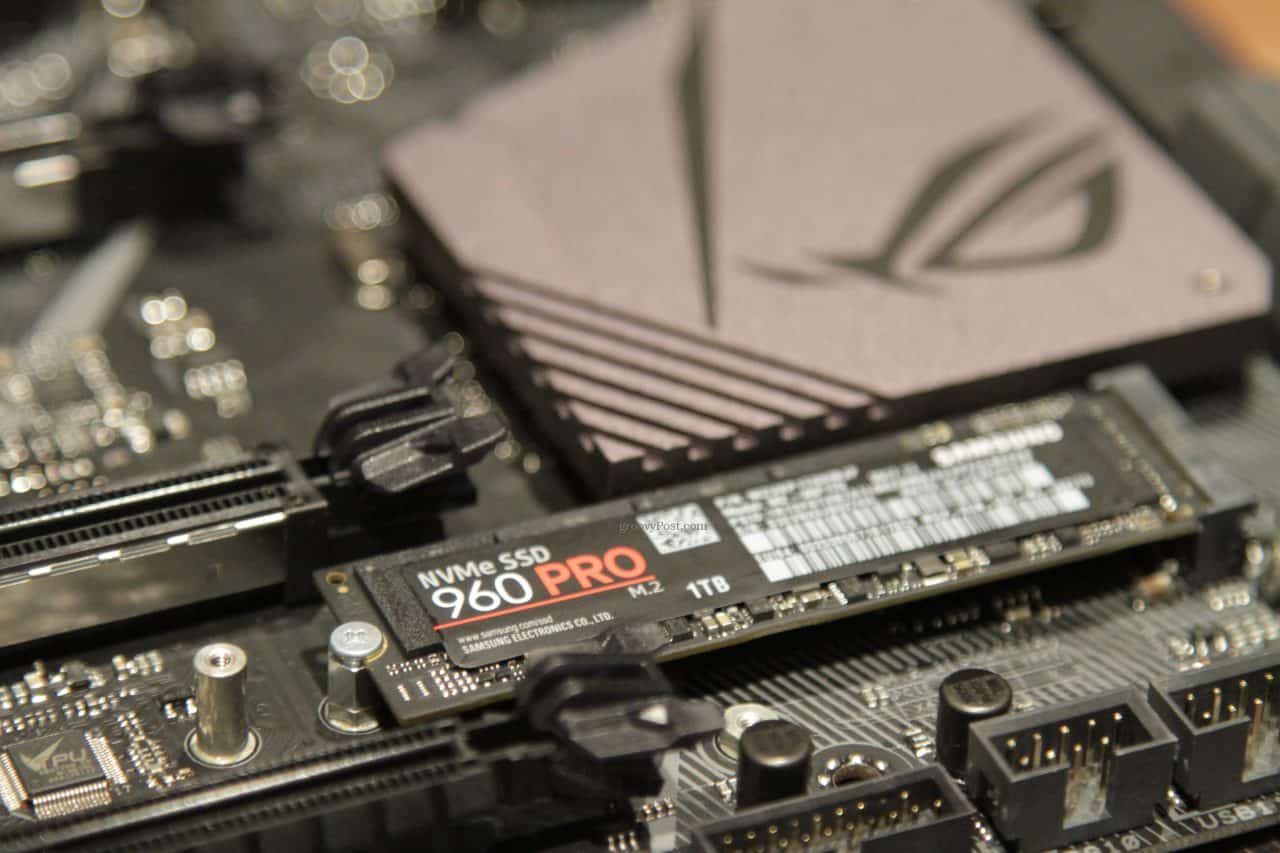
Credit: www.groovypost.com
Frequently Asked Questions For How To Install A Pcie Ssd
What Is A Pcie Ssd?
A PCIe SSD, or Peripheral Component Interconnect Express Solid State Drive, is a high-speed storage device that connects directly to the computer’s motherboard through the PCIe interface. It offers faster data transfer speeds and improved performance compared to traditional hard drives.
Why Should I Install A Pcie Ssd?
Installing a PCIe SSD will significantly enhance your computer’s performance by reducing boot times, accelerating file transfers, and improving overall system responsiveness. With its faster data transfer speeds, you’ll experience quicker application launches and seamless multitasking.
How Do I Install A Pcie Ssd?
To install a PCIe SSD, start by locating an available PCIe slot on your motherboard. Carefully insert the PCIe SSD into the slot and secure it by screwing it in. Then, connect the power and data cables to the PCIe SSD and ensure everything is tightly connected.
Finally, power on your computer and follow the relevant manufacturer instructions for initializing the drive.
Can I Install A Pcie Ssd In Any Computer?
Not all computers are compatible with PCIe SSDs. It is essential to check if your motherboard has an available PCIe slot and supports PCIe SSDs. Additionally, ensure that your computer’s BIOS is up to date and supports booting from PCIe devices.
If in doubt, consult your computer’s manufacturer or a professional technician for guidance.
Conclusion
Installing a PCIe SSD is a straightforward process that can significantly enhance your computer’s performance. By following these simple steps and precautions, you can upgrade your system to take advantage of the speed and reliability offered by the PCIe SSD technology.
With the additional storage and faster data access, you can experience seamless multitasking and faster boot times, making your computing experience more efficient and enjoyable.
0 comments