
To install an SSD in PS5, remove the console’s cover, unscrew the current drive, and insert the new SSD. Expanding your PS5 storage with an SSD can enhance your gaming experience by allowing you to store more games and reduce load times.
Installing an SSD in your PS5 is a straightforward process that can be done at home with basic tools. With the increasing file sizes of modern games, adding an SSD to your PS5 can help you keep up with the demands of the latest titles without compromising on storage space.
Follow the steps provided by Sony to ensure a successful SSD installation and maximize your gaming potential on the PlayStation 5.
Credit: www.nordelta.com
Why Install An Ssd In Ps5
Installing an SSD in your PS5 can significantly enhance your gaming experience. With faster load times, improved performance, and increased storage capacity, upgrading to an SSD can take your gaming to the next level. In this post, we’ll explore the various benefits of installing an SSD in your PS5 and provide a step-by-step guide to help you through the process.
Improved Performance
Upgrading to an SSD can dramatically reduce load times and improve overall system responsiveness. With faster data transfer speeds, games will load quicker, and you’ll experience smoother gameplay with reduced lag. The improved performance of an SSD can elevate your gaming experience to new heights, making it a worthwhile investment for any avid gamer.
Increased Storage Capacity
By adding an SSD, you can expand the storage capacity of your PS5, allowing you to store more games and multimedia content without compromising on speed. With larger storage options available, you can have a wider selection of games readily accessible on your console, eliminating the need to constantly manage limited storage space.
Choosing The Right Ssd
Looking to upgrade your PS5 with an SSD? Make sure to choose the right one that is compatible with the console. Follow the installation instructions carefully to ensure a seamless upgrade process for improved gaming performance.
Choosing the Right SSDPS5 CompatibilityStorage CapacityRead and Write SpeedsSSD in a PS5Choosing the Right SSD. Ensure PS5 Compatibility by checking the manufacturer’s specifications. Consider the Storage Capacity needed based on your gaming habits. Evaluate Read and Write Speeds for optimal performance.Preparing For The Installation
Prepping for the PS5 SSD installation involves following a step-by-step process, which includes backing up your data, obtaining the necessary tools, and understanding the installation procedure. This guide will walk you through each stage, ensuring a smooth and successful SSD installation for your PS5 gaming experience.
Backup Your Data
To ensure you don’t lose any data, back up all your games and saved files before starting the SSD installation process.
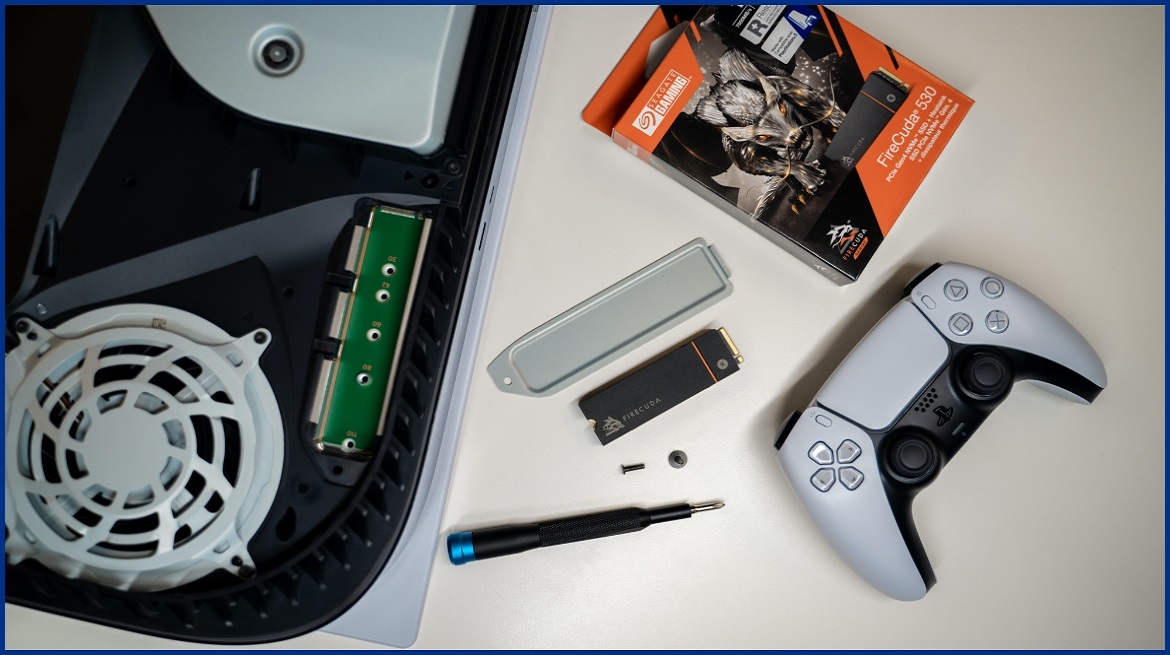
Gather The Necessary Tools
- Prepare a compatible SSD, minimum 250GB, with a read speed of 5,500MB/s or higher.
- Get a Phillips screwdriver and a small flat tool for opening the PS5 casing.
- Have a USB drive ready for system software installation if needed.
Credit: www.pocket-lint.com
Opening The Ps5 Console
Are you looking to give your PS5 a performance boost by installing an SSD? If so, you’ll need to open the PS5 console to access the M.2 SSD slot. While this might seem like a daunting task, it’s a straightforward process when broken down into simple steps. Let’s walk through the process of opening the PS5 console to install an SSD.
Disconnecting Cables
Before you begin, make sure your PS5 is powered off and disconnected from the power source. Next, disconnect all cables, including the HDMI, power, and any other connected cords.
Removing The Screw
After safely disconnecting all the cables, place your PS5 on a flat surface with the rear ports facing towards you. You will notice a screw securing the PS5 cover, located next to the PS logo. Use a Phillips-head screwdriver to carefully remove this screw. Ensure that the screw is kept in a secure place to prevent misplacement.
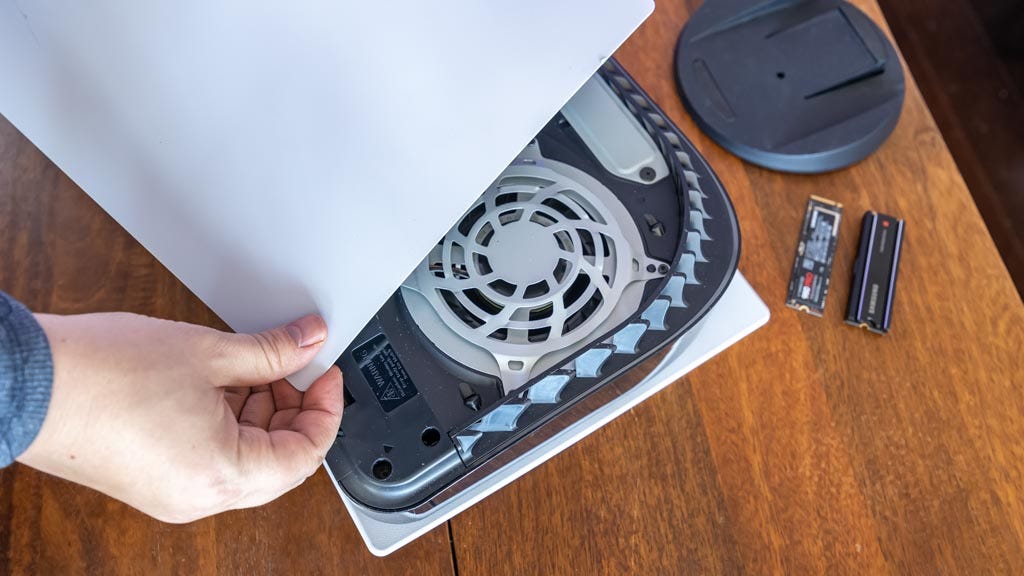
Removing The Ps5 Cover
With the screw removed, gently slide the PS5 cover towards the top of the console, then lift it off. Be cautious and ensure a smooth, steady motion to prevent damage to the cover or any internal components. Once the cover is removed, you will have clear access to the internal components of your PS5, including the M.2 SSD slot.
Installing The Ssd
Upgrading the storage capacity of your PS5 with a solid-state drive (SSD) can significantly enhance your gaming experience by allowing you to store more games and reduce loading times. In this guide, we will walk you through the process of installing an SSD in your PS5, step by step.
Locating The Ssd Slot
The first step is to locate the SSD slot on your PS5. The SSD slot is located on the bottom side of the console, right next to the main storage expansion bay. It is covered by a plastic cover, which you will need to remove in order to access the slot.
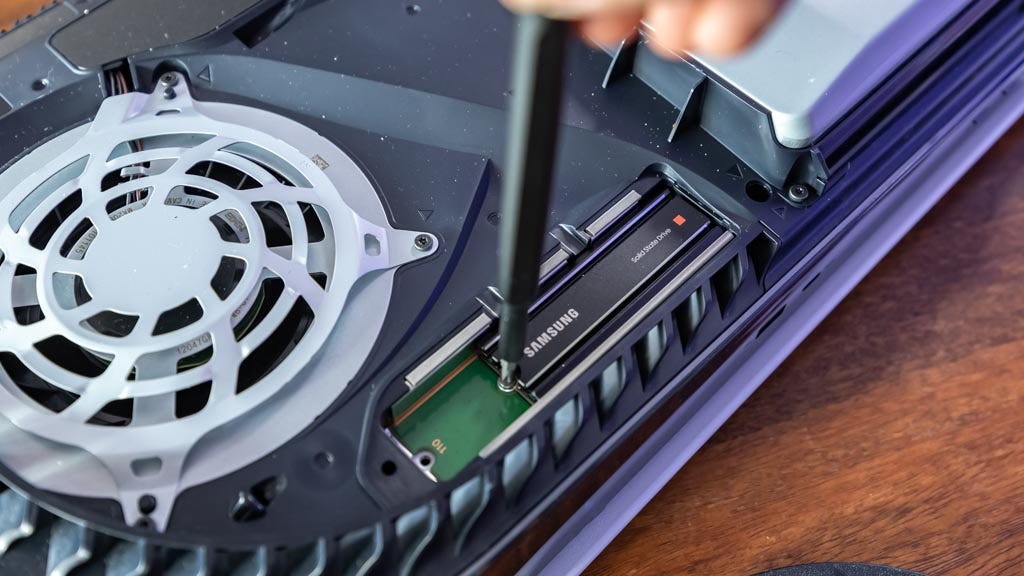
Inserting The Ssd
Now that you have located the SSD slot, it’s time to insert the SSD. Before doing so, make sure the console is powered off and unplugged to avoid any potential damage.
To insert the SSD into the slot, follow these steps:
- Grab the plastic cover of the SSD slot and gently pull it upwards to reveal the slot.
- Take your SSD and hold it by the sides, making sure not to touch the connectors.
- Align the SSD with the slot, ensuring that the connectors on the SSD match the connectors inside the slot.
- Gently push the SSD into the slot until it is firmly in place.
- Replace the plastic cover by sliding it back into position.
It is important to note that PS5 is compatible with certain SSDs. It is recommended to check the PS5 manufacturer’s website or consult the user manual to ensure that the SSD you are using is compatible with the console.
Once you have successfully installed the SSD, you can power on your PS5 and format the new storage. From the PS5 main menu, go to “Settings” > “Storage” > “Extended Storage” and follow the on-screen prompts to format the SSD and begin using it.
Upgrading your PS5 with an SSD is a simple process that can vastly improve the storage capacity and performance of your console. By following the steps above, you can enjoy a wider selection of games and faster loading times, taking your gaming experience to the next level.
Updating The System Software
Once you have successfully formatted your SSD for your PS5, the next step is to update the system software to ensure compatibility and optimal performance. Updating the firmware of your PS5 is a straightforward process that can be done in a few simple steps. In this section, we will walk you through the process of formatting your SSD and installing the latest PS5 firmware.
Formatting The Ssd
Formatting the SSD is the first step you need to take before installing it in your PS5. This process ensures that the SSD is properly prepared for use with the console. Follow these steps to format your SSD:
- Start by turning off your PS5 and disconnecting it from the power source.
- Open the PS5 console and locate the SSD slot.
- Gently insert the SSD into the slot and secure it in place.
- Power on the PS5 and navigate to the Settings menu.
- Select “Storage” from the menu options.
- Choose “USB Extended Storage” and then select your SSD.
- Click on “Format as Extended Storage” to initiate the formatting process.
- Wait for the formatting process to complete.
After following these steps, you have successfully formatted your SSD for use with your PS5. Now, it’s time to install the latest PS5 firmware.
Installing The Latest Ps5 Firmware
To ensure that your PS5 is up-to-date and ready to take full advantage of the new SSD, follow these steps to install the latest firmware:
- Ensure that your PS5 is connected to a stable internet connection.
- Power on your PS5 and navigate to the Settings menu.
- Select “System Software” from the menu options.
- Choose “System Software Update and Settings”.
- A list of available updates will be displayed. Select “Update System Software”.
- Follow the on-screen instructions to download and install the latest firmware update.
- Wait for the installation process to complete.
- Once the installation is finished, your PS5 will restart with the latest firmware.
Congratulations! You have successfully updated the system software of your PS5 with the latest firmware. Your console is now ready to deliver enhanced performance and a smoother gaming experience with the new SSD.
Reassembling The Ps5 Console
Reassembling your PS5 console is the final step in the process of installing an SSD. Follow these steps carefully to ensure that everything is properly put back together and your PS5 is ready to use.
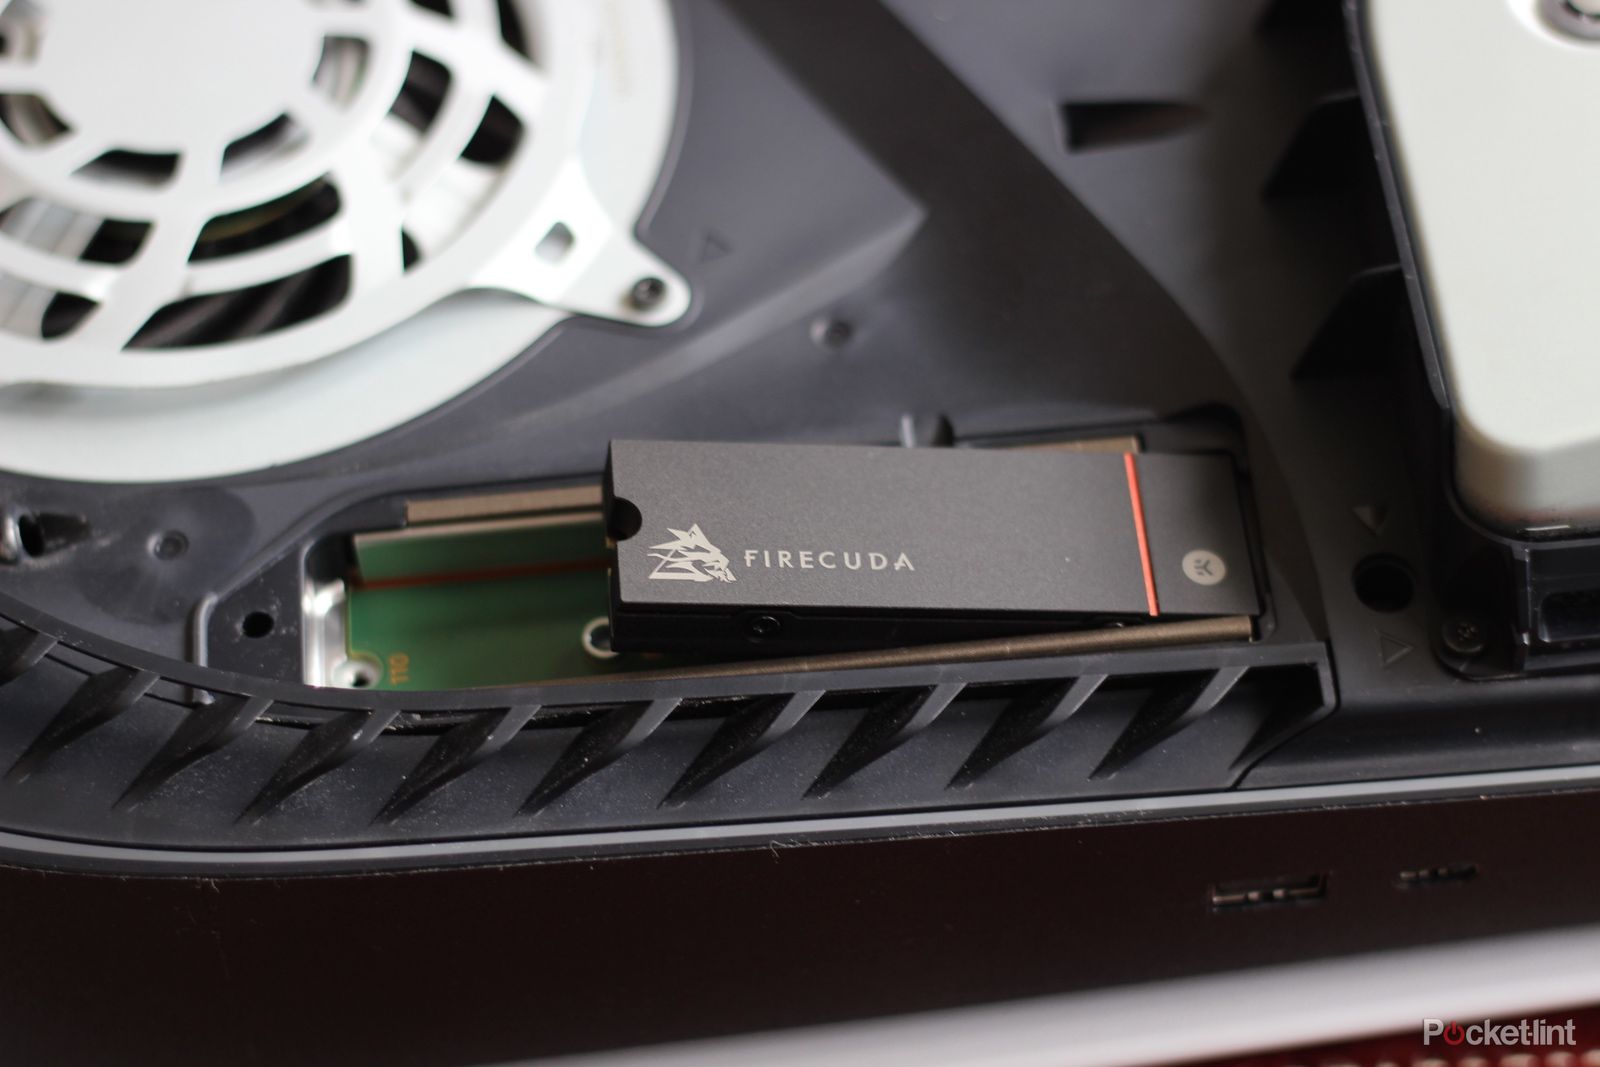
Placing The Ps5 Cover
After installing the SSD, place the PS5 cover back onto the console. Make sure to align it properly and gently press down on the edges to secure it in place.
Reconnecting Cables
Next, reconnect the cables that were disconnected during the disassembly process. This includes the power cable, HDMI cable, and any other peripheral cables that were removed. Ensure that each cable is firmly plugged into its respective port.
Credit: www.seagate.com
Restoring Your Data
If you’re looking to enhance your gaming experience on the PS5, consider installing an SSD. This guide provides step-by-step instructions on how to install an SSD in your PS5, ensuring smooth gameplay and faster data restoration.
Transferring Data From Backup
Once you have installed the SSD in your PS5, it’s time to restore your data. To transfer data from your backup, follow these steps:
- Connect your external storage device with your backup data to the PS5.
- Go to the Settings menu and select System.
- Choose the System Software section and then select Data Transfer.
- Follow the on-screen instructions to transfer your saved data and settings.
Copying Game Files
Copying game files is essential to ensure that you can continue playing your favorite games without any interruptions. Follow these steps to copy game files to the new SSD:
- Insert your game disc or download the game from the PlayStation Store.
- Go to the Game Library and select the game you want to copy.
- Choose the option to copy the game to the new storage device.
- Wait for the copying process to complete before launching the game.
Testing The Ssd
Looking to install SSD in your PS5? You can test the SSD to ensure it’s compatible with your console. Follow the manufacturer’s instructions and use a reliable SSD testing tool, then install the SSD, and enjoy enhanced storage and performance for your PS5 gaming experience.
Verifying Performance
Checking Storage Capacity
When it comes to testing the SSD installed in your PS5, it is crucial to ensure that it is performing optimally. Here are some essential steps to verify the performance and storage capacity of your new SSD.
Verifying Performance
- Check the load times of games to see if they have improved.
- Run benchmark tests to measure read and write speeds.
- Play graphic-intensive games to test the SSD’s responsiveness.
Checking Storage Capacity
- Review the available storage space on your PS5.
- Transfer large game files to the SSD to test its capacity.
- Ensure that the SSD is recognized and accessible in the PS5 settings.
Frequently Asked Questions Of How To Install Ssd In Ps5
How Do I Install An Ssd In Ps5?
To install an SSD in PS5, you need to ensure it meets the required specifications, such as being PCIe Gen4, NVMe, and having a capacity of at least 250GB. Then, turn off the console, remove the PS5 base, unscrew the SSD cover, insert the SSD into the slot, push it down gently, and secure it with the screw.
Finally, reattach the SSD cover, put the base back on, and you’re good to go!
Why Should I Install An Ssd In Ps5?
Installing an SSD in PS5 allows you to expand the console’s storage capacity and enjoy faster loading times and faster data transfer rates. With an SSD, you can have more games installed simultaneously, benefit from shortened loading screens, and experience smoother gameplay.
It enhances your gaming experience by providing ample storage and improved performance.
What Are The Benefits Of Installing An Ssd In Ps5?
Installing an SSD in PS5 offers several benefits, including increased storage space, faster load times for games and applications, and quicker data transfer rates. It allows you to have a larger library of games and applications readily accessible, reduces waiting times, and enhances overall system performance.
You’ll have a more enjoyable gaming experience with improved efficiency and convenience.
Conclusion
Installing an SSD in your PS5 can greatly enhance its performance and storage capacity. With the right tools and guidance, the process can be relatively straightforward. Ensuring compatibility and following the correct steps will lead to a seamless upgrade, providing you with a more responsive and efficient gaming experience.
0 comments