

To move OS from HDD to SSD, users can clone the system using software like Acronis True Image. Acronis provides step-by-step guidance for seamless migration.
Making the shift from a hard disk drive (HDD) to a solid-state drive (SSD) is a common upgrade that can significantly boost the speed and performance of your computer system. By transferring your operating system (OS) to an SSD, you can experience faster boot times, quicker application launches, and overall improved system responsiveness.
In this guide, we will walk you through the process of moving your OS from an HDD to an SSD using a reliable software tool like Acronis True Image. This migration can help you unleash the full potential of your new SSD and take your computing experience to the next level.
Preparing For The Migration
Before moving your operating system (OS) from a hard disk drive (HDD) to a solid-state drive (SSD), it is crucial to undertake some vital preparatory steps to ensure a smooth and successful transition. Let’s delve into the essential aspects of the pre-migration phase that will help you seamlessly transfer your OS and data.
Checking System Requirements
Ensure that your computer meets the necessary system requirements for migrating the OS to an SSD. Check if your system supports SSD installation and if there are any specific software or hardware prerequisites. Verify the compatibility and capacity of the SSD to guarantee a seamless transition without any compatibility issues or space constraints.
Backing Up Data
Prior to initiating the migration process, it is paramount to back up all your data from the HDD to an external storage device. This includes documents, applications, and any other important files. Create a comprehensive backup to safeguard your data against any unforeseen mishaps or data loss during the migration process. This step is crucial in ensuring that you can restore your data in case of any unexpected issues.
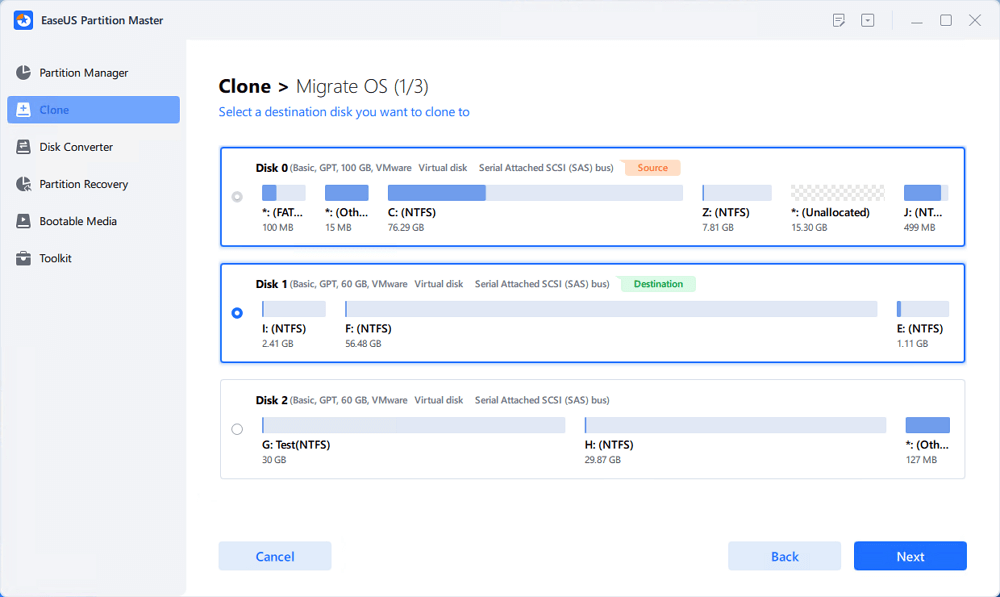
Credit: www.easeus.com
Cloning The Hard Drive
Cloning the hard drive is a crucial step when moving your operating system from HDD to SSD. This process involves creating an exact copy of your existing drive to the new SSD, ensuring a seamless transition.
Choosing The Right Cloning Software
When it comes to selecting the appropriate cloning software, opt for a reliable and user-friendly program such as EaseUS Todo Backup or Clonezilla. These tools facilitate the cloning process and ensure data integrity.
Connecting The Ssd
Before cloning the drive, make sure to properly connect the SSD to your computer. Utilize a compatible SATA cable and power connection to establish a physical link between the SSD and your system.
Cloning The Drive
1. Obtain the chosen cloning software and install it on your computer.
2. Open the software and select the option to clone your hard drive.
3. Choose the source drive (HDD) and the target drive (SSD) to initiate the cloning process.
4. Follow the on-screen instructions to start the clone operation and wait for it to complete.
5. Once the cloning process finishes, shut down your computer and replace the HDD with the SSD.
6. Power up your system and verify that the SSD is functioning as the new primary drive.
7. You have successfully moved your OS from HDD to SSD through cloning the hard drive.
Preparing The Ssd
When upgrading your OS from HDD to SSD, preparing the SSD correctly is crucial for a smooth transition.
Formatting The Ssd
To start, formatting the SSD is the initial step in optimizing it for your operating system.
Partitioning The Ssd
Next, partition the SSD to allocate storage efficiently. Make sure to organize data into separate sections.
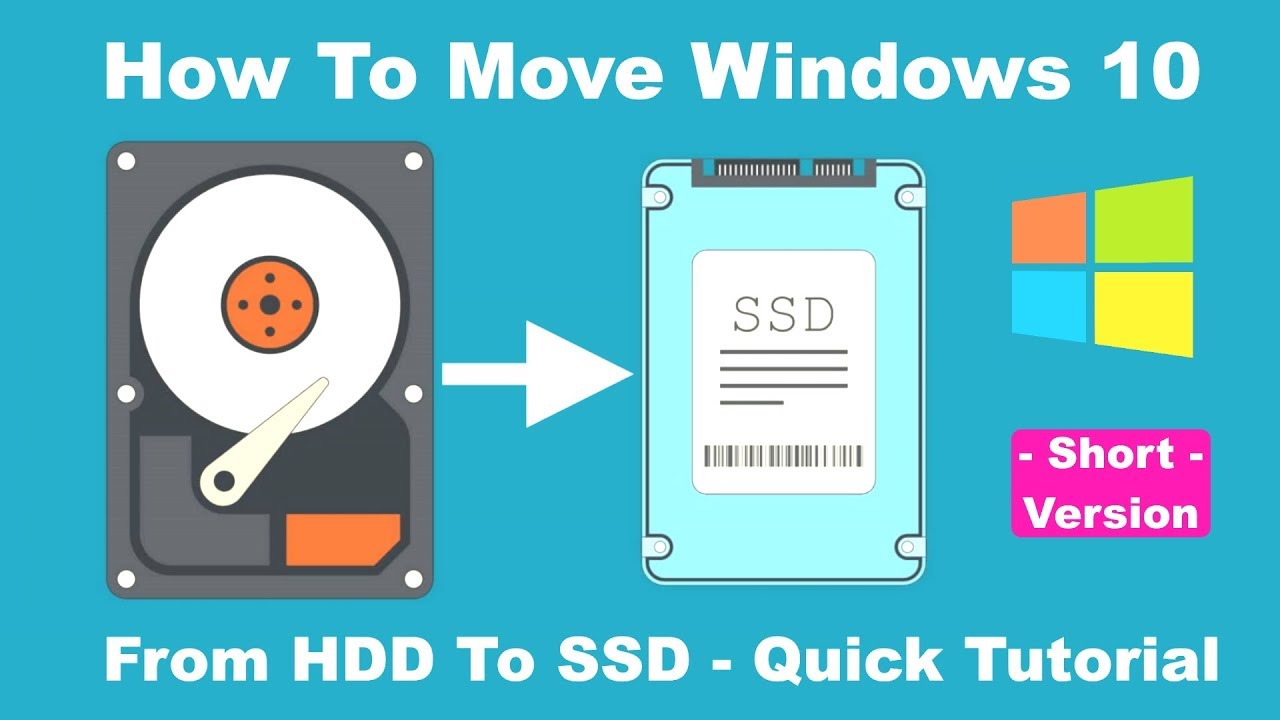
Credit: m.youtube.com
Changing Boot Priority
Changing the boot priority is essential when you want to move your operating system (OS) from a hard disk drive (HDD) to a solid-state drive (SSD). By modifying the boot order, you can ensure that your computer boots from the new SSD and accesses your OS from there. Below, we’ll discuss the necessary steps to change the boot priority, including accessing the BIOS settings and modifying the boot order.
Accessing The Bios Settings
To change the boot priority, the first step is to access your computer’s BIOS settings. This can typically be done by pressing a specific key during the initial startup process, such as Del, F2, or F12, depending on your computer’s manufacturer. Once you’ve entered the BIOS, navigate to the “Boot” or “Startup” tab using the arrow keys on your keyboard.
Modifying Boot Order
After accessing the BIOS settings, locate the “Boot Order” or “Boot Priority” option within the menu. This is where you can specify the sequence in which your computer searches for bootable devices. Using the arrow keys, move the SSD to the top of the list, ensuring it has the highest boot priority. Once this change is made, save and exit the BIOS. Your computer will now prioritize booting from the SSD before other storage devices.
Migrating Os To The Ssd
Migrating your operating system (OS) from an HDD to an SSD can significantly boost the performance of your computer. The SSD is much faster than the traditional hard drive, which results in quicker boot times and overall improved responsiveness. In this article, we will discuss the process of transferring OS files from the HDD to the SSD and activating the SSD. Let’s dive in!
Transferring Os Files
To begin the process of migrating your OS to the SSD, you will need to transfer the necessary files from your HDD. Here is a step-by-step guide to help you:
- First, ensure that your SSD is installed and connected properly to your computer.
- Next, open the software provided by your SSD manufacturer or use a reliable data migration tool.
- Select the option to clone your HDD to your SSD. This will copy all the files, including the OS, from the HDD to the SSD.
- Choose the destination drive as your SSD and start the cloning process. This may take some time, depending on the size of the files being transferred.
- Once the cloning process is complete, shut down your computer and disconnect the HDD.
- Now, boot up your computer and ensure that the OS is running on the SSD. You can check this by going to your computer’s settings and looking for the storage details.
By following these steps, you should be able to successfully transfer your OS files from the HDD to the SSD, ensuring that your computer is now utilizing the faster storage drive.
Activating The Ssd
After transferring your OS files to the SSD, the next step is to activate it so that your computer recognizes and utilizes the drive correctly. Here’s what you need to do:
- Restart your computer and enter the BIOS or UEFI settings. This can usually be done by pressing a specific key like F2 or DEL during the boot process, but it may vary depending on your computer manufacturer.
- Navigate to the “Boot” or “Storage” options within the BIOS/UEFI settings.
- Locate the SSD in the boot order list and move it to the top to prioritize it over other storage devices.
- Save the changes and exit the BIOS/UEFI settings. Your computer will now boot from the SSD.
Once you have completed these steps, your SSD will be activated, and your computer will be running the OS from the faster storage drive. Enjoy the improved performance and responsiveness!
Verifying The Migration
When moving your OS from HDD to SSD, it’s important to verify the migration process to ensure everything transfers correctly. This involves checking software compatibility, transferring files accurately, and testing the SSD for performance and stability before fully utilizing it.
After successfully transferring your operating system (OS) from HDD to SSD, it is crucial to verify the migration process to ensure everything went smoothly. This step is important as it helps prevent potential data loss and ensures the functionality of your new SSD. In this article, we will discuss two key areas to check when verifying the migration: data integrity and OS functionality.
Checking For Data Integrity
Verifying the integrity of your data is essential to guarantee that no files were lost or corrupted during the migration process. To do this, you can use the following methods:
- Compare file sizes: Check the sizes of important files and folders on your SSD with their corresponding sizes on the HDD. This will help identify any discrepancies and potential data loss.
- Perform checksum validation: Use a checksum tool to calculate and compare the checksums of files before and after the migration. Any differences in checksums indicate data corruption.
- Run error-checking utilities: Perform error-checking on your SSD using built-in tools like Windows’ Disk Check or third-party software. These tools can identify and fix any file system or disk errors.
Ensuring Os Functionality
Aside from data integrity, you should also ensure that your operating system is functioning correctly on the new SSD. Here are some steps to take:
- Boot from the SSD: Restart your computer and ensure it boots from the newly installed SSD. This confirms that the OS has been successfully migrated.
- Check system drivers: Make sure all necessary drivers are installed and up to date. Visit the manufacturer’s website to download the latest versions if required.
- Test software and applications: Open various applications and software that you regularly use to ensure they run without any glitches. Pay attention to any errors or performance issues that may arise.
In conclusion, verifying the migration of your OS from HDD to SSD is a crucial step to ensure data integrity and proper functioning of your system. By following the steps outlined above, you can confirm a successful migration and enjoy the benefits of improved speed and performance with your new SSD.
Finishing Touches
Now that you have successfully replaced the HDD with SSD and optimized the system for better performance, there are a few finishing touches to ensure everything is in top shape. Let’s go over the final few steps to complete the process and make sure your new SSD is running smoothly.
Replacing The Hdd With Ssd
Remove the old hard drive and carefully install your new SSD in its place, ensuring it fits securely and is properly connected. Use caution when handling the SSD to avoid damage.
Testing The Performance
Once the SSD is installed, it’s important to test its performance to ensure it is functioning optimally. Boot up your system and run some programs to gauge the speed and responsiveness of the new SSD.
Optimizing Ssd Usage
Enabling Trim
TRIM is an essential feature to maintain SSD performance by clearing unused data blocks.
Managing Disk Space
Effective disk space management ensures longevity and optimal performance of your SSD.
Tips And Troubleshooting
When moving OS from HDD to SSD, follow these tips and troubleshoot common issues for a smooth transition.
Updating Drivers
- Ensure drivers for the SSD are updated to the latest versions.
- Check manufacturer’s website for driver updates.
- Drivers play a crucial role in SSD performance.
Troubleshooting Common Issues
- Slow boot times: Check for any loose cables or incorrect BIOS settings.
- Drive not detected: Verify connections and SATA port settings.
- Data migration failure: Use reliable software for data transfer.
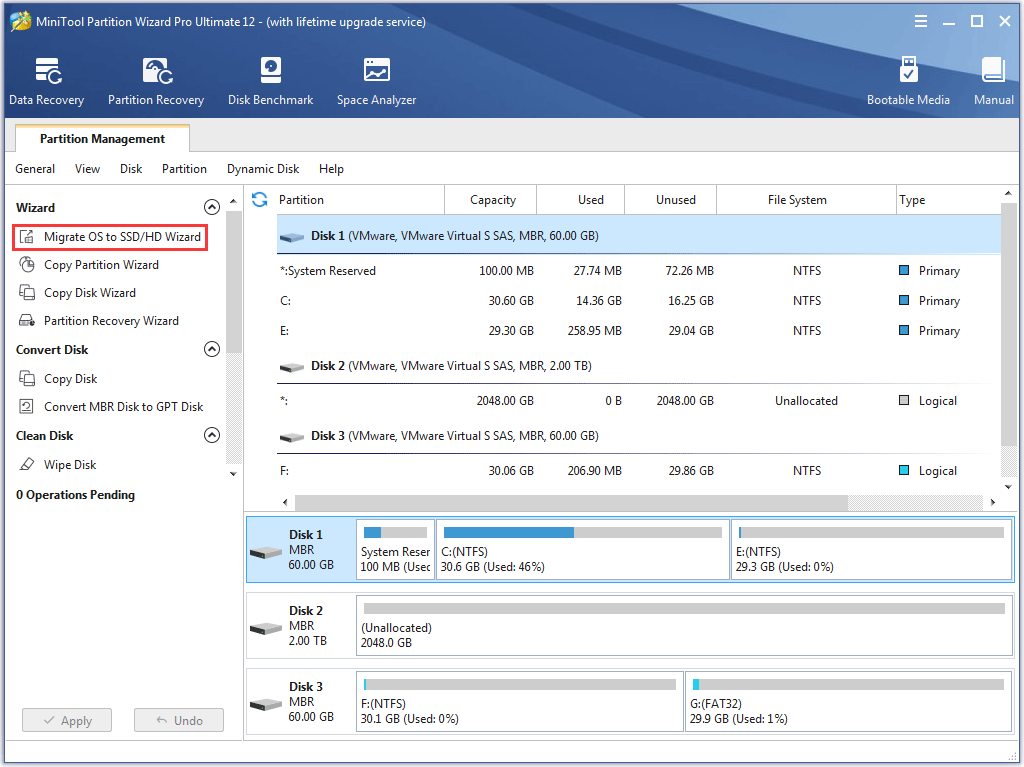
Credit: www.partitionwizard.com
Frequently Asked Questions For How To Move Os From Hdd To Ssd
What Is The Benefit Of Moving Os From Hdd To Ssd?
Moving OS from HDD to SSD improves overall system performance by providing faster boot times, quicker application loading, and better overall responsiveness. SSDs offer faster read and write speeds, eliminating the bottleneck caused by traditional hard drives. This upgrade can significantly enhance your computing experience.
Is It Possible To Move Os From Hdd To Ssd Without Reinstalling?
Yes, it is possible to move the OS from HDD to SSD without reinstalling. You can use specialized software such as “Clonezilla” or “Macrium Reflect” to clone the entire hard drive onto the SSD. This process ensures that all your applications, files, and settings are transferred seamlessly to the new drive, saving you time and effort.
What Steps Should Be Followed To Move Os From Hdd To Ssd?
To move the OS from HDD to SSD, follow these steps:
1. Connect the SSD to your computer. 2. Use specialized cloning software to clone the HDD onto the SSD. 3. Once the cloning process is complete, power off your computer. 4. Disconnect the HDD and connect the SSD in its place. 5. Power on your computer, and the OS should now be running from the SSD, improving your system’s performance.
How Much Time Does It Take To Move Os From Hdd To Ssd?
The time it takes to move the OS from HDD to SSD depends on various factors, such as the size of the HDD, the amount of data stored on it, and the speed of your computer. Generally, the cloning process can take anywhere from a few minutes to a couple of hours.
It is recommended to allocate enough time for the process and ensure that your computer is not interrupted during the transfer.
Conclusion
Transitioning your operating system from HDD to SSD is a game-changer. With faster boot times, improved system performance, and increased reliability, your computer will feel like new. By following the steps outlined in this guide, you can seamlessly migrate your OS and unleash the full potential of your SSD.
Welcome to the world of speed and efficiency!
0 comments