
To operate a projector, connect it to a power source and input device, then power it on. Operating a projector correctly requires ensuring proper connections and settings.
Understanding the projector’s features and controls is essential for optimal performance. Projectors are commonly used in business presentations, classrooms, and home theaters for displaying images and videos on a larger screen. Mastering the operation of a projector can enhance your visual presentations and improve audience engagement.
This guide provides practical tips and step-by-step instructions for efficiently using a projector in various settings. Whether you’re a professional presenter or a casual user, learning to operate a projector effectively can elevate your multimedia experience.
Setting Up The Projector
If you’ve recently purchased a projector and need guidance on how to set it up for your next presentation or movie night, you’re in the right place. Properly setting up your projector is crucial for achieving the best possible image quality and ensuring a smooth experience. In this guide, we’ll walk you through the essential steps for setting up your projector, including choosing the right location, connecting the power cord, and connecting the video source.
Choosing The Right Location
Before setting up your projector, select the ideal location for its placement. Ensure that the area is spacious enough to accommodate both the projector and the screen without any obstructions. Additionally, make sure the location provides easy access to power outlets and is conducive to achieving the desired image size and clarity. Consider factors such as ambient lighting and potential distractions when choosing the setup location.
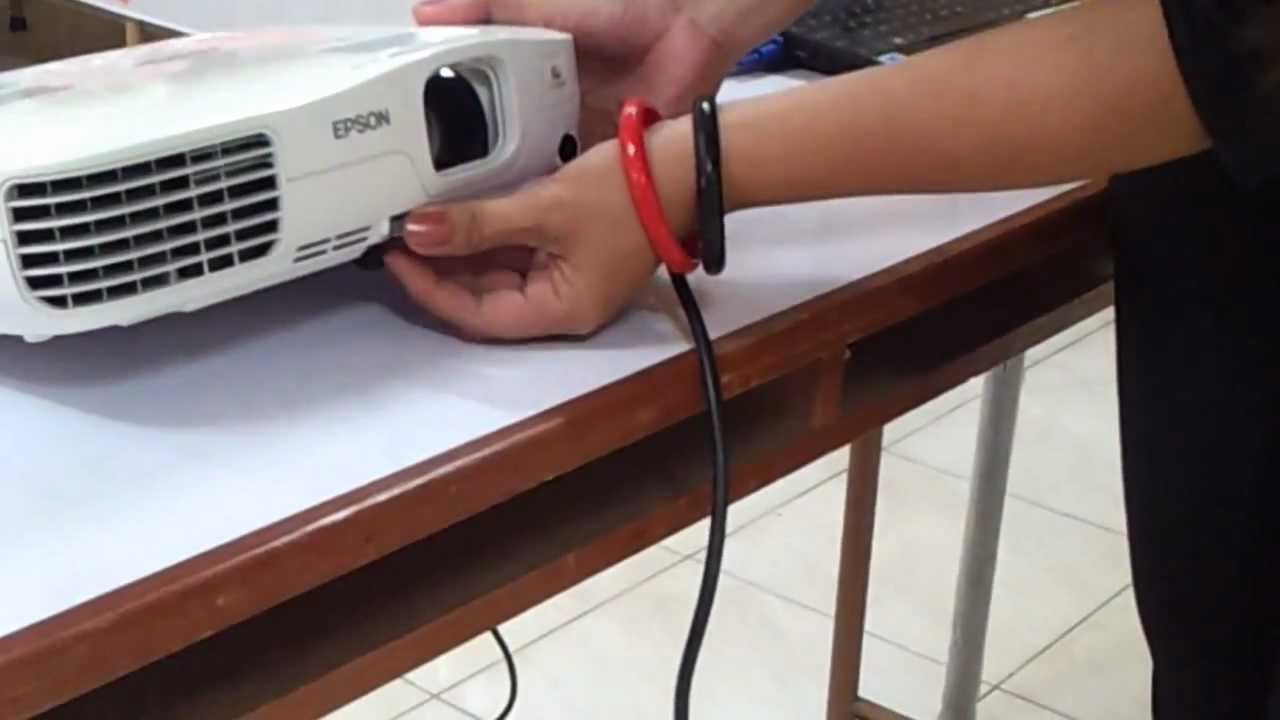
Connecting The Power Cord
Once you’ve identified the optimal location for your projector, it’s time to connect the power cord. Locate a nearby power outlet and plug the cord into the projector’s power input. Verify that the power source is stable and secure to avoid any interruptions during operation. Double-check that the cord is well-positioned to prevent tripping hazards and ensure a clean setup.
Connecting The Video Source
After addressing the power connection, the next step is to connect the desired video source to your projector. Begin by identifying the appropriate video input port on the projector, such as HDMI or VGA. Then, securely connect the cable from your video source to the corresponding input on the projector. Confirm that the connection is secure and that the video source is transmitting the signal effectively.
Adjusting The Display
Adjusting the Display:
Focusing The Image
Turn the focus dial until the image is crisp and clear.
Keystone Correction
Use the keystone adjustment feature to correct distorted images.
Aspect Ratio Settings
Adjust the aspect ratio settings to match the source for optimal viewing.
Using The Remote Control
To operate the projector, use the remote control to power it on or off, adjust the settings, and navigate through the menu options. Point the remote at the projector, and press the corresponding buttons to control the functions. It’s an easy and convenient way to manage the projector’s operations.
Powering On/off
Press the power button on the remote to turn the projector on/off quickly and efficiently.
Navigating The Menu
Use the arrows on the remote to navigate through the menu options for easy selection.
Adjusting Brightness And Volume
To adjust brightness, press the up or down buttons. For volume, use the dedicated volume controls on the remote.
Credit: it.fitnyc.edu
Selecting The Input Source
When it comes to operating a projector, selecting the input source is a crucial step. Ensuring you choose the correct input source is essential to a successful connection and a smooth projection experience. Let’s take a closer look at how to use different input sources to connect your devices to the projector.
Using Hdmi Connection
An HDMI connection is one of the most common and straightforward ways to connect your device to a projector. To use an HDMI connection, simply follow these steps:
- Locate the HDMI port on your device and the projector.
- Insert one end of the HDMI cable into the HDMI port on your device.
- Insert the other end of the HDMI cable into the HDMI port on the projector.
- Turn on your projector and ensure it is set to the correct HDMI input source.
- Your device’s screen should now be mirrored or displayed on the projector.
Using Vga Connection
If your device does not support HDMI, a VGA connection is an alternative option for connecting to a projector. Here’s how to use a VGA connection:
- Locate the VGA ports on your device and the projector.
- Connect one end of the VGA cable to the VGA port on your device.
- Connect the other end of the VGA cable to the VGA port on the projector.
- Power on the projector and ensure it is set to the correct VGA input source.
- Your device’s display should now appear on the projector’s screen.
Using Usb Connection
Many projectors also support USB connections, allowing you to directly connect a USB flash drive or external storage device for projection. To use a USB connection:
- Insert the USB flash drive or external storage device into the USB port on the projector.
- Power on the projector and select the USB input source.
- Your projector should now display the content stored on the USB device.
Configuring Audio Settings
Learn the essentials of configuring audio settings to enhance your projector experience. Discover how to optimize sound quality and adjust volume levels effortlessly.
Connecting External Speakers
To enhance the audio experience of your projector, you may want to connect external speakers. Follow these simple steps to connect them:Step 1: Locate the audio output port on your projector. It is usually labeled as “Audio Out” or “Headphone Jack.”
Step 2: Get an audio cable that matches the audio output port on your projector and the input port on your speakers. Common audio cable options include RCA, 3.5mm AUX, or HDMI.
Step 3: Insert one end of the audio cable into the audio output port on your projector and the other end into the input port on your external speakers.
Step 4: Turn on your projector and external speakers. Make sure the speakers are set to the correct input channel (e.g., AUX, HDMI).
Adjusting Speaker Volume
Step 1: Locate the volume control buttons on your projector or remote control. These buttons are commonly represented by a speaker icon.Step 2: Press the volume up or volume down button to increase or decrease the speaker volume respectively. This will allow you to find the desired sound level. Be mindful of the volume, ensuring it does not exceed safe listening levels.
Enabling Surround Sound
If you want to take your audio experience to the next level, you may want to enable surround sound on your projector. Follow these steps:Step 1: Check if your projector has built-in surround sound capability. This information can be found in the projector’s user manual or specifications.
Step 2: If your projector supports surround sound, go to the settings menu, typically accessible through the remote control or the projector’s on-screen menu.
Step 3: Navigate to the audio settings section and look for the surround sound options. Enable the surround sound feature.
Step 4: Connect additional speakers to the audio output ports of your projector following the steps mentioned earlier for connecting external speakers.
Step 5: Test the surround sound by playing content with surround sound audio. Ensure the speakers are placed correctly for an optimal surround sound experience.
Managing Image Settings
Learn how to effectively manage image settings for your projector. From adjusting brightness and resolution to optimizing color settings, this guide will help you operate your projector with ease.
Managing Image Settings When operating a projector, it is essential to understand how to manage the image settings to ensure optimal picture quality. By properly selecting the display mode, changing color settings, and adjusting contrast and brightness, you can create a captivating visual experience for your audience.Selecting Display Mode
Choosing the right display mode is crucial to achieving the desired image quality. Most projectors offer various display modes such as Standard, Cinema, Game, and Dynamic. Each mode is tailored to specific viewing preferences and content types. For example, the Cinema mode is ideal for movies, as it enhances colors and sharpness, while the Game mode is designed to provide better visibility for gaming purposes. Experiment with different display modes to find the one that best suits your needs.Changing Color Settings
Color settings play a significant role in the overall visual experience. To adjust the color settings on your projector, access the settings menu and locate the color or picture options. Here, you can fine-tune aspects such as saturation, tint, and hue to achieve accurate and vibrant colors. It is advisable to avoid oversaturating the colors, as this can lead to unnatural or unrealistic visuals. Experiment with the color settings until you achieve a balance that suits your preferences and the type of content you are displaying.Adjusting Contrast And Brightness
Contrast and brightness are vital factors in creating a visually appealing projection. To adjust these settings, navigate to the appropriate menu in your projector’s settings. Increasing the contrast level enhances the differentiation between light and dark areas, resulting in a more immersive image. Similarly, adjusting the brightness ensures that the projected image is neither too dim nor too bright. Finding the right balance between contrast and brightness will contribute to a clear and vivid projection. In conclusion, managing the image settings on your projector is essential for achieving optimal picture quality. By selecting the appropriate display mode, adjusting color settings, and fine-tuning contrast and brightness, you can create captivating visuals that engage your audience. Take the time to experiment with these settings and find the perfect combination that suits your preferences and the type of content you are projecting.Setting Up A Projection Screen
To operate a projector, begin by setting up the projection screen in a suitable location with minimal glare. Ensure the screen is clean, smooth, and properly tensioned to achieve optimal image quality. Adjust the projector’s position and focus to align with the screen and ensure a clear, sharp image.
Choosing The Right Screen Type
When setting up a projection screen, the first step is to choose the right screen type that suits your specific needs. There are various types of projection screens available, such as fixed frame, motorized, portable, and manual pull-down screens. Consider factors like room size, viewing angles, ambient light, and intended use to determine the most suitable screen type for your space.
Installing The Screen
Once you have selected the appropriate screen type, it is time to install the screen. Follow the manufacturer’s instructions carefully to ensure proper installation. Whether mounting the screen on a wall, ceiling, or using a portable stand, make sure to securely fasten the screen to prevent any safety hazards.
Positioning The Screen Correctly
After installing the screen, it is essential to position the screen correctly within the space. The screen should be placed at an optimal height and distance from the projector to ensure a clear and focused image. Use a spirit level to ensure that the screen is horizontally aligned to prevent distortion in the projected image.
Credit: www.youtube.com
Troubleshooting Common Issues
When operating a projector, you may encounter common issues. Here’s how to troubleshoot them:
No Image Displayed
If no image is displayed, check connection cables and input sources.
Blurry Or Distorted Image
A blurry or distorted image can be resolved by adjusting focus and keystone settings.
Projector Overheating
To prevent projector overheating, ensure proper ventilation and clean filters regularly.
Maintenance And Care
Cleaning The Projector
Regularly clean the external surfaces using a soft cloth to prevent dust build-up.
For optimal performance, gently blow off any dust inside the projector using canned air.
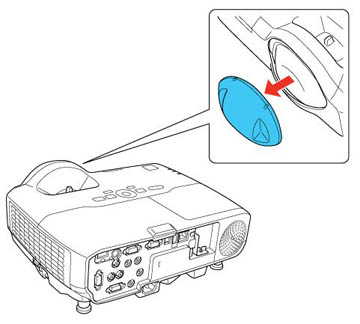
Replacing The Lamp
Follow the manufacturer’s guidelines on the right time to replace the lamp.
- Turn off the projector and let it cool before replacing the lamp.
- Carefully remove the old lamp and insert the new one according to instructions.
- Secure the lamp compartment and reset the lamp timer if needed.
Storing The Projector Properly
When not in use, store the projector in a cool, dry place away from extreme temperatures.
Keep the projector covered to prevent dust accumulation and damage.
Credit: files.support.epson.com
Frequently Asked Questions Of How To Operate Projector
How Do I Connect My Laptop To A Projector?
To connect your laptop to a projector, you’ll need to use a VGA or HDMI cable. Simply plug one end of the cable into your laptop’s video output port and the other end into the projector’s input port. Then, select the appropriate input source on the projector and your laptop screen will be projected.
What Should I Do If The Projector Is Not Displaying Anything?
If the projector is not displaying anything, first check the cables and ensure they are securely connected. Make sure the projector is turned on and the correct input source is selected. Additionally, check the settings on your laptop to make sure it is set to duplicate or extend the display.
If the issue persists, restart both your laptop and projector.
How Do I Adjust The Focus On A Projector?
To adjust the focus on a projector, first make sure the projector is displaying an image. Then, locate the focus ring on the projector lens. Turn the focus ring left or right until the image appears sharp and clear. It may be helpful to have a test image or text on the screen to assist with the adjustment.
Can I Connect A Dvd Player To A Projector?
Yes, you can connect a DVD player to a projector. Most projectors have input ports that support HDMI or VGA connections, which are also commonly used by DVD players. You will need to connect the DVD player to the projector using the appropriate cable, and then select the corresponding input source on the projector to display the DVD player’s output.
Conclusion
Operating a projector can seem daunting at first, but with the right knowledge, it becomes a straightforward process. By following the tips outlined in this blog post, you can ensure smooth operations and enjoy seamless presentations and entertainment. Familiarize yourself with the controls, optimize the settings, and troubleshoot any issues that may arise.
With practice, you’ll become a pro at operating a projector in no time.
0 comments