
To put an SSD in a desktop, power off the computer, open the case, locate and remove the old hard drive, insert the SSD into an available drive bay, connect the SATA and power cables securely, close the case, and power on the PC. Upgrading your desktop with a solid-state drive (SSD) can significantly improve its speed and performance.
Whether you are a gaming enthusiast, a creative professional, or simply looking to boost your computer’s efficiency, installing an SSD is a relatively simple process that can yield impressive results. In this guide, we will walk you through the steps to seamlessly integrate an SSD into your desktop setup, allowing you to enjoy faster boot times, quicker program launches, and overall smoother computing experience.
Preparing For Installation
When installing an SSD in a desktop, proper preparation is key to ensure a smooth and successful installation process. Before diving into the physical installation, it’s important to take some initial steps to prepare your system and workspace. In this guide, we’ll walk you through the essential preparations for adding an SSD to your desktop.
Check System Compatibility
Prior to embarking on the installation, verify that your desktop is compatible with an SSD. Check the motherboard specifications to confirm compatibility with the type of SSD you plan to install. Ensure that there are available SATA ports and power connectors for the SSD. Additionally, check if the desktop’s BIOS supports booting from an SSD to enable optimal performance. Make sure to consult the desktop’s manual or manufacturer’s website for detailed information on compatibility.
Gather Necessary Tools
Before commencing the installation, gather the essential tools to facilitate the process. Ensure you have a screwdriver, as you may need it to open the desktop case and secure the SSD in place. Clean and well-lit workspace with ample room to maneuver around the desktop is also crucial. Moreover, a grounding strap or mat can help prevent static discharge, protecting your system and the SSD from potential damage. Have a stable workspace to keep tools and parts organized and easily accessible.
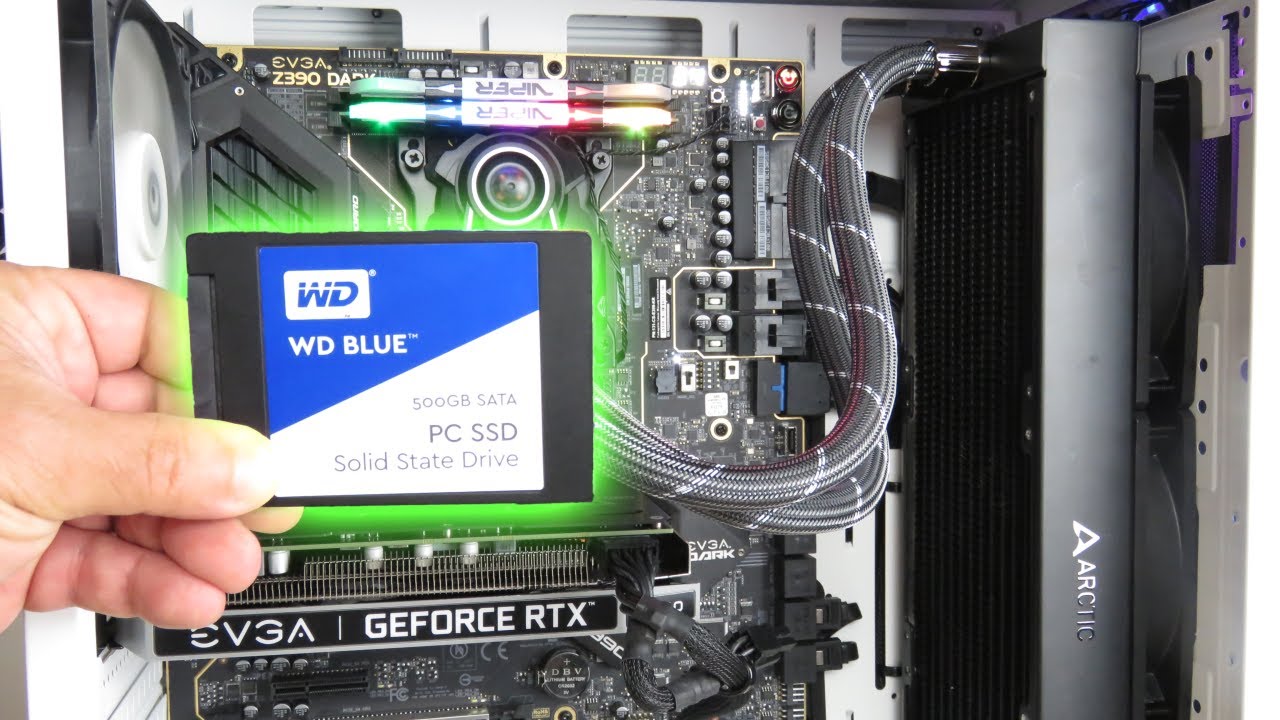
Credit: www.pcworld.com
Backing Up Data
When putting an SSD in a desktop, backing up data is crucial to avoid losing important files. Ensure to transfer files to an external drive or cloud storage before commencing the SSD installation to prevent data loss. It is a vital step to safeguard your information and streamline the transition.
Identify Important Files
Take stock of all crucial documents, media, and folders on your desktop.
Make a list of items that are essential for your work or personal life.
Organize the files by importance to prioritize what to back up.
Choose Backup Method
Select a backup method such as external hard drives, cloud storage, or backup software.
Ensure your chosen method is secure, reliable, and easy to use.
Regularly schedule automatic backups to safeguard your data effectively.
Before installing an SSD in your desktop, it’s crucial to back up your data to prevent any loss.
Identify Important Files
Take stock of all crucial documents, media, and folders on your desktop.
Make a list of items that are essential for your work or personal life.
Organize the files by importance to prioritize what to back up.
Choose Backup Method
Select a backup method such as external hard drives, cloud storage, or backup software.
Ensure your chosen method is secure, reliable, and easy to use.
Regularly schedule automatic backups to safeguard your data effectively.
Opening The Desktop Case
Opening the Desktop Case: Before upgrading your desktop with an SSD, you need to open the desktop case. Follow the steps below to safely access the interior of your computer.
Shut Down And Unplug Computer
Ensure the computer is off and unplugged to prevent any electrical accidents or damage during the installation process.
Remove Side Panel
Locate and remove the side panel of the desktop case to expose the internal components. This step may vary depending on the type of case you have.

Credit: m.youtube.com
Locating Drive Bay
To put an SSD in a desktop, you first need to locate the available drive bays in your computer. The drive bays are the slots or compartments where you can install additional storage drives, such as SSDs. Identifying the drive bays is crucial for determining where you can place the SSD and how to connect it to your system.
Identify Available Drive Bays
Start by opening the computer case to access the internal components. Look for the drive bays, which are usually located in the front or side of the case. Many desktop computers have multiple drive bays, each capable of holding a storage drive. If you are unsure about the location of the drive bays, consult the user manual or manufacturer’s website for your specific desktop model for guidance.
Determine Sata Connection
Once you have located the drive bays, check for the available SATA connections. Most SSDs use the SATA interface to connect to the motherboard. Identify an open SATA port on the motherboard where you can attach the SSD. Additionally, ensure that you have an available SATA power connector from the power supply unit to provide power to the SSD.
Mounting The Ssd
Mounting the SSD is a crucial step when installing it in a desktop. This ensures that the SSD is securely attached to the drive bay, preventing any movement or damage during use. To mount the SSD properly, follow these simple steps:
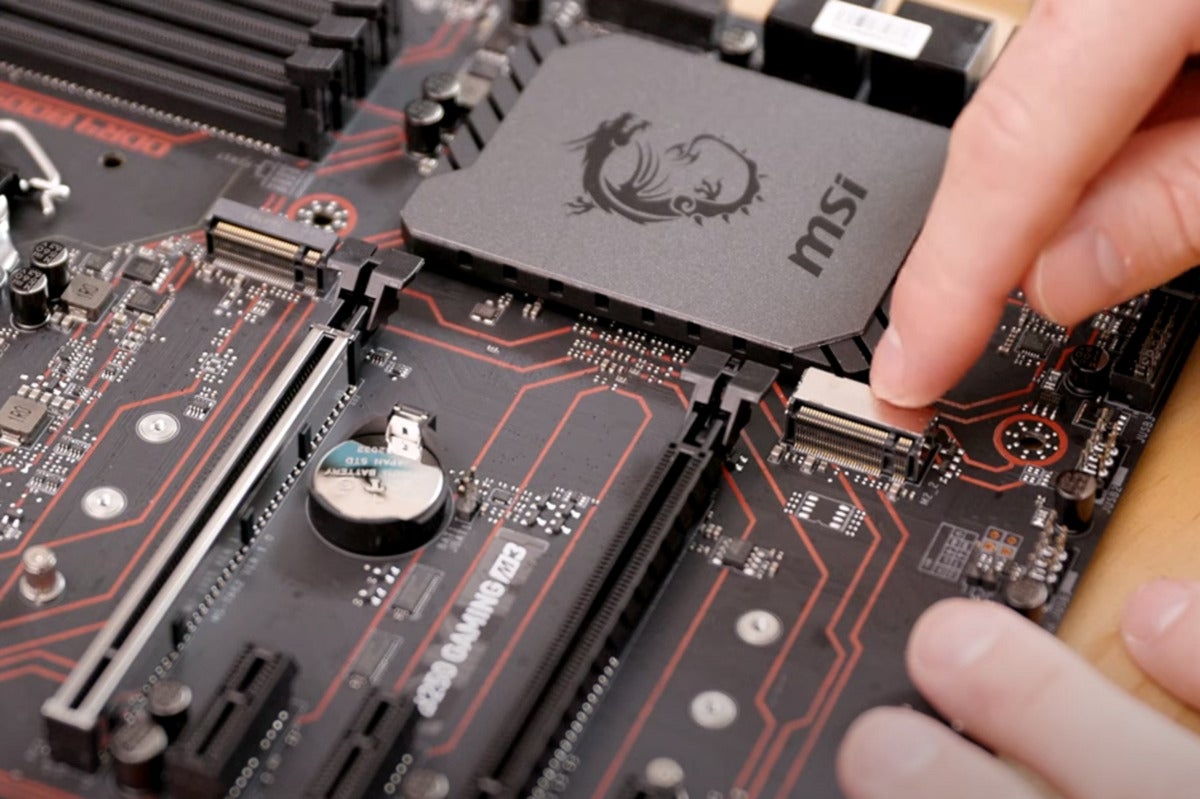
Insert Ssd Into Drive Bay
The first step in mounting the SSD is to insert it into the drive bay of the desktop. Locate an available drive bay and gently slide the SSD into the bay, ensuring that the connectors align correctly with the SATA port. It is important to handle the SSD with care, avoiding any excessive force or dropping it.
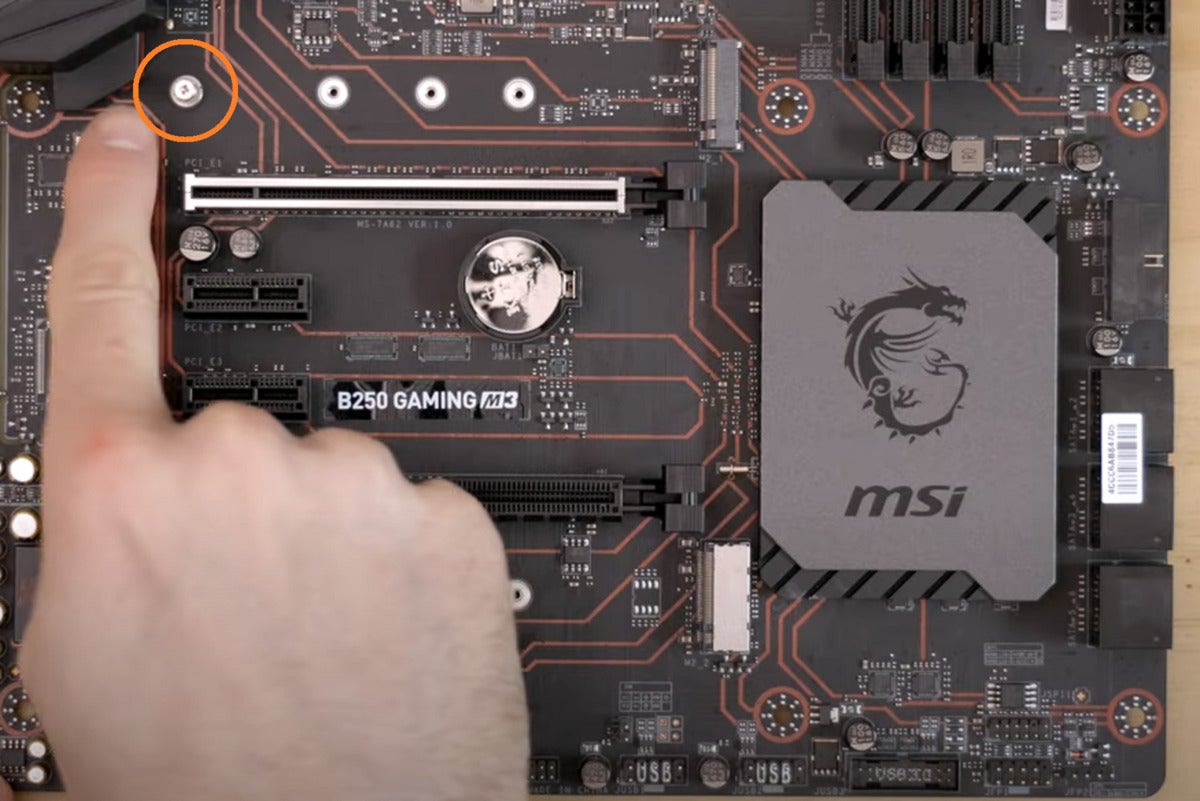
Secure With Mounting Screws
Once the SSD is inserted into the drive bay, the next step is to secure it in place with mounting screws. These screws are typically provided with the desktop case or can be purchased separately if needed. Place the SSD in the desired position within the drive bay and align the mounting holes on the SSD with the corresponding holes on the case.
Then, using a screwdriver, gently tighten the mounting screws to secure the SSD firmly in place. Be careful not to overtighten the screws, as this could damage the SSD or the case. Double-check that the SSD is securely fastened and does not move when gently nudged.
Mounting the SSD in a desktop is a relatively simple process and an essential step in upgrading to a solid-state drive. By following these steps to insert the SSD into the drive bay and secure it with mounting screws, you can ensure a proper and secure installation.
Connecting Cables
This short description will provide clear instructions on how to successfully install an SSD in a desktop computer. Find out the step-by-step procedure to connect the necessary cables and enhance your desktop’s performance.
Find Sata And Power Cables
Finding the SATA and power cables is the first step in connecting your new SSD to your desktop. These cables will allow your SSD to communicate with the computer’s motherboard and receive power. SATA cables are usually flat and have a small connector on each end, while power cables typically have larger connectors.
Attach Sata And Power Cables To Ssd
Once you have located the SATA and power cables, it’s time to attach them to your SSD. Here’s a step-by-step guide to help you with the process:
- Identify the SATA port on your desktop’s motherboard. These are usually labeled and can be found near the existing hard drive.
- Connect one end of the SATA cable to the SATA port on the motherboard. Ensure that the connector is aligned correctly before gently pressing it in.
- Find the SATA port on the SSD. It’s similar to the one on the motherboard but might be located on a different side.
- Connect the other end of the SATA cable to the SATA port on the SSD. Again, make sure the connector is properly aligned and push it in gently until it fits securely.
- Locate the power connector on your computer’s power supply. It’s usually a larger, rectangular connector with multiple pins.
- Attach one end of the power cable to the power connector on the power supply. Ensure that it fits snugly and the pins align correctly.
- Connect the other end of the power cable to the power input on the SSD. This connection might be labeled as “PWR” or “Power.”
Now that you have successfully connected the SATA and power cables to your SSD, you are one step closer to enjoying faster speeds and improved performance on your desktop. Make sure all the connections are secure and properly seated before powering on your computer.
Closing The Desktop Case
After successfully installing the SSD into your desktop, it’s time to close the desktop case to protect the internal components and ensure proper functioning of the system. Follow these steps to securely close the case of your desktop:
Replace Side Panel
Firstly, locate the side panel that you removed earlier and align it with the grooves on the case. Slide the panel gently back into place until it fits snugly and the screws align with the screw holes.
Plug In And Power Up Computer
Once the side panel is securely in place, plug in all the necessary cables including the power cord and any additional peripherals if required. Ensure the SSD is properly connected to the motherboard and power supply. Power up your computer and ensure that it boots successfully.
Bios Configuration
Learn how to install an SSD in your desktop by configuring the BIOS. Follow these steps to optimize your computer’s performance with this hardware upgrade.
Access Bios Settings
1. Turn off the desktop and disconnect all cables.
2. Remove the side panel of the computer case.
3. Locate the BIOS access key (often F2, Del, or Esc) on startup.
4. Press the key to enter BIOS settings.
Adjust Boot Order
- Navigate to the Boot menu in the BIOS settings.
- Select the SSD as the primary boot device.
- Save changes and exit the BIOS settings.
Testing And Verifying Ssd Installation
Check Ssd Status In Operating System
After installing the SSD in your desktop, it’s crucial to confirm its status in the operating system to ensure proper connection and detection.
- Access the Disk Management tool in Windows or Disk Utility in macOS to check if the SSD appears on the list of available drives.
Run Performance Tests
Verifying the SSD’s installation involves running performance tests to assess its speed and overall functionality.
- Utilize benchmarking software like CrystalDiskMark or AS SSD Benchmark to measure read/write speeds and other performance metrics.
Credit: www.pcworld.com
Frequently Asked Questions Of How To Put An Ssd In A Desktop
How Do I Install An Ssd In My Desktop?
To install an SSD in your desktop, you will need to open the computer case, locate an available drive bay or slot, connect the SSD to the power supply and motherboard using SATA cables, secure the SSD in place, and then close the computer case.
Follow the manufacturer’s instructions for more specific guidance.
What Are The Benefits Of Installing An Ssd In A Desktop?
Installing an SSD in your desktop can greatly improve performance, as SSDs are faster and more reliable than traditional HDDs. You’ll experience quicker boot times, faster application loading, and overall snappier system responsiveness. Additionally, SSDs are quieter, consume less power, and generate less heat compared to HDDs.
Can I Add An Ssd To My Existing Desktop With An Hdd?
Yes, you can add an SSD to your existing desktop that already has an HDD. You can use the SSD as your primary drive to store the operating system and frequently used applications, while keeping the HDD for data storage.
This combination allows you to enjoy the benefits of faster SSD performance while still having ample storage capacity.
Conclusion
Upgrading your desktop with an SSD is a game-changer in terms of speed and performance. It gives your system the boost it needs to run smoother and faster. With the right tools and a little bit of know-how, installing an SSD is a straightforward process that can make a world of difference.
So go ahead and take the plunge – your desktop will thank you for it!
0 comments